 Sign in
Error alert using e-mail
Email alerts are used by industrial robot system, to provide notifications about unexpected events or maintenance requests. In this lecture you will learn how to send an e-mail alert from your robot. You will write the code, that completes a job, than it send the notification through G-mail. You will also learn how to use a corporate e-mail system (an SMTP server) to send the e-mail message.
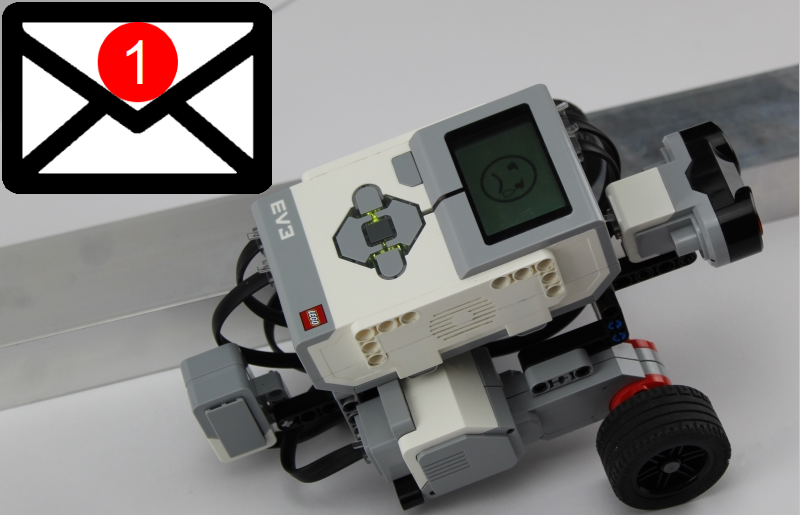
Figure 1 - The Sniffer is sending an error alert
Requirements
- Ozeki Sniffer: Sniffer robot build instructions
- Ozeki 10 installed on 3 PCs: Installed Ozeki 10 Robot OS
- Lego connection installed: Installed Lego Bluetooth connection
- SNAP basics: Basic knowlege of the Snap programming language
- E-mail account
Write down what the absolute value means!

Absolute value - It means how far a number is from zero. Due to this, it cannot be a negative number. For example, the absolute value of 6 is 6, and the absolute value of −6 is also 6.
Describe what the e-mail is!
E-mail - Method of exchanging computer-stored messages between two or more connections using internet or web based communication platforms.
Create a new e-mail connection in Control Panel that the robot can use to send e-mail alerts to you!
To receive email messages from if the robot falls over, first you need to create an e-mail account to send messages. This is the account what the robot will use to send e-mail alerts towards other email accounts. To create an e-mail connection, you just need to open Control Panel and click on Create new Connection button. Here you can see the connection methods of Ozeki 10. For creating an e-mail account connection, please select the Messaging option (Figure 2).
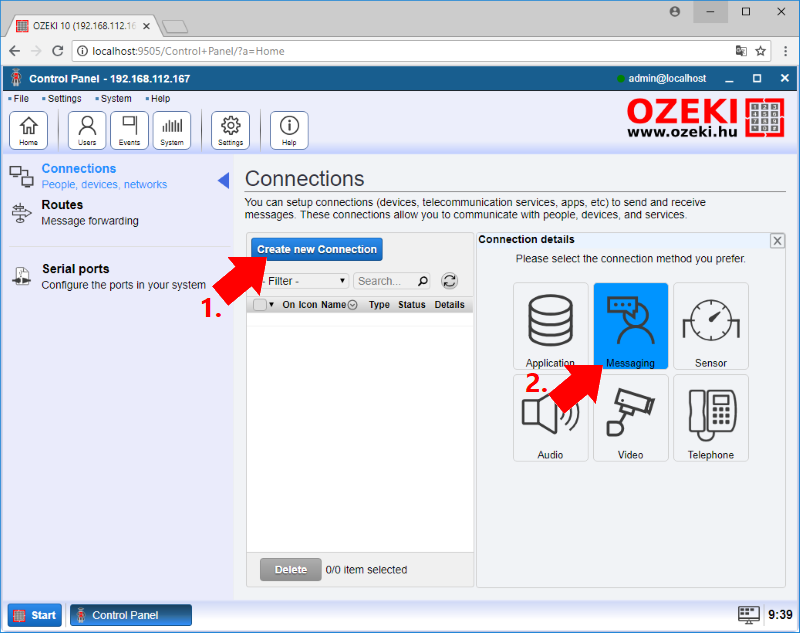
Figure 2 - Selecting Messaging connection methods in Ozeki 10
After you selected the Messaging option you will be able see the available messaging connections. Because this lecture is about to send error alerts using e-mail, choose the e-mail connection. When you click on it, you can see two types of e-mail connections that Ozeki 10 provides like Figure 3 demonstrates. This lecture is going to use the Gmail connection, so just click on it.
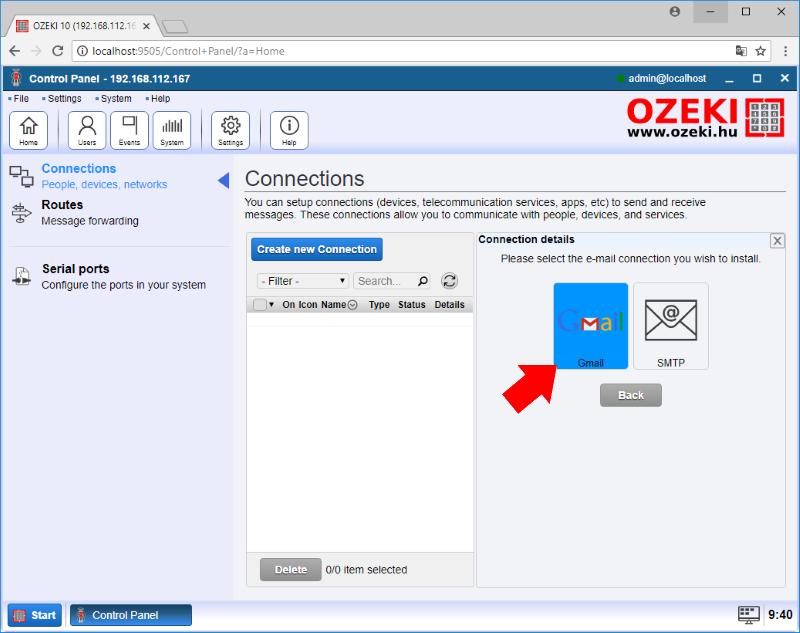
Figure 3 - Selecting Gmail SMTP server onnections in your Ozeki 10
Before finishing the creation of the e-mail connection you need to specify the details of the connection (Figure 4). Here you can type a name for it. You will be able to refer to it in the SNAP program, define the details of the SMTP Server, but it is recommended to leave it as default, because your connection is going to work perfectly. Finally, type the username and password informations of your gmail account, which you want to use as the robot's SMTP server. You can find more information about Gmail connection installation at http://www.ozeki.hu/index.php?owpn=5867.
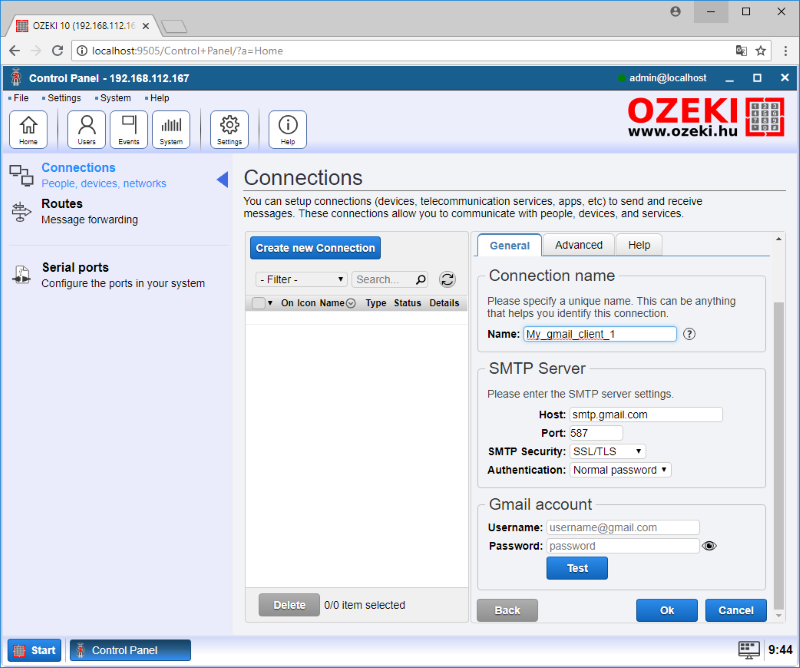
Figure 4 - Set username and password in the Gmail configuration menu
Create a program that recalibrates the Gyroscope Sensor!
The next task is to create the program of the lecture in Ozeki Snap. In it first drag an entry point for the program which would be 'when green flag clicked' block. Then you are going to calibrate your Gyroscope Sensor, so that way you will get the correct information from it. For this just add the 'Recalibrate' block from the Lego category and select the Gyro Sensor. Then the program will have to wait till the calibration is completed. The way you can do it is by dragging a 'wait until' block and fill the condition that the rotation angle of the Gyroscope Sensor is equal to zero. You can find the equals operator in the Operators category and the 'Rotation angle' block in the Lego category. After you have filled the 'wait until' block with the gyroscope sensor check if it is equal to 0 (Figure 5).

Figure 5 - Calibrating the gyroscope sensor
Upgrade the code to start the robot, and verify the rotation angle to check if it is lower than a critical value!
With the calibrated sensor now you can start the robot. For that just drag the 'Start motor' block and select the connected motors and type the power of the motors. In this case they are A and B motors set to 20% of power. Now you need to check the rotation angle of the sensor while moving the robot. Using the 'wait until' block from the Controls category, the program lets the robot move until the rotation angle is lower than the critical value. So just drag the '>' block inside the 'wait until' and fill it with the 'abs of' block from the Operators category and drag in the 'Rotation angle' block and select the Gyro Sensor. To the other side, type a critical value where the robot is likely to fall over. This is illustrated on Figure 6. With the 'abs of' block you can examine the rotation angle to the both ways, because the absolute value means the distance from zero, and it won't be a negative number.
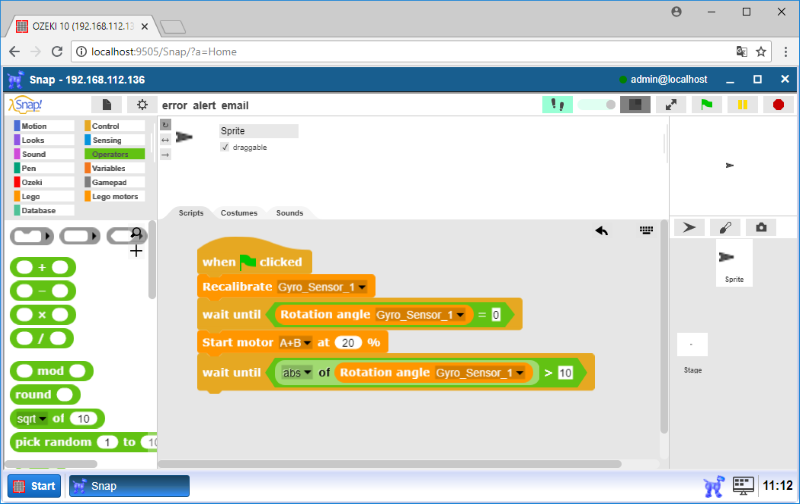
Figure 6 - Checking the value of the gyroscope sensor
Upgrade the program to send the error alert using the e-mail connection that you created before!
When the robot falls over, you have to stop its motors by adding a 'Stop motor' block from the Lego category and select the connected A and B motors from the block's deop-drown list. Now it is time to send the alert message. You only need to add the 'To [connection], address: [address] message: [text]' block from the Ozeki category. In this block there are three parameter to fill. The first one tells that the message will be sent from the e-mail connection that you created as Task 1, so just select that connection from the list. The next parameter is the address that determines the e-mail address where you want to send the error alert. The last parameter is the message text itself that you want to send by the robot. Fill them like on Figure 7 then try the program by pressing the green flag.
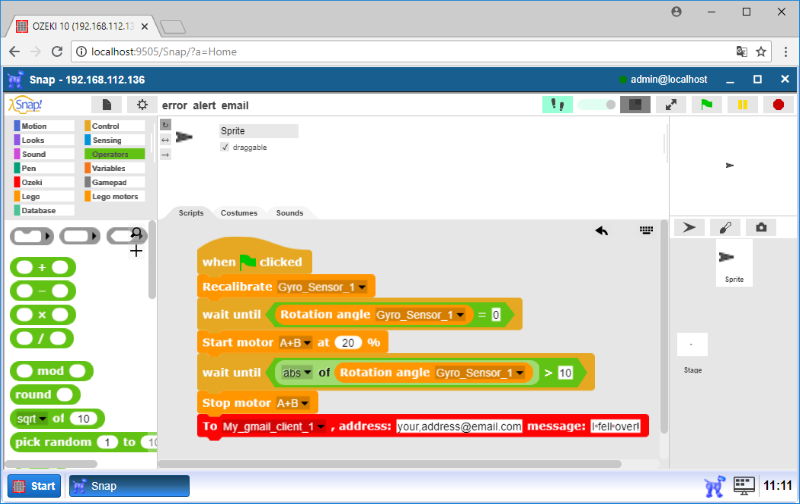
Figure 7 - The robot is ready to send error alerts
Program code

Figure 8 - This program code sends the error message
|
|
Download program code to learn the method of sending error alerts With this code the robot is capable to send alerts by e-mail. It is easier to follow the guide if you have the codes in front of you: Download the Ozeki SNAP code for robot error alerts through e-mail |
More information
- Displaying emotions, playing sounds
- Control robot using chat
- Error alert using e-mail
- Robot status updates on a website using FTP
- Robot control using voice commands
- Robot error alert using text to speech
- Robot control using SMS
- Error alert using SMS
- Write messages in Morse code
- Robot error alert using Telephone call (voice)