 Sign in
Robot error alert using Telephone call (voice)
In this lecture you will learn how you can dial a telephone and read in a voice message from your robot. You will also learn about Voice over IP (VoIP), the Session Initiation Protocol (SIP) and how these communication protocols can be used in robot communication.
Figure 1 - Sending a phone call through a VoIP service provider
Requirements
- VoIP telephone
- VoIP service provider
- Ozeki Sniffer: Morse build instructions
- Ozeki 10 installed: Installed Ozeki 10 Robot OS
- Lego connection installed: Connect the Lego robot to Ozeki 10
- SNAP basics: Basic knowlege of the Snap programming language
Describe what VoIP and VoIP Service Provider mean!
VoIP - Voice Over Internet Protocol, it is using Internet Protocol
instead of analog telephone lines to create a telephone connection.
VoIP Service Provider - Offers VoIP solutions to residential or commercial customers
and provides the VoIP hardware and services to subscribers.
Create a VoIP connection in Control Panel!
To be able to initiate a VoIP call when the robot is down, you must first establish a VoIP connection in Ozeki 10 that is connected to a VoIP PBX or an Internet VoIP provider. To do it, log in to Ozeki 10 and open the Control Panel from desktop then click on Create new Connection and select the Telephone option. Finally, you need to choose the VoIP Service connection like Figure 2 shows.
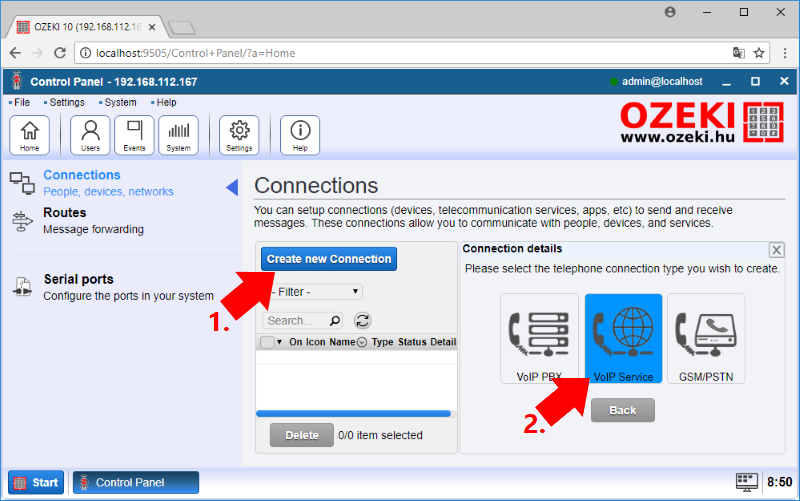
Figure 2 - Telephone connections in Ozeki 10
In Figure 3, you can see the VoIP Service connection details. Here you can enter a specific name of the connection to identify the connection easily. Under SIP Settings you have to type the details of your VoIP service provider that your VoIP telephone is connected to. Finally, you can modify the call limit, but it is not necessary in this lecture, so you should leave it as it is at the moment.
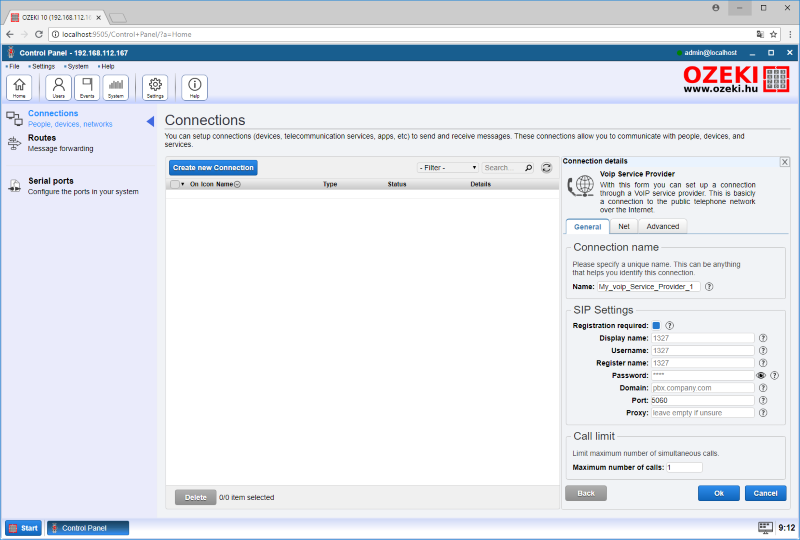
Figure 3 - VoIP connection details
Create a program to recalibrate the Gyro Sensor!
As always you need to enter the program with a 'when green flag clicked' block. After that you have to carry out the calibration method. For that just add the 'Recalibrate' block and choose the connection of the Gyroscope Sensor. Now you need to wait for the finish of the calibration. It means that the rotation angle of the sensor is equal to zero. You can do this by adding a 'wait until' block and drag the '=' block found in Operators category to check if the 'Rotation angle' is equal to zero (Figure 4). The code will continue from the next step if the calibration is ready.
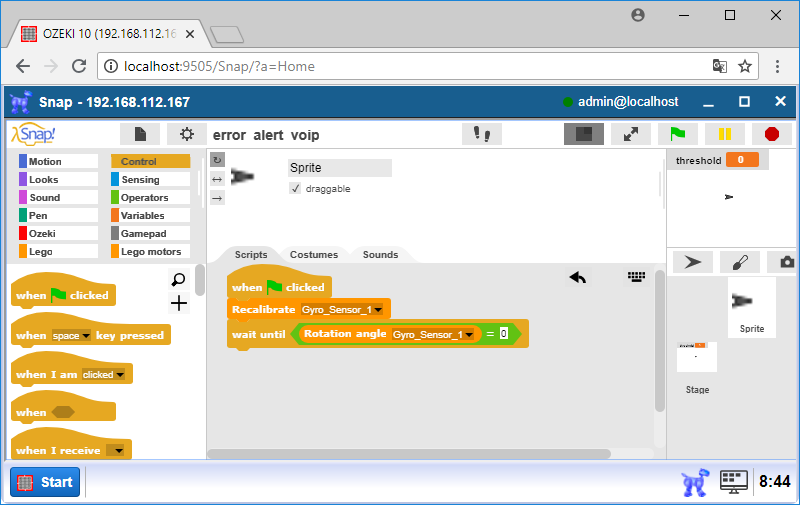
Figure 4 - Recalibrating the Gyroscope sensor of the robot
Upgrade the code to start the robot!
With the calibrated sensor now your robot is ready to go. To do this, you only need to add a 'Start motor' block that ensures your robot is moving to a given direction until you stop the program or some kind of object forces your robot to stop. Here in this block, select the A and B motors that are connected to your Ozeki Sniffer. In the 'Start motor' block, you also need to enter the percentage of the power wich you can use to control how fast your robot will move as you can see on Figure 5.
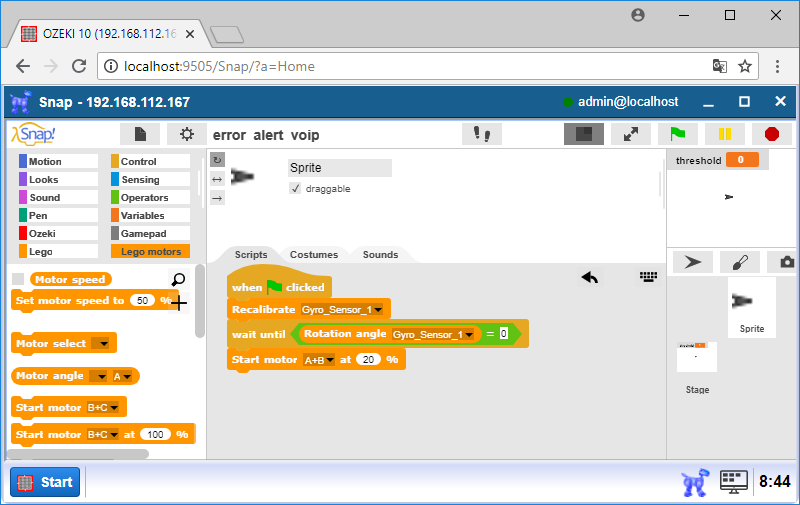
Figure 5 - Moves both Sniffer motors forward
Expand the code to check the rotation angle!
To stop the robot, the rotation angle of the gyroscope needs to be higher than a critical value that means your robot has fallen over. To check that condition continously, you need to place a 'wait until' block and fill it with the requirement of the '>' operator. On the left hand side, drag the 'abs of' operator and add a 'Rotation angle' to it (Figure 6). On the right hand side of the operator type the critical value from where your robot probably fells over, so you need to do some action with it.
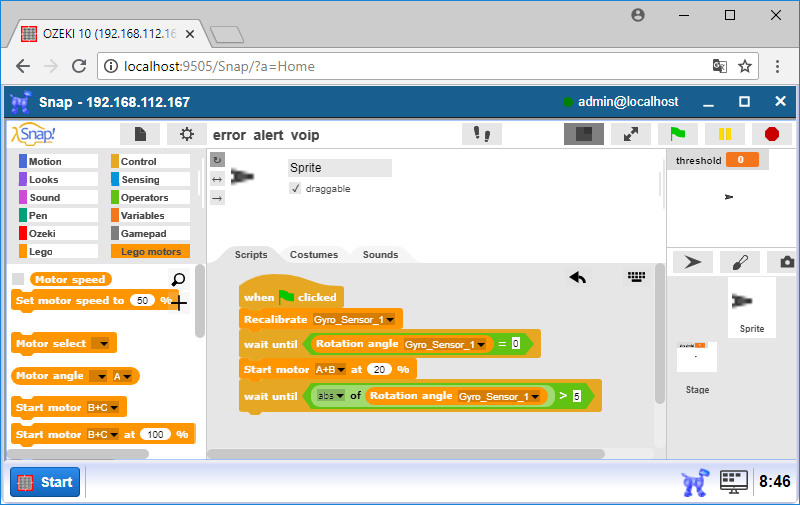
Figure 6 - Checking the rotation angle and compare it with the critical value
Upgrade the code to launch a VoIP call when the rotation angle is above the critical value!
To hear your VoIP telephone ringing when the robot falls over, you only need to add two more blocks. First you probably want your robot to stop its motors, so add the 'Stop motor' block and select the A+B option. Then drag the 'To [connection], address: [address] message: [message]' block found in Ozeki category that is for launching the phone call. First select the VoIP connection you created in #Task 1 from the drop-down menu. Then enter the telephone number that you wish to call (Figure 7). Finally, type the message text that Ozeki 10 will read through the phone using the text to speech technology. Congratulations! You are done with a program that will trigger a VoIP phone call when the robot fall over.
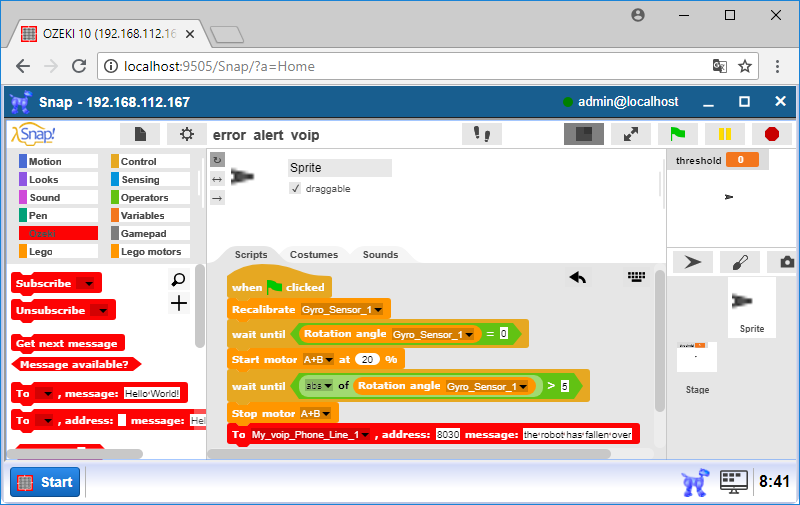
Figure 7 - Calling a user over a PSTN provider
Program code

Figure 8 - Program code to launch a VoIP phone call if the robot fell over
|
|
Download the SNAP program code to get a phone call from your robot The code can launch a VoIP phone call in case of some error. It is easier to follow the guide if you have the codes in front of you: Download Ozeki Snap code for VoIP error alerts |
More information
- Displaying emotions, playing sounds
- Control robot using chat
- Error alert using e-mail
- Robot status updates on a website using FTP
- Robot control using voice commands
- Robot error alert using text to speech
- Robot control using SMS
- Error alert using SMS
- Write messages in Morse code
- Robot error alert using Telephone call (voice)