 Sign in
Build the frame
The fun part starts with building your first Lego robot the Chopper. This is a simple motorcycle of a large motor used for driving the motorcycle forward and a medium motor for steering the motorcycle. In this lecture you will learn about the structural elements, and you will see the building steps to build this robot.

Figure 1 - The frame of Ozeki Chopper
Requirements
- EV3 Brick
- Large and Medium motors
- Building block pieces
- Build instructions for Ozeki Chopper: http://www.ozeki.hu/index.php?owpn=6202
What did you learn about EV3 Brick? What is it good for?
EV3 Brick - The central unit of a Lego robot. It contains the microcontroller that will control the motors. It also has some integrated devices like LED, LCD and speaker.
Which two types of motors do you know? What are they good for?
Large motor - A high performance, strong engine that can speed up
the Chopper.
Medium motor - A low performance, fast engine that will steer
the Chopper's wheel.
Collect the building block pieces
First you should collect the pieces to build the Ozeki Chopper. You will need two 'wedge-belt wheel', two 'tyre normal wide', two 'double angular beam 3x7', seven 'bush for cross axle', four 'cross axle 5m', two 'tyre for wedge-belt', four 'technic 5m beam', five 'connector peg w. friction', two 'conn. bush', two 'cross block 90', two 'rim wide w.cross 30x20', two 'technic ang. beam 3x5', two 'cross axle 3m', sixteen 'connector peg w.friction 3m', an 'angle element', a 'cross axle 9m', a 'beam frame 5x7', a 'beam h. frame 5x11', a Lego Mindstorms EV3 Brick, a Medium motor and a Large motor.
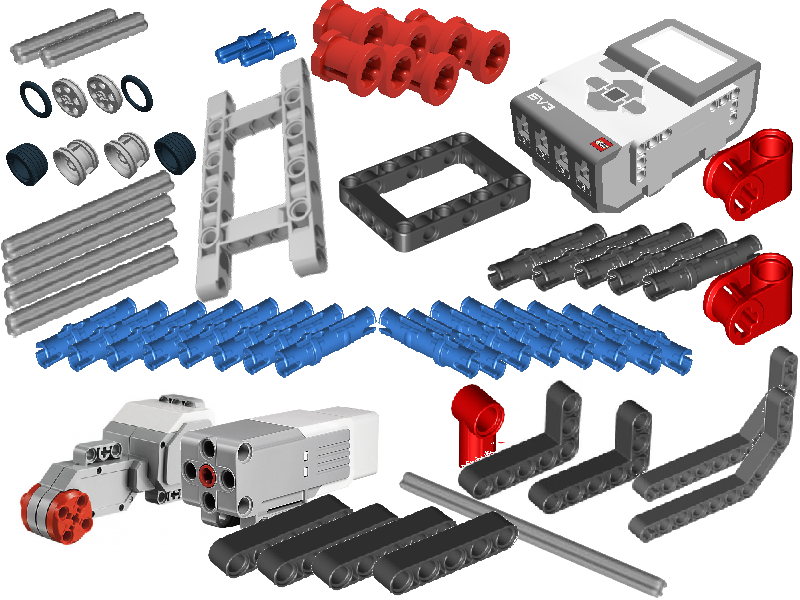
Figure 2 - All the necessary building block pieces
Build the Chopper frame
In this step you will connect the Medium motor to some pieces. First you have to connect two 'connector peg w. friction 3m' to one 'double angular beam 3x7'. Then connect one 'technic 5m beam' to the right with two blue pieces. You need to connect that piece to a 'bush for cross axle' and an another 'double angular beam 3x7', then connect the new piece to the Medium motor.
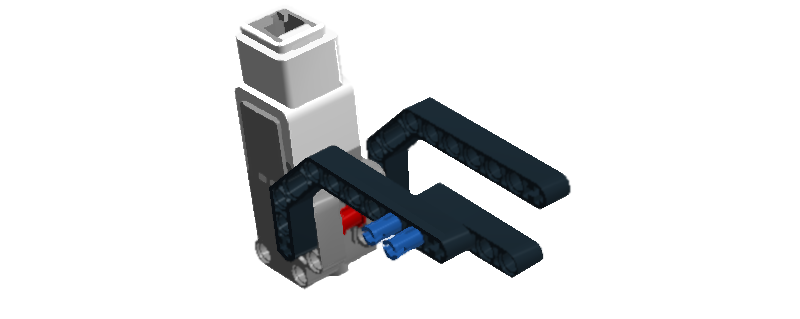
Figure 3 - Connecting pieces to Medium motor
Put a 'cross axle 5m' above the red 'bush for cross axle' and a 'connector peg w. friction 3m' to the 'cross axle 5m's right side and another piece to the left side. Connect a 'cross axle 3m' to the Medium motor's bottom. Put three 'bush for cross axle' to a 'cross axle 5m' and then link the two 'double angular beam 3x7' with that piece. Link a 'beam h. frame 5x11' to a 'technic 5m beam'. Then connect that piece with two 'connector peg w. friction 3m' to the frame. You have just built the case.
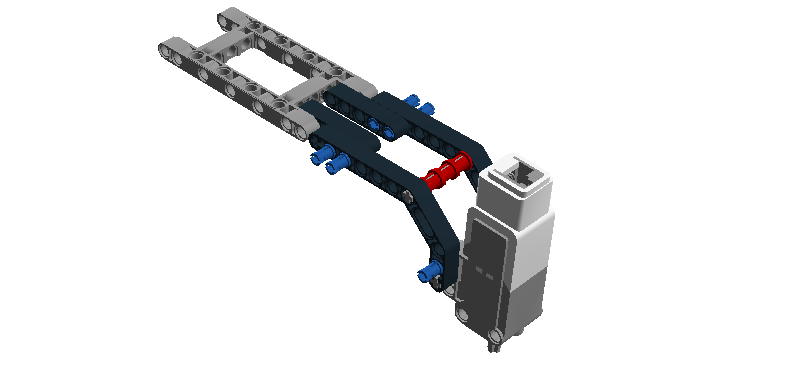
Figure 4 - The Large motor's case
Now take a 'technic 5m beam', a 'bush for cross axle' and two 'connector peg w. friction 3m' and link them to the Chopper's left side. Link two 'connector peg w. friction 3m' above the blue pieces in the frame's right side. Take the Large motor. Link a 'beam frame 5x7' and a 'connector peg w. friction' to the Large motor's back. Connect that piece to the 'beam h. frame 5x11' in the frame and fix it with a 'technic 5m beam' in the frame's right side. Fix the motor with four 'connector peg w. friction 3m'.
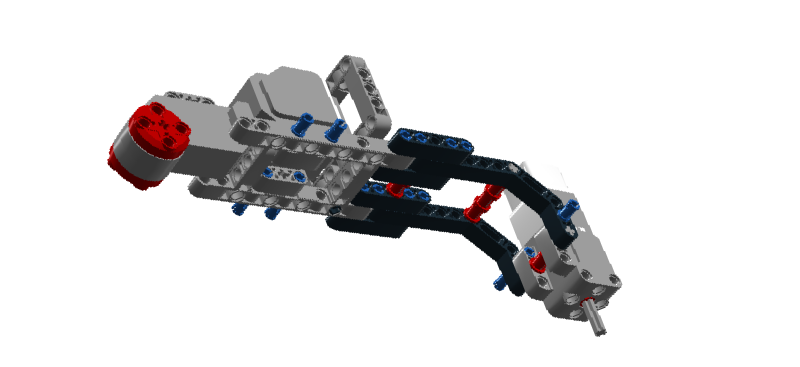
Figure 5 - Connecting the Large motor
Take two 'connector peg w. friction' and link them to the top of the 'beam frame 5x7'. Connect a 'connector peg w. friction 3m' to the middle of the Large motor. Connect a 'cross axle 9m' to the middle of the Large motor's red piece. The wheels will link to that axle. Connect a 'technic ang. beam 3x5' to the middle of the Large motor then connect a 'bush for cross axle', a 'connector peg w. friction 3m' and a 'cross axle 5m'. You have built the Brick's case. In the next step you will connect it.
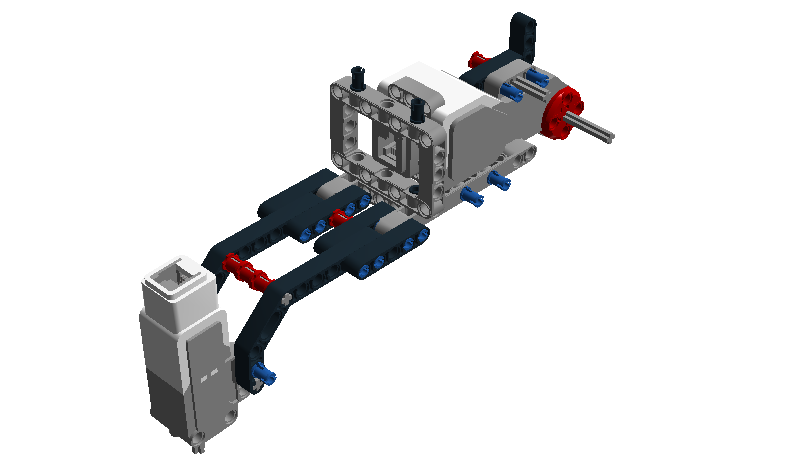
Figure 6 - The EV3 Brick's case
Link another 'technic ang. beam 3x5' and put a 'conn. bush' to the 'technic ang. beam 3x5' and do it in the right side too. Then link a 'cross block 90' to the right 'technic ang. beam 3x5' and to the left too. Put a 'connector peg w. friction' to the 'cross block 90' in the right and in the left side. Now you can link the EV3 Brick to the frame and fix it with a 'bush for cross axle'. Let's connect the wheels.

Figure 7 - Connecting the EV3 Brick
For the back wheel take a 'rim wide w. cross 30x20' and a 'tyre normal wide'. Connect them to the 'cross axle 9m's right side. Do the same in the left side. For the front wheel take a 'wedge-belt wheel' and a 'tyre for wedge-belt wheel'. Connect them. Take again a 'wedge-belt wheel' and a 'tyre for wedge-belt wheel' and connect them too. Link the two pieces with an 'angle element'. Connect that piece to the 'cross axle 3m'. Congratulation! You have built your robot's case called Ozeki Chopper!
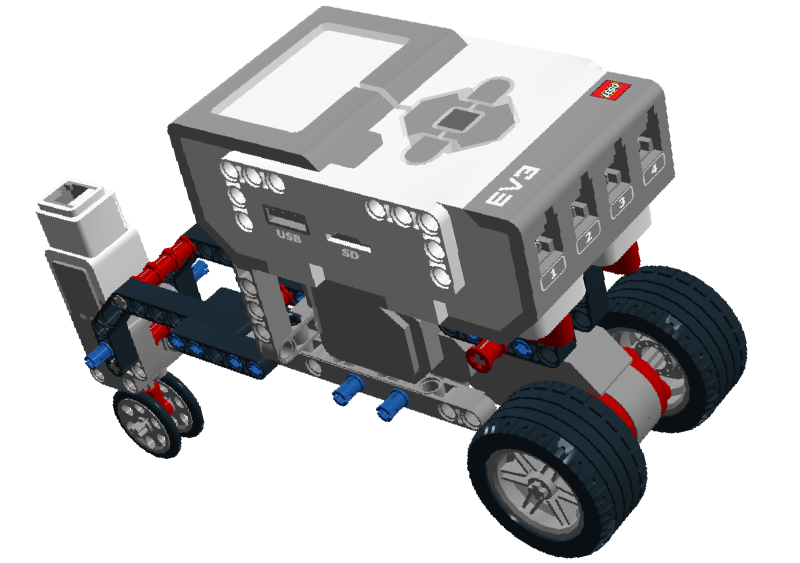
Figure 8 - Four wheels added: two 'rim wide w.cross 30x20' and two 'wedge-belt wheel'
More information
- Collect the parts
- Build the frame
- Connect the motors to Lego Brick
- Connect the Lego Brick to your Windows PC
- Install Ozeki Robot Developer
- Connect the Lego robot to Ozeki 10
- Test the Lego Motors individually
- Start SNAP and write your first program
- Use Lego blocks in SNAP to control Lego Motors
- Drive your Robot around obstacles