 Sign in
Start SNAP and write your first program
In this lecture you will learn about SNAP. SNAP is the best tool to learn programming. SNAP is a visual programming language developed at Berkeley University. Ozeki 10 extends SNAP with building blocks for robotics. SNAP was chosen, because it is a great first step to learn the logic of programming. It is very easy to convert the knowledge acquired in SNAP to more advanced programming languages, such as C#.Net.
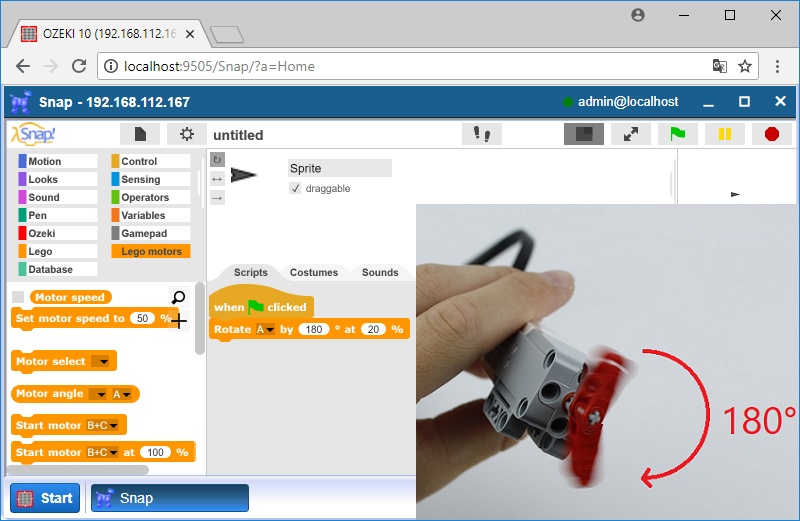
Figure 1 - The Medium motor plugged into port A is rotated by 180°
Requirements
- Ozeki Chopper: http://www.ozeki.hu/index.php?owpn=6202
- Medium motor on port A and Large motor on port C
- Snap basics: http://www.ozeki.hu/index.php?owpn=6180
Start Ozeki 10's SNAP application and find the program blocks
After you have logged in to Ozeki 10 and have easily connected it to the Chopper, please start Snap by double clicking its icon, which you can find on Ozeki 10's desktop. For using SNAP, first you need to know the basics. You can find the block sections at the top left side of the screen like Figure 2 shows. For example there are Control blocks, Ozeki blocks, Lego and Lego motors blocks. Which are used to start motors, stop them or rotate them, but most importantly you can use operators and variables, which are used in other programming languages as well.
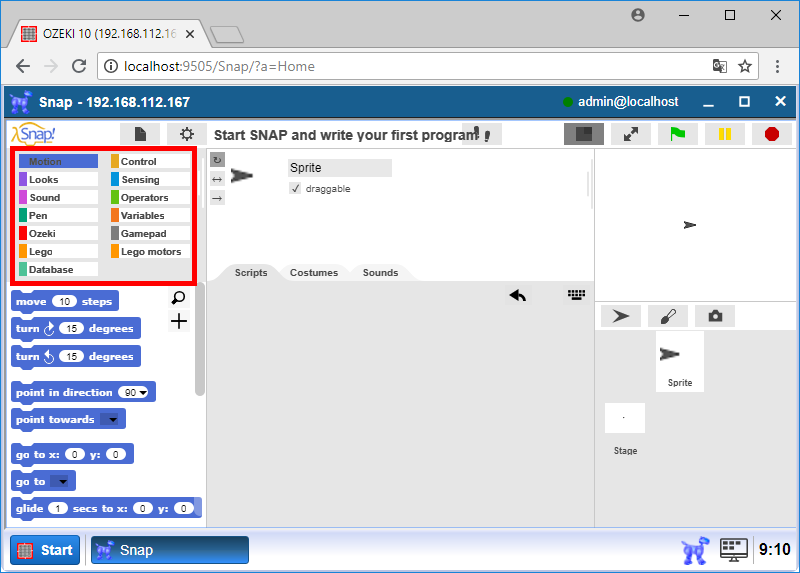
Figure 2 - Look through all Snap block categories you can find
Which is the first Snap block to start your code
In this task you will create your first program in Ozeki 10 SNAP. In the previous task you have learned where you can find the blocks for the codes. Now you will use one of them. Click on 'Control' where the first block on the top is a 'when green flag clicked'. Click and drag it into the 'Scripts' field (Figure 3). The code sequence under the block will be called by pressing the green flag.
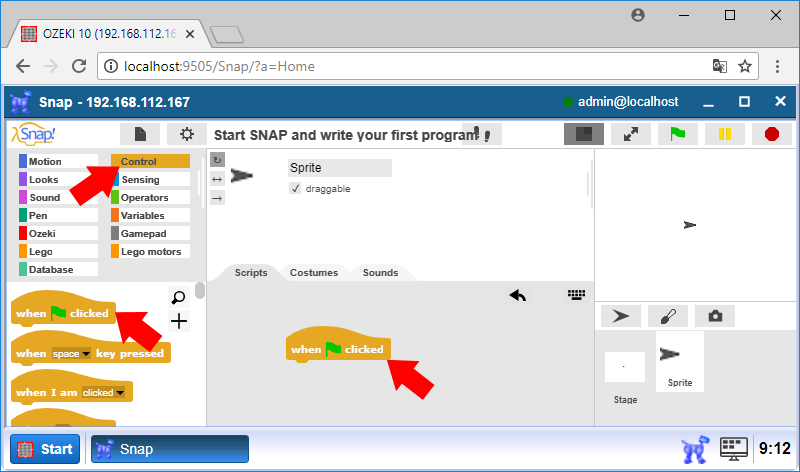
Figure 3 - Use the first block of Control
Move motor A and C using Snap messaging blocks
Send command messages towards each motor. The first message can keep motor C running at 20%, while the second message can rotate motor A clockwise by 180°. The following messages can be used: 'C 20' and 'A 20 180'. To send them, Ozeki 10 has a special message sending block in the red 'Ozeki' category. Look for the 'To [connection], message: [text]' block and select the motor connection as the first parameter and send the proper command message to each motor (Figure 4).
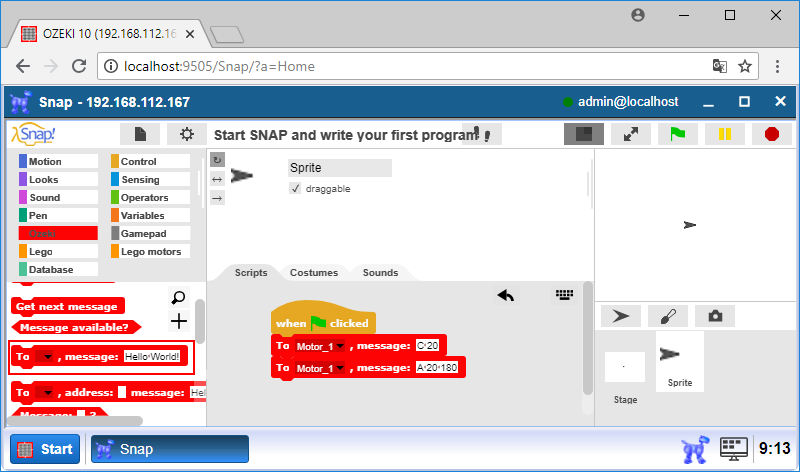
Figure 4 - Move both motors with message blocks
Move motor A and C using Snap Lego motor blocks
There are specific motor movement blocks in the 'Lego motors' menu. They are easier to use than the message blocks. First start moving motor C with a 20% power by using the 'Start motor C at 20%' block. Then rotate motor A clockwise with 180 degree with the same power level by using the 'Rotate A by 180° at 20%' command (Figure 5). Click the green flag to watch the motors move.
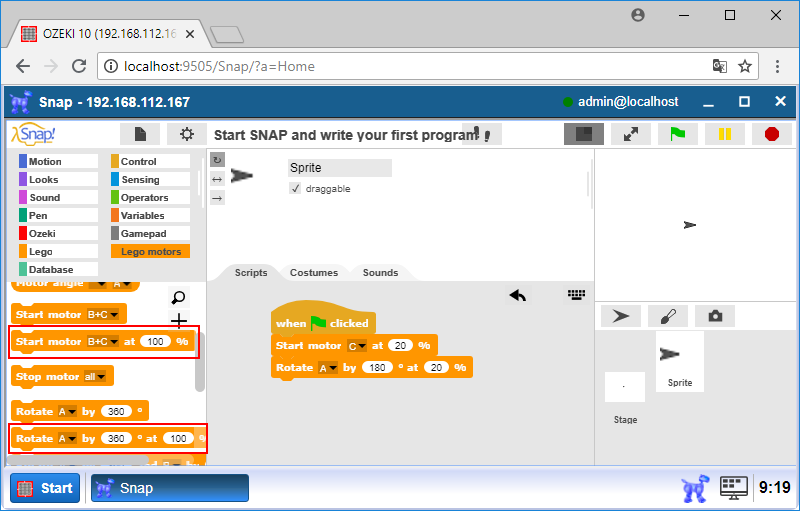
Figure 5 - Move both motors with Lego motor blocks
Program code
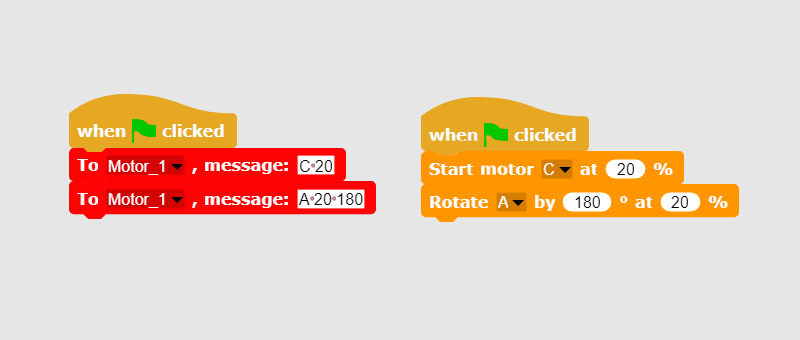
Figure 6 - Both techniques are included in this simple program code
|
|
Download the Program Code The program moves the Lego motors with special Snap blocks. You will not find an easier code on this website. Download the program code |
More information
- Collect the parts
- Build the frame
- Connect the motors to Lego Brick
- Connect the Lego Brick to your Windows PC
- Install Ozeki Robot Developer
- Connect the Lego robot to Ozeki 10
- Test the Lego Motors individually
- Start SNAP and write your first program
- Use Lego blocks in SNAP to control Lego Motors
- Drive your Robot around obstacles