 Sign in
Drive your Robot around obstacles
In the final lecture of this course, you will learn how to drive your Chopper robot around obstacles. You will write a simple program, that turns the motor responsible for steering the robot and drives the other motor to go forward or backward. You will enjoy this lecture, as it finally gives you a real feel of what robotics is about.
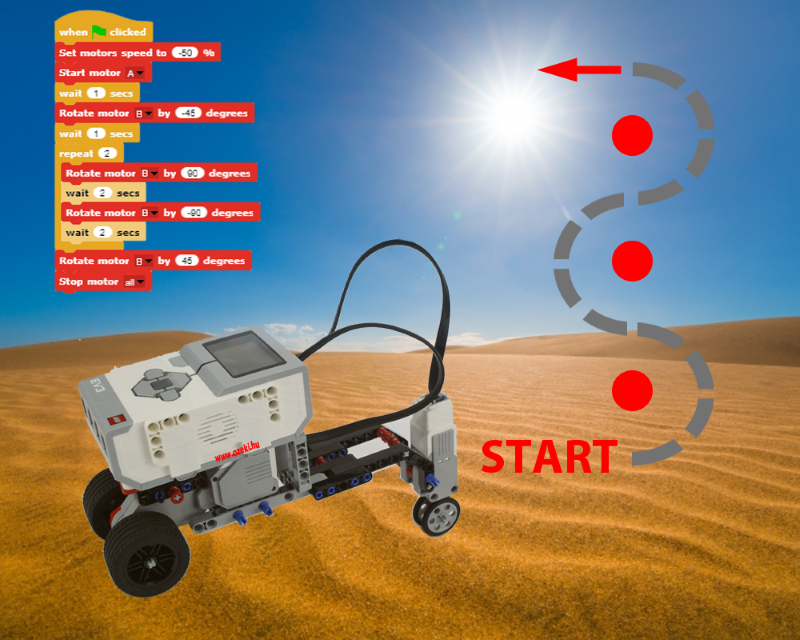
Figure 1 - Drive the robot around obstacles
Requirements
- Ozeki Chopper
- Large motor on port A and Medium motor on port B
- Ozeki 10 Snap: http://www.ozeki.hu/index.php?owpn=6180
Instruction video
Lecture video - How you can drive the Chopper around obstacles
Open Snap and place a Block that can start the code
Start SNAP from Ozeki 10's desktop. If you cannot find the icon, you can open Snap from Ozeki 10's Start Menu under the 'Programs/Education/Snap' section. If you see the SNAP GUI opening in front of you, please place your first program block, which you can find beneath the category of 'Control' blocks. Then drag the yellow 'when green flag clicked' block into the 'Scripts' field (Figure 2).
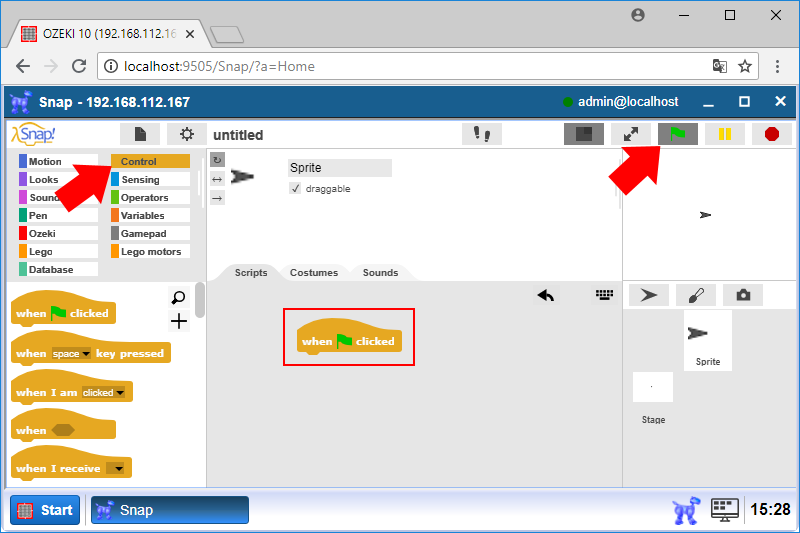
Figure 2 - Drag and drop the 'when green flag clicked' block
Create an obstacle course and write a code to drive around it
First set the motor speed by using the 'Set motor speed to [degree] %' block that you can find in the 'Lego motors' category. Please set the [degree] parameter to 50%. Attach the block under the 'when green flag clicked' block. It should start the Large motor. You can do it with the 'Start motor [motor]' block. Please select the Large motor's port by setting the [motor] to A and also attach the block under the previous block. Please find the 'wait [secs] secs' block in the 'Control' category. Please set the [secs] parameter to 1. Attach it to the previous block as you can see on Figure 3. The motor will start and wait for 1 sec. With this code the motor will not stop.
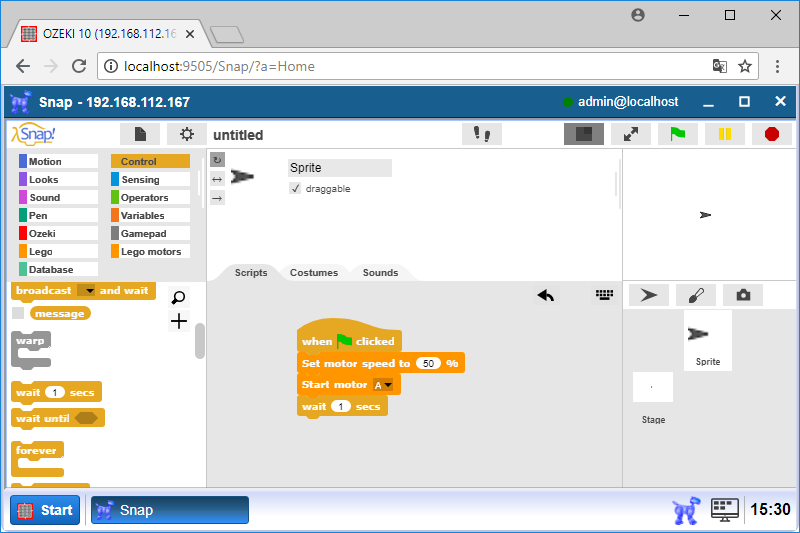
Figure 3 - Attach these 3 blocks under the yellow Control block
The current code can speed up the Chopper, but you should steer the Chopper with the Medium motor, so please place the following 3 blocks under eachother: 'rotate [motor] by [degree]°', a 'wait [secs] secs' and use a 'repeat [times]' cycle (Figure 4). The goal of this step is to turn the steering wheel in 45 degree to the left, so it can go around the first obstacle. You should use 'rotate [motor] by [degree]°' to achieve this, please set [motor] to B and [degree] to -45. To ensure the motors safely run after eachother, use 'wait' blocks and set their value to 1 sec. Finally place the 'repeat [times]' block to the bottom, which should repeat all blocks 2 times. You will fill the cycle in the next step.
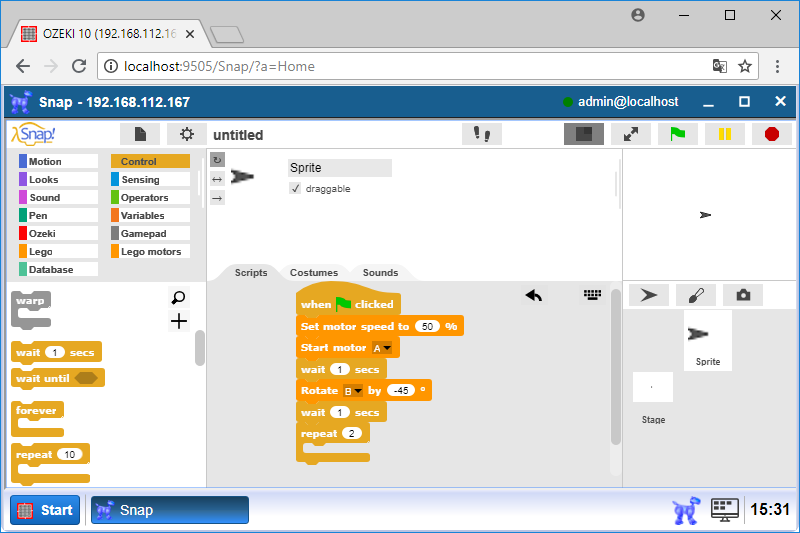
Figure 4 - Steer the wheel in 45° and attach a repeat block
This step ensures that your Chopper safely goes around the obstacle course. You will rotate the Medium motor by 90 and -90° and wait 2 secs between rotating. For this take a 'rotate [motor] by [degree]°' block from Lego motors. Choose B motor as the first parameter and 90° for the second parameter then drop it into the 'repeat 2' block. Then attach a 'wait 2 secs' block to the previous block. Drag another 'rotate B by [degree]°' block for the Medium motor with -90° and attach it to the 'wait 2 secs' blocks. Drag the last 'wait 2 secs' block and attach it to the end of the loop (Figure 5).
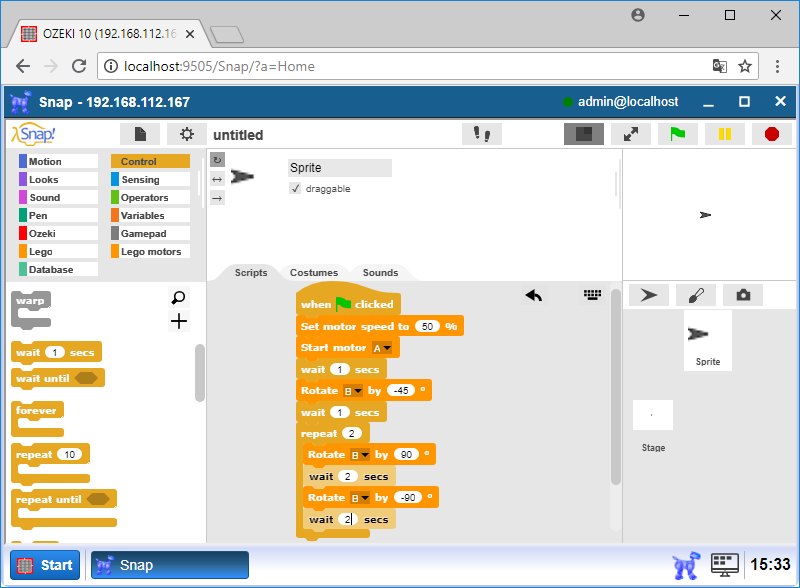
Figure 5 - Build the repeat block
In this step you will rotate the Medium motor by 45° and stop the Chopper. First attach the 'rotate [motor] by [degree]°' block under the 'repeat 2' block. You should stop all motors with the 'Stop motor [motors]' command block by attaching it to the end (Figure 6). Set [motors] to all. Now the final code of course 1 is ready. It is a good idea to modify it by using more obstacles. Have fun!

Figure 6 - Stop all motors with Ozeki Snap by attaching the final block
Program code
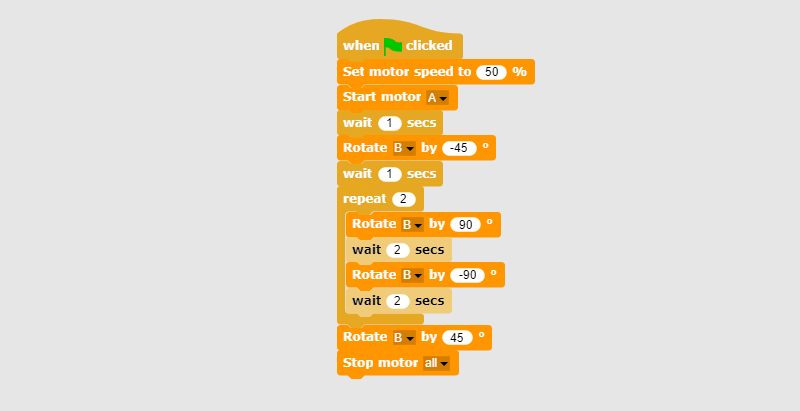
Figure 7 - Program code that drives Chopper around obstacle course
|
|
Download the program code to move large and medium motors The program moves your robot around obstacles course by controlling the large and medium motors of the Chopper. Download the program code |
More information
- Collect the parts
- Build the frame
- Connect the motors to Lego Brick
- Connect the Lego Brick to your Windows PC
- Install Ozeki Robot Developer
- Connect the Lego robot to Ozeki 10
- Test the Lego Motors individually
- Start SNAP and write your first program
- Use Lego blocks in SNAP to control Lego Motors
- Drive your Robot around obstacles