 Sign in
Measure the time of the motion
In robotics, there are many situations when you need to measure time. In this lecture you will learn, how to create a stopwatch in SNAP, that can be triggered and stopped on sensor events such as the press of a button.

Figure 1 - The start and stop entry points you should create
Requirements
- Ozeki 10 installed: http://www.ozeki.hu/index.php?owpn=6066
- Lego connection installed: http://www.ozeki.hu/index.php?owpn=6067
- Snap basics: http://www.ozeki.hu/index.php?owpn=6180
Create two entry points. Each of them should be triggered with different keyboard keys!
Snap can detect keypress events to initiate codes, which are entry points to your program. Here you will use different entry points than in the previous lectures. In your stopwatch program, you will use 'when [key] key pressed' block found in Control category, because you must start and stop your stopwatch by pressing two different keys. Please drag two 'when [key] key pressed' blocks after opening the SNAP application as you can see on Figure 2. Please set different keys (for example 's' and 't'), because if you choose the same key, the stopwatch will stop at the moment when you would like to start it. Be careful because if your operating system's keyboard layout and your real keyboard layout are different, some keys of the keyboard will be recognized differently.
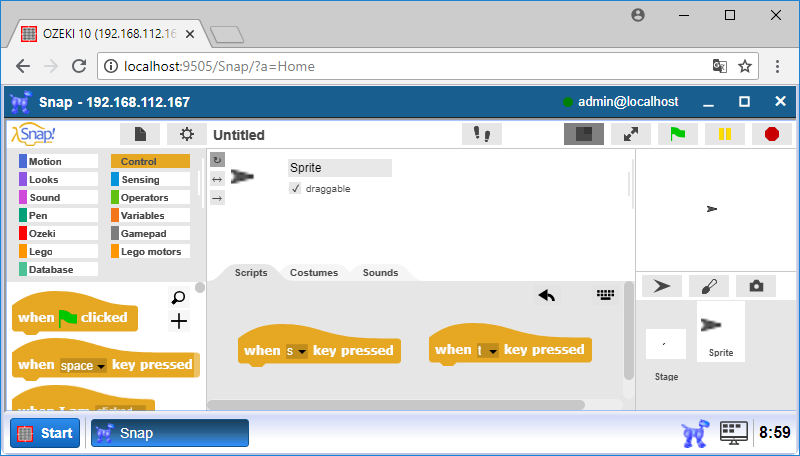
Figure 2 - The start and stop entry points you should create
Create three variables to store the starting, stopping and the passed time between the previous two ones.
To measure the passed time between the two pressed keys, you will need to store the time of the key presses. You can store the time in variables. One variable has three property. The first is the variable's name which identifies it. The second is the type which is define what type of data (such as numbers, characters, text) can they store. The third is the value which is represents the stored data. In your stopwatch program you will store numbers (int and float) in your variables. Please create one variable to store the starting time called 'start', create a variable called 'stop' to store the stopping time and finally a variable to store the difference between start and stop (Figure 3). You can create new variables by clicking on the 'Make variable' button found in Variables category.
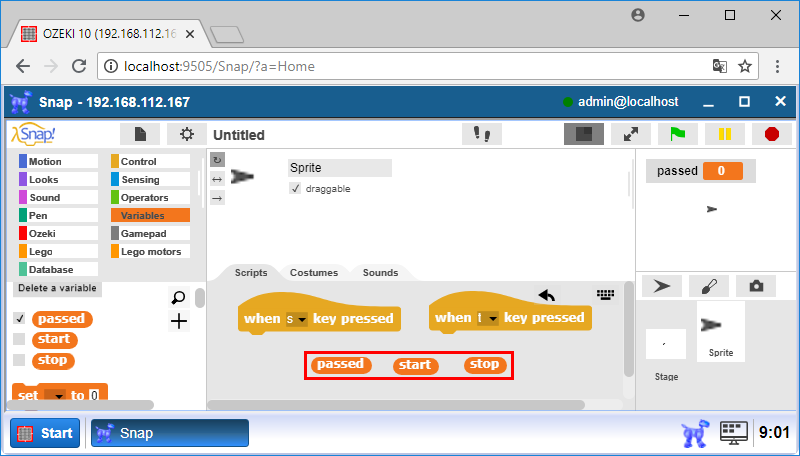
Figure 3 - Variables you should create
Calculate the passed time in seconds using 'start' and 'stop' variables!
After you have the three variables, you will need to do some operations with them. There are two main type of operators. The first type can compare values to calculate true or false logical values. The second type can calculate operations on value(s) such as summation, subtraction, division or multiplication. Usually this type of operators produces the same type of value than the input type. In this lecture, you should use the second type of the operators to subtract the 'stop' variable's value from the 'start' variable's one to get the passed time in milliseconds then you need to divide the result by 1000 to get the passed time in seconds. To do this you need to use the subsctract and devide blocks from Operators category as you can see on Figure 4.
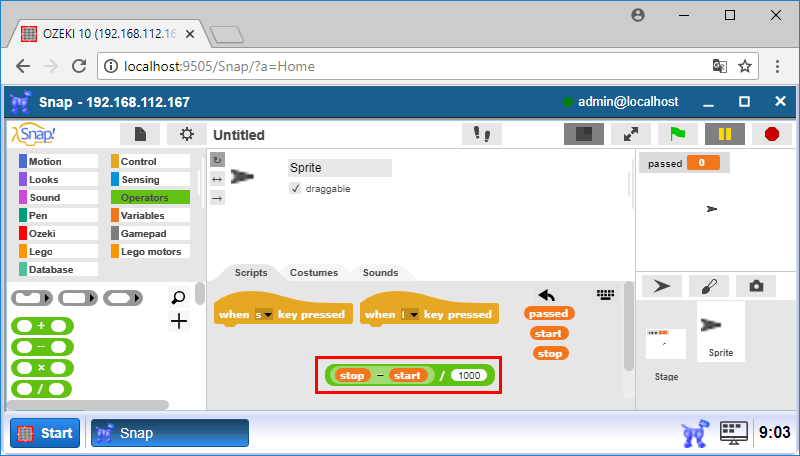
Figure 4 - Calculate how many seconds have passed
Place a block which returns the time in milliseconds!
To measure the passed time between two pressed keys, you will need to catch the current time when pressing a key. You can get the current time using the 'current [time_unit]' block which is in the Sensing category. This block can be used for getting the current date, hour, minute, second and many others. But the most important is the last option for now which is a 'time in milliseconds'. It returns the current time in millisecond. Its value grows by 1 in every ms. Use it in your stopwatch program to get the current time in milliseconds to make accurate measurements.
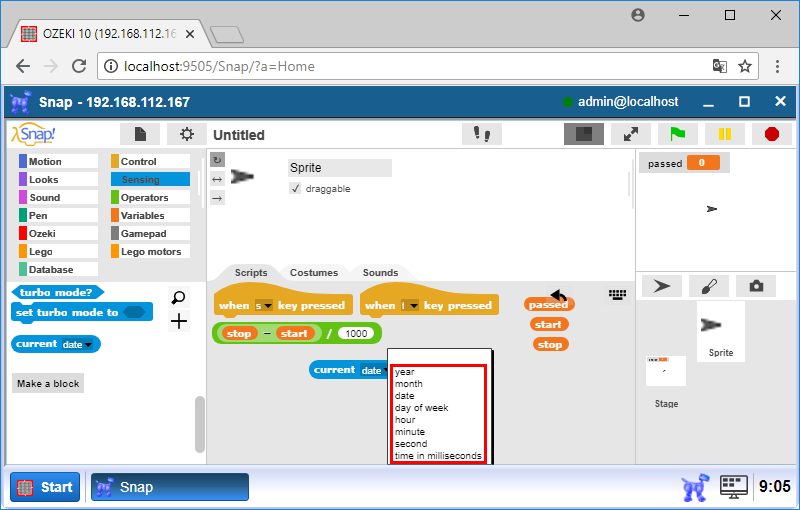
Figure 5 - Use the 'current' block to measure time
Create a stopwatch which stores the elapsed time between the two key presses using the previous blocks!
After you placed the blocks to the stage, you should snap them together to create the stopwatch program. Choose one of the entry points, set the value of the start variable to the current time in milliseconds by using a 'set [variable] to [value]' block inside the Variables category. In this case, the 'variable' field is the variable's name and the 'value' will be the variable’s value. Finally, choose the other entry point and save the current time to the 'stop' by pressing the 't' key. After all, calculate the passed time which you can get by subtracting the 'stop' variable from the 'start' variable and dividing it by 1000 to get it in seconds. Place the result in the 'passed' variable.

Figure 6 - The stopwatch program code
Upgrade the code to have only one entry point!
After successfully creating a stopwatch program in the previous task, you will learn how to upgrade your stopwatch to see the passed time during the measurement. In the upgraded program, you will use only one entry point by detecting the start key. Please place a 'repeat until [condition]' block, where the condition will be the 'key [key] pressed?' block. In case of last block, it should be equal to the key that stops the stopwatch. The passed time will be set to the 'passed' variable repeatedly until you press the stop key. By running this program, you should see the passed time during the measurement on the top right corner of the GUI. Finally you can export your project by clicking on the sheet icon and choose 'Export project...' option to download your project to your computer.
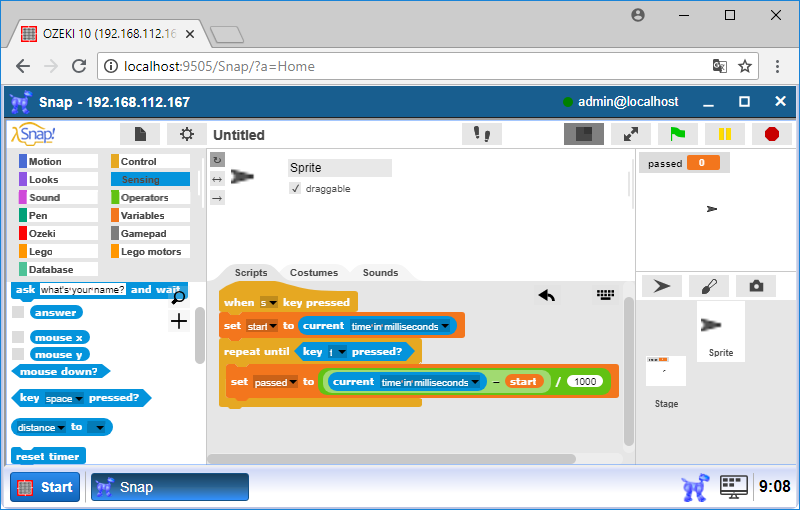
Figure 7 - Stopwatch program code with only one entry point
Program code

Figure 8 - A program code that starts your timer and stops it as well
|
|
Download the program This code measures ellapsed time between two keypresses It is easier to follow the guide if you have the codes in front of you: Download the SNAP code files |
More information