 Sign in
Create a parking assist system
In this lecture you can learn how parking assist systems work in modern cars. Your task will be to use the ultrasonic distance sensor to detect a free parking space. You will also have to design the path the robot can use to park into the detected space.
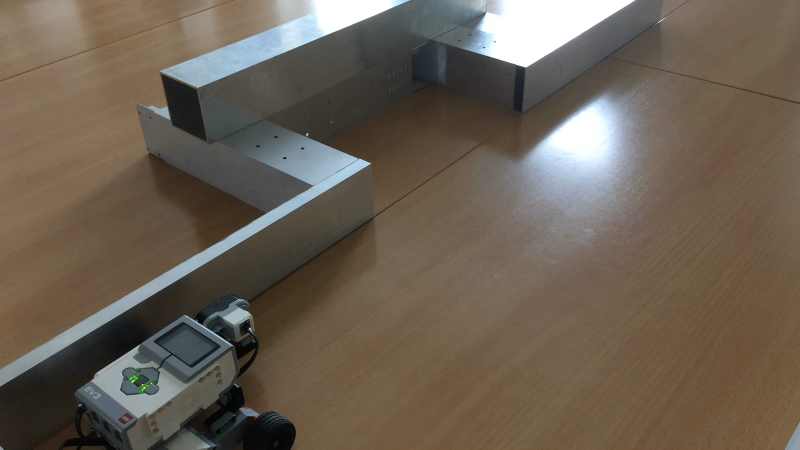
Figure 1 - Park your robot with an IR sensor
Requirements
- Ozeki Sniffer: http://www.ozeki.hu/index.php?owpn=6204
- Ozeki 10 installed: http://www.ozeki.hu/index.php?owpn=6066
- Lego connection installed: http://www.ozeki.hu/index.php?owpn=6067
- Snap basics: http://www.ozeki.hu/index.php?owpn=6180
Instruction video
Lecture video - How to park your robot by using an Infrared sensor
Change the mode of the IR sensor to proximity!
In this program you have to use the Infrared Sensor with 'proximity' mode, which is the best mode to measure distance. Start by opening the Control Panel and selecting the Infrared Sensor from the list then click on the 'Configure', and finally choose the 'proximity' mode on the 'Sensor mode' field (Figure 2). In this mode you can ask the proximity from SNAP with the proper block.
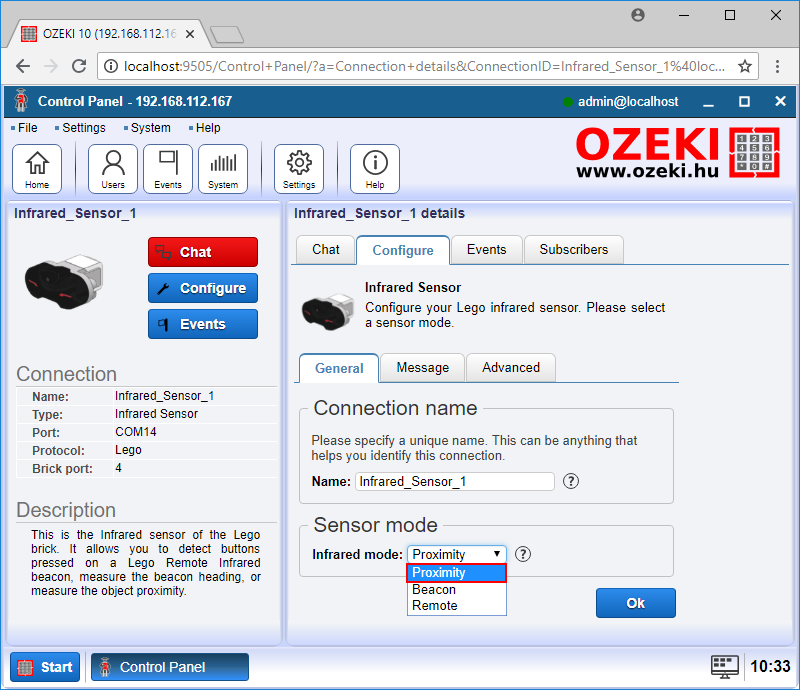
Figure 2 - How to change the IR sensor mode to 'Proximity'
Create an entrypoint that triggers
when the space button is pressed
Add the 'when [key] key pressed' block from the Control tab, as an entry point for your parking program, where choose a key as you wish. Then please make three variable using the 'Make variable' button from the Variables tab, named to 'reference', 'difference' and 'new'. In your program you will use the 'reference' variable to store a reference value to help detect bigger changes in the measured distance. The 'new' variable will store the newest measured distance from the IR sensor. Finally the 'difference' variable will store the difference of the 'reference' and the 'new' variables.
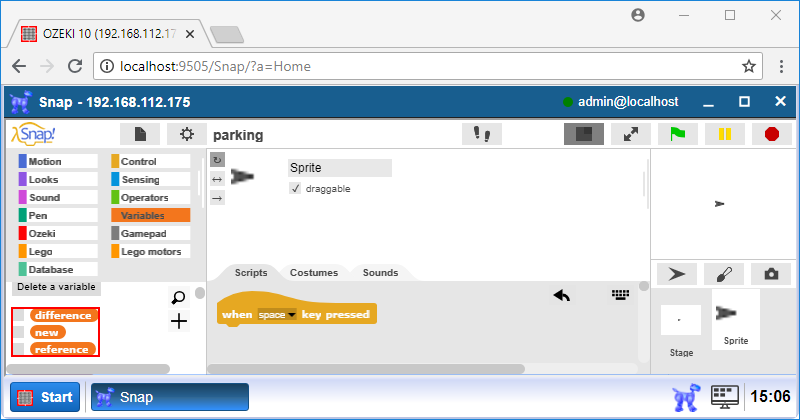
Figure 3 - An entry point and 3 variables you created
Create two blocks, one to start the robot and one to stop it!
To move your Sniffer along the wall, while it is searching the free parking place, you will need to place some blocks from the 'Lego motors' category. First place a 'Start motor [motors] at [number]%' block to start your Sniffer, where [motors] are the motors you use and the Sniffer's speed is provided by a [number] which is 40 (Figure 4). The 'Stop motor [motors]' block can stop your Sniffer, where [motors] are the same motors you have started, because you will need to stop your Sniffer after that you successfully parked to the free space you found.
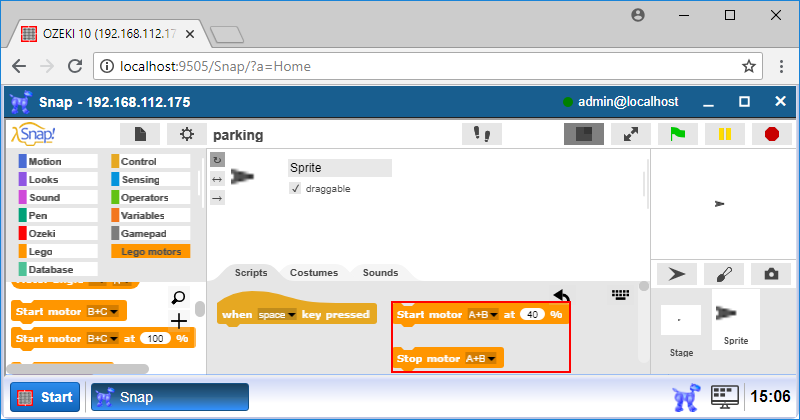
Figure 4 - You have created two blocks that moves the robot along the wall
Detect the beginning of the free place
Detect the beginning of the free place with your Sniffer, first you will need to measure the distance from the wall. You can get the measured distance from your IR sensor by using the 'Object proximity [connection]' block, where [connection] is your IR sensor's connection name. After that you will need to set the 'reference' variable to the current distance and the 'difference' variable to 0 (Figure 5). Then place a 'repeat until [comparison]' block, where the [comparison] is a '[value] > [variable]' block, where the [value] is 10 cm and the [variable] is the 'difference', because 10 cm is required for parking. Repeat measuring until the difference is calculated. Finally set the 'new' variable's value to the newest measured distance and also set the 'difference' by subsctracting 'reference' from 'new'. The robot will go forward till 1 second then recheck the distance.
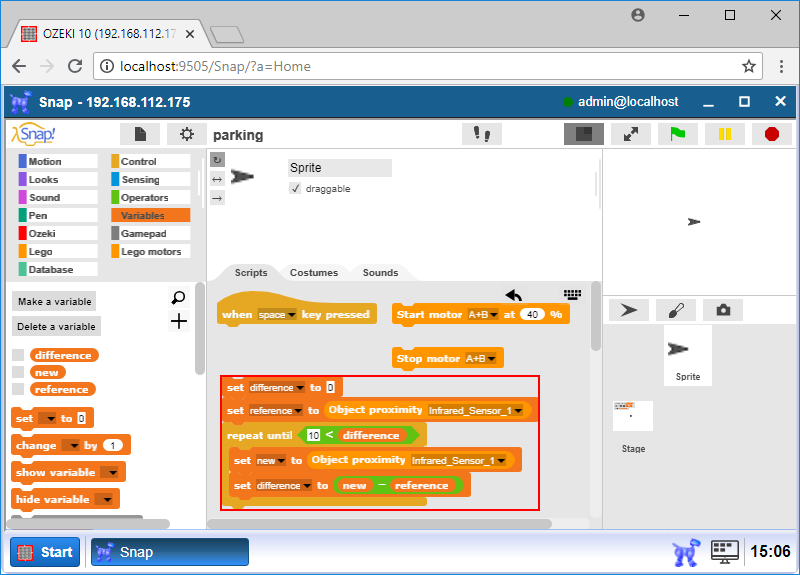
Figure 5 - Detect the beginning of the free place
Write a code which detect the ending of the free place
To detect the ending of the free place, you will use same blocks like what you used in the previous step. So please click one of them and if all of blocks surrounded with a line, please do a right click and click on the 'duplicate' option like in Figure 6 below. If you did everything well, you should see that all surrounded block is duplicated. Now both big block measure distance until it is not grown up. Because when your Sniffer leave the free place the distance decreases, you should swap the 'new' and 'reference' variable block (Figure 6) inside the subtraction block to get positive values.
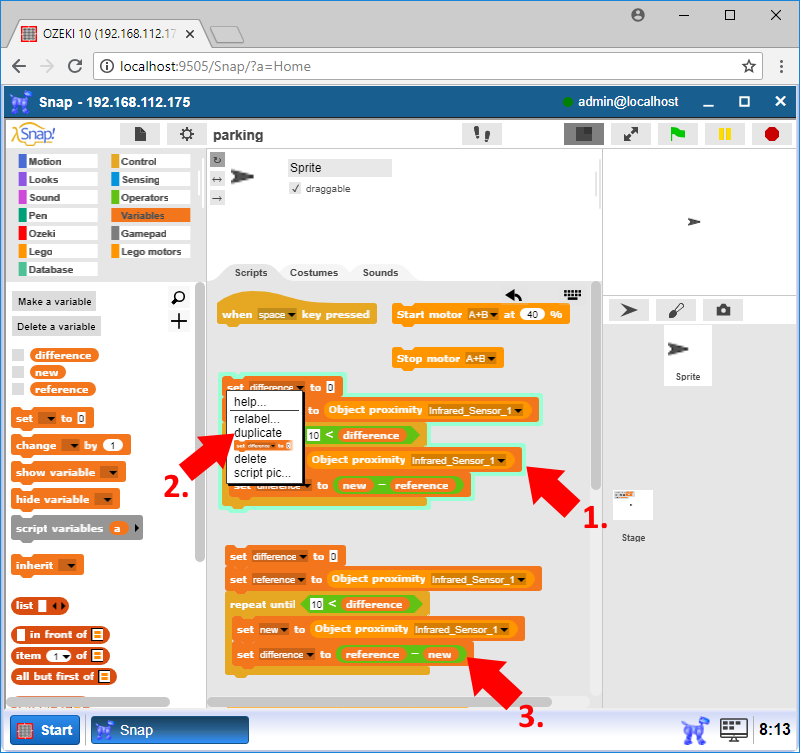
Figure 6 - Detect the ending of the free parking place by duplicating the last function
Park the robot to the right place
In this step you will use only the 'Drive [motors] [direction] [time] sec at [value]%' block where [motors] are your motors, [direction] is the movement direction, [time] is the time of movement and [value] is the speed in percentage. The 'Rotate [motors] by [value] °', where [motors] are the motors you use and [value] is the degree what your motor(s) will rotate. You will use the 'Rotate' block to move your Sniffer backward, and the 'Drive' block to turn your Sniffer. If your Sniffer facing forward and your IR sensor is on the left side, you will need to set first a negative small degree value in the 'Rotate' block for the easier parking, then a 'Drive' block with 'left' direction to turn your Sniffer's back to the parking place. Then please set again a bigger value in a 'Rotate' block to reverse in the parking place. Select a 'Drive' block with 'right' direction to finish the parking. Set lower speed and change the time option that is suitable for your parking place.
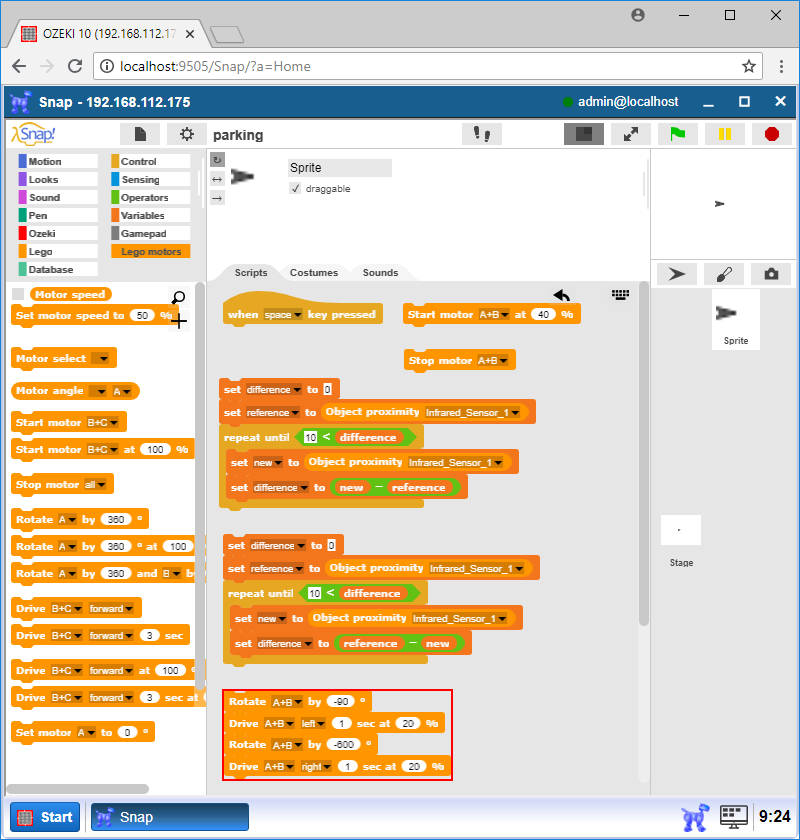
Figure 7 - Parking with your Lego robot vehicle
Test it
After you created all component for the parking program please put it together. First please connect the motor starter block to the entry point. Then please place under it the block from the STEP 3, which detect the beginning of the free place. After that place a 'wait X secs' block where set X to 1, to wait one second after the detection to get valid new reference value. After the waiting block place the ending detector blocks and the 'Stop motor X' block. Finally connect the blocks which park your Sniffer to the free place (Figure 8). If you start your program by clicking on the green flag, you should see that your robot moving to the end of the free place and finally park to it.
Program code
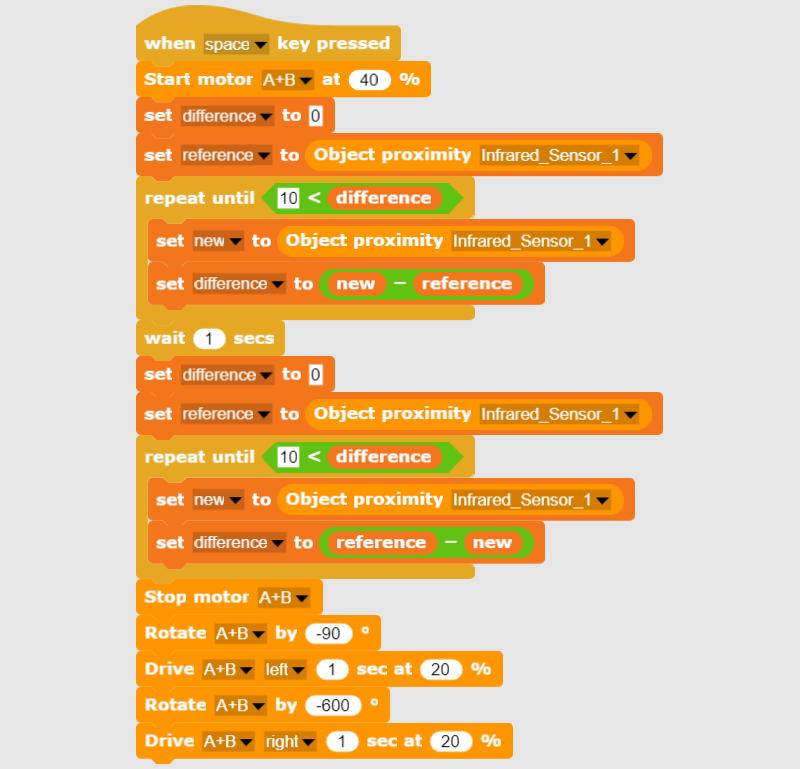
Figure 8 - The program code detects a parking space in 1 sec and easily parks
|
|
The program code easily parks your robot vehicle This code shows you how to detect a free parking place and park to it with your Lego robot. It can park backwards like in the video. It is easier to follow the guide if you have the codes in front of you: Download the SNAP code files |
More information
- Mapping and Navigation
- Going to a coordinate
- Collision detection / sensor feedback based navigation
- Surround sensing using linear distance sensor
- Create a parking assist system
- Homing to a dock using an IR beacon
- Follow me lunch bag
- Map a room's walls using ultrasonic sensor
- Mapping a room with LIDAR
- Outdoor navigation using GPS and mobile network