 Sign in
Follow me lunch bag
Every children in the UK carry a lunch bag to school. Wouldn't it be great, if the lunch bag would go to school by itself? In this lecture you will learn to build a lunch bag carrying robot, that can follow a child. It will use an IR beacon and a distance sensor to follow the child at a distance.
Instruction video
Lecture video - The lunch bag can easily follow your IR beacon
Requirements
- Ozeki Transporter: http://www.ozeki.hu/index.php?owpn=6272
- Ozeki 10 installed: http://www.ozeki.hu/index.php?owpn=6066
- Lego connection installed: http://www.ozeki.hu/index.php?owpn=6067
- Snap basics: http://www.ozeki.hu/index.php?owpn=6180
Build the lunch bag transporter robot
This robot is based on an IR sensor, which should put as high up as possible, so the robot can operate on the ground. The robot will use two large motors to move forward, backward, left or right. By rotating these motors at different speeds, the robot can turn. This is how it can follow the beacon. You can find the transporter robot's building instruction in the requirements section just above this task. After building it you can place a lunch bag in the transporter's trunk and follow this tutorial.

Figure 1 - The lunch bag transporter
Start your program with an entry point and
place a forever loop in it
Open the SNAP application in Ozeki 10. First you need to add an entry point, select the 'when green flag clicked' block from the Conttrol menu to start the program. Drag the 'Forever' block after that from the Control menu as you can see it on Figure 2 below. The 'Forever' block is an essential part, since it is very important that the transporter keeps following the beacon.
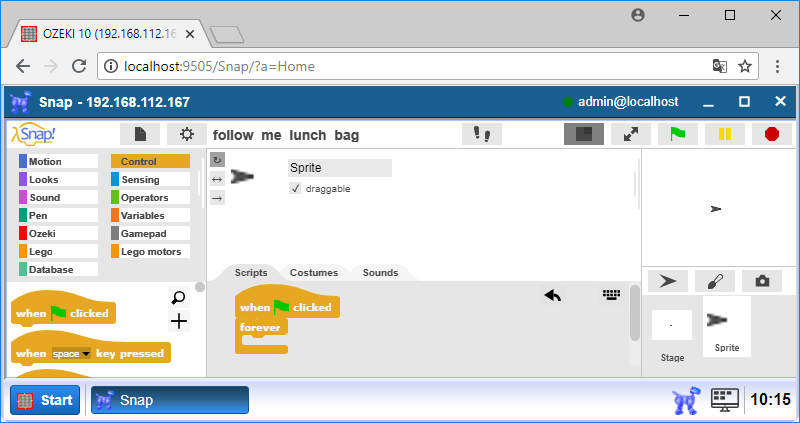
Figure 2 - Start your program code with an entry point
Control your robot with the Infrared sensor
Add the 'if [condition] else' block from the Control category to examine the distance between the robot and the beacon. Drag the '<' block to set the [condition] that checks if the 'Beacon proximity' is less then 10 cm (Figure 3). Please don't forget to choose the Infrared Sensor and CH1 in the Beacon proximity block. It means if the distance is less than 10cm, the condition is true and it is executed. Choose the 'Stop motor [motors]' block into the if branch and select all [motors]. Drag the 'Drive [motors] [direction] at [speed] %' block from Lego motors menu into the else branch. Select the A+D [motors], choose the forward [direction] and set the robot motor [speed] to -20 percent. The robot should go stop if the distance is less than 10 cm.
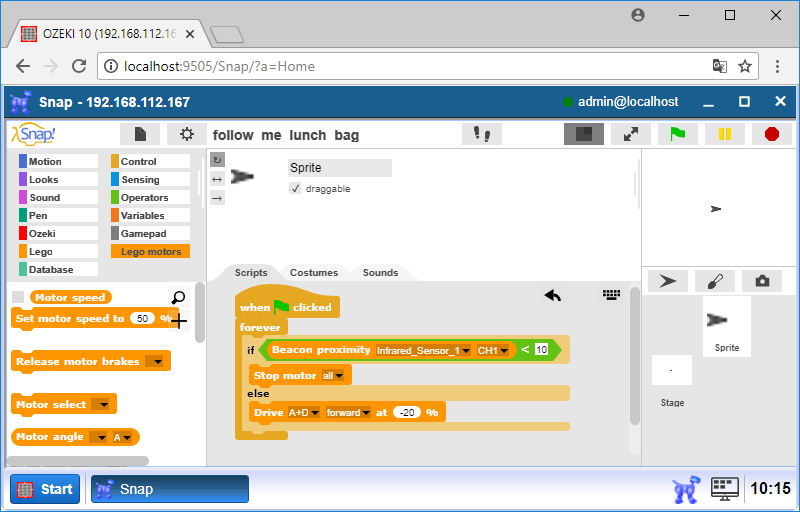
Figure 3 - Starts both motors, but stops them if it gets close enough to the beacon
Start a code which set the robot to follow the beacon
The robot needs to follow the beacon, so add another 'if' block below the else branch of the previous if block (Figure 4). Compare the value of the Beacon heading with a '>' block. Check if the beacon heading is more than 3 by selecting the Infrared Sensor and CH1 in the Beacon heading block. From Task 6# you will need to control the vehicle towards the beacon depending on the heading.
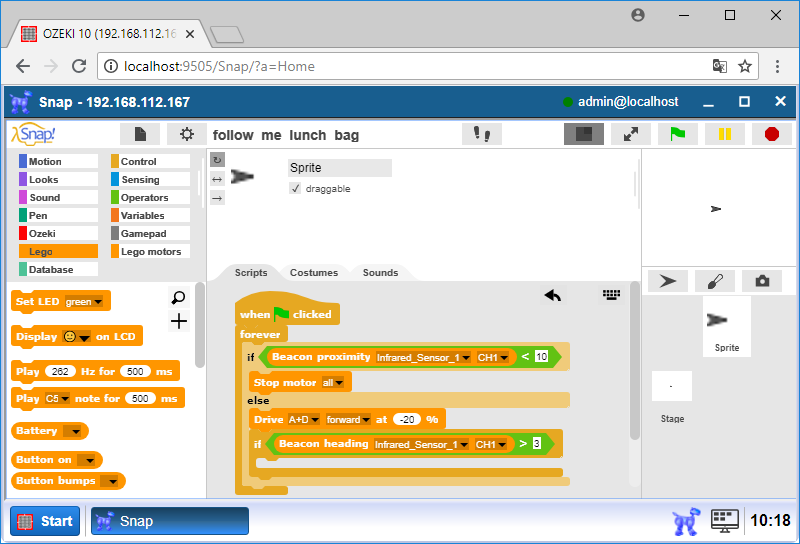
Figure 4 - Check if the beacon heading is more then 3
Make a command to turn the robot to the correct direction
In order to make the robot turn towards the beacon, make a block that turns it. In the Variable menu you can make a block and create title (Figure 5). Click the '+' signal between the 'title text' options to make a title. After the title, you have to make a variable which can save the direction. Click the '+' signal again then the title and choose the 'input name' option and call it 'direction'.
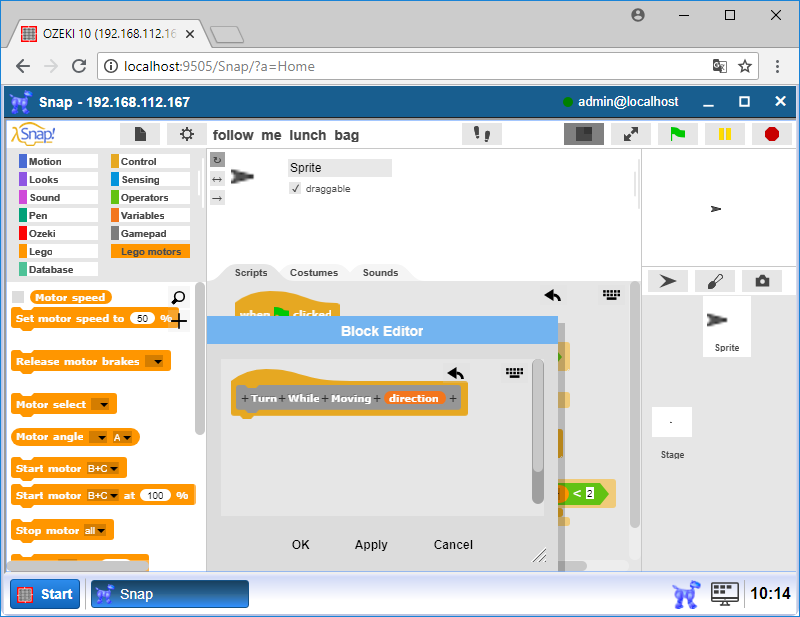
Figure 5 - Create a new block called 'Turn While Moving'
Set the 'right' direction
Add the 'if' block to the 'Turn While Moving' block. This block is executed if the 'direction' variable is equal with 'right'. Add the '=' block from the Operators menu to the if condition part. Drag the direction variable to the left side and write 'right' to the right side. You have to set the motors, that the robot can turn right, so choose the 'Start motor [motor] at [speed]%' block twice to the if branch. In the first 'Start Motor' block, choose [motor] A and set the motor [speed] to -5. In the second 'Start Motor' block, select another motor, which connect to the robot, so choose [motor] D and set the [speed] to -30. This demonstrates on the Figure 6 below.
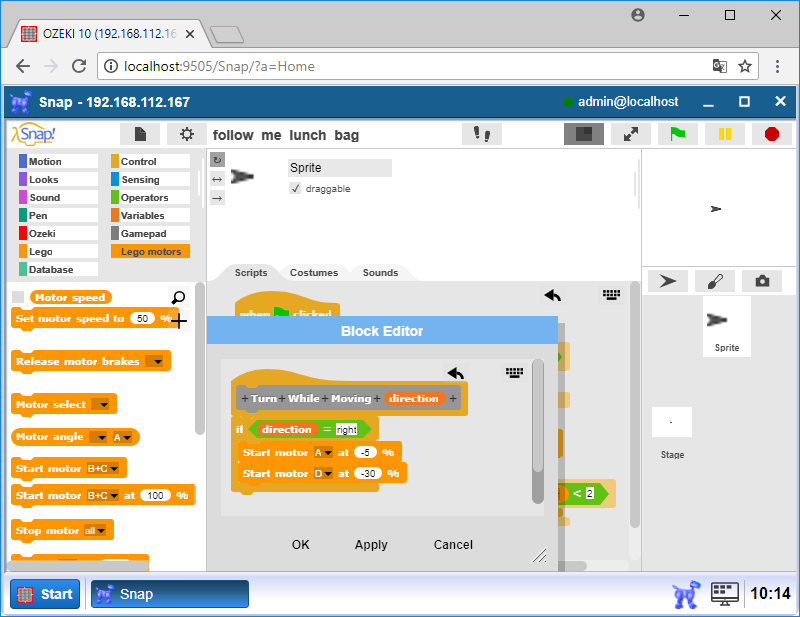
Figure 6 - Set a 'right' parameter to turn your Transporter to the right
Create a code which set the 'left' direction to the robot
To turn the robot left, you set it almost as in the previous step. Add the if block to examine the direction again, but now this if block is executed if the direction is equal to 'left' (Figure 7). In this if block you have to use two 'Start Motor [motor] at [speed]%' blocks, where set the motor speed to -30 to A motor and set -5 to D motor. Last step is click 'OK' to save this block.
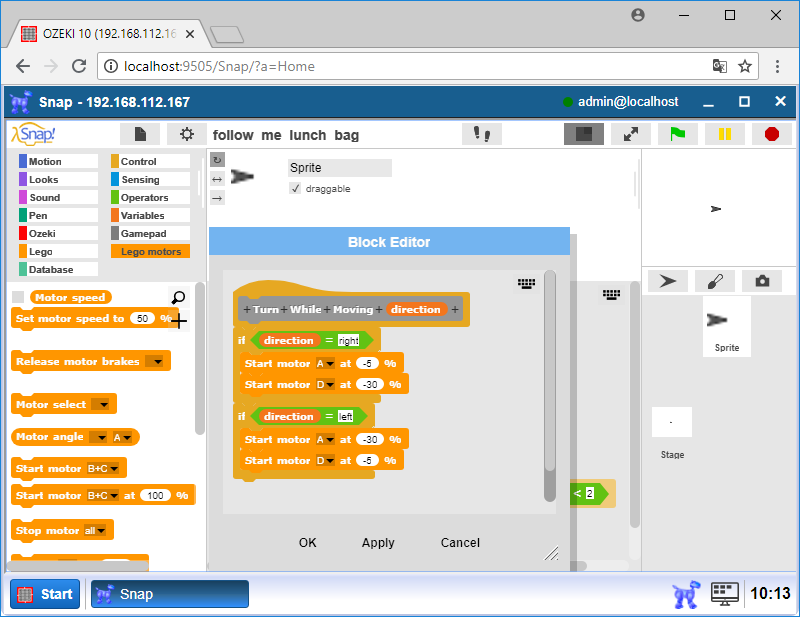
Figure 7 - Set a 'left' parameter to turn your Transporter to the left
Turn right the robot to the beacon.
Drag the 'Turn While Moving' block from the Variable menu and type 'right' into it (Figure 8). The robot should turn right until the Beacon heading's value is less than 2, so add the 'wait until' block from the Control menu and put the '<' block into to condition part. Drag the 'Beacon heading' block to the left side, select the Infrared Sensor and CH1 option and write 2 to the right side.
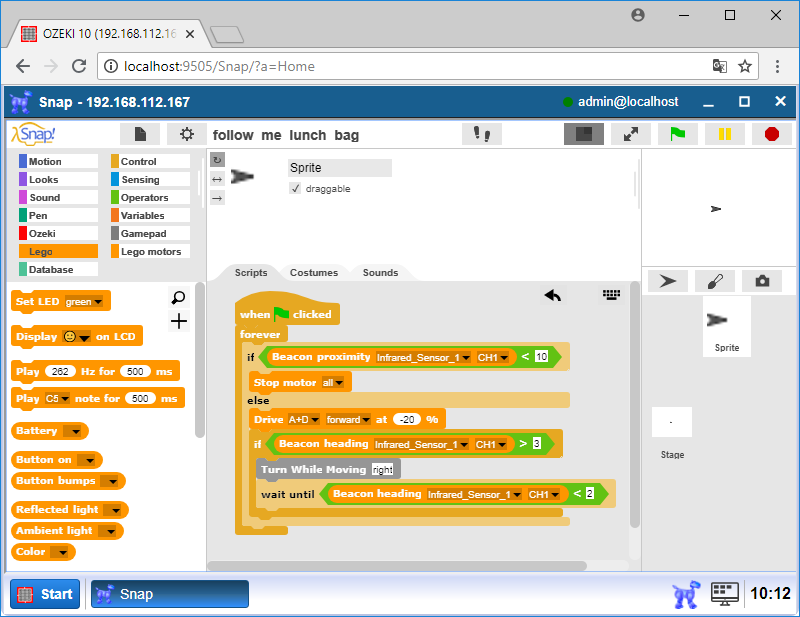
Figure 8 - Turn your robot right if the beacon heading reads more than 3
Do almost as the previous step in the opposite direction
You have to add the 'if' block to check when need to turn left the robot. Put into the conditon the '<' block, where drag the 'Beacon heading' block to the left side and write -3 to the right side. Don't forget to select the Infrared Sensor and CH1 option. Into the if block, put the 'Turn While Moving' block and write 'left' to it (Figure 9). The robot should turn left until the Beacon heading's value is greater than -2. Please, drag the 'wait until' block and add into the '>' block. On the left side put the 'Beacon heading' block and write -2 to the right side. As a conclusion between -2 and 2 the lunch bag transporter will go straight forward until it reaches the beacon remote device.
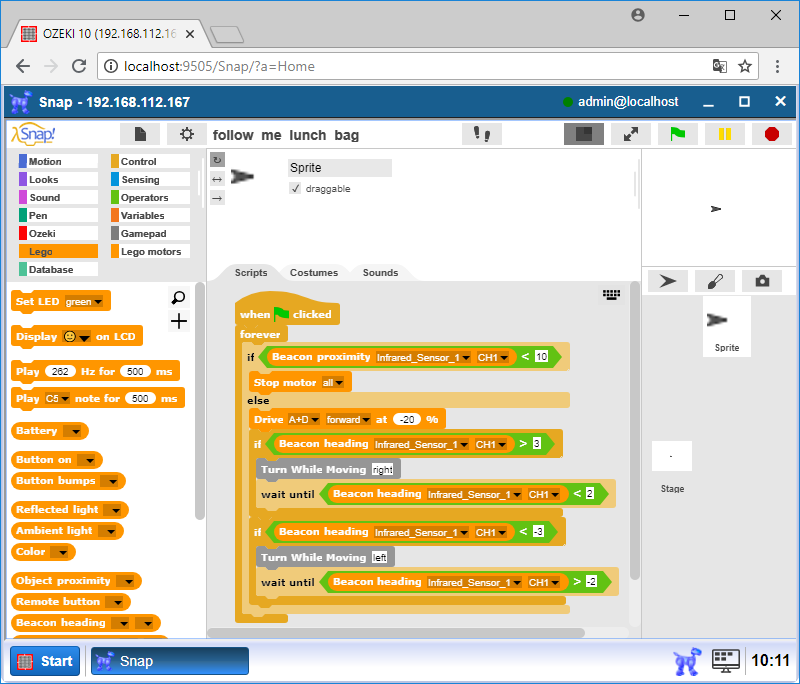
Figure 9 - Turn your robot left if the beacon heading gets less then -3
Program code with the new block
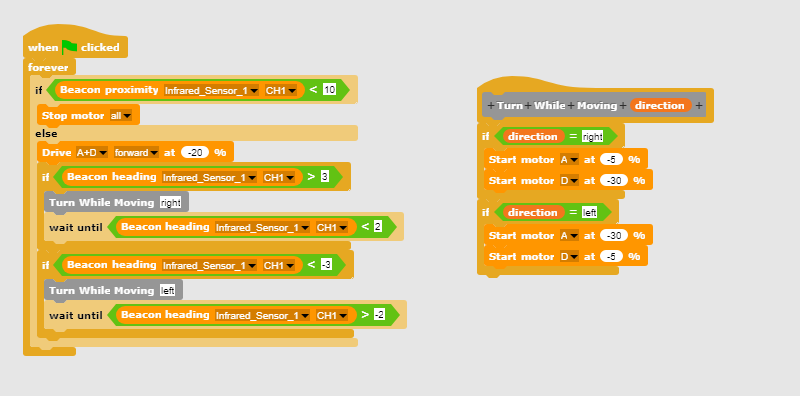
Figure 10 - Program code the moves the Transporter towards the beacon
|
|
The program code shows a way how to follow a lunch bag It is easier to follow the beacon if you have the codes in front of you: Download Ozeki Snap code for this follow me lunch bag lecture |
More information
- Mapping and Navigation
- Going to a coordinate
- Collision detection / sensor feedback based navigation
- Surround sensing using linear distance sensor
- Create a parking assist system
- Homing to a dock using an IR beacon
- Follow me lunch bag
- Map a room's walls using ultrasonic sensor
- Mapping a room with LIDAR
- Outdoor navigation using GPS and mobile network