 Sign in
Collect sensor data with timestamps
In this lecture you will learn about using database tables with multiple columns. You will define a table with two columns, the first column will store the sensor value, the second will store the time stamp of the measurement. You will also learn how to use functions in your SQL queries. For saving time stamp, you will use the now() function instead of a value received from the robot. You will also how to set a threshold and to save a sensor reading into a database only if the sensor value changes by the defined value.
Figure 1 - The robot sends color data with timestamps
Requirements
- Ozeki 10 installed: Installed Ozeki 10 Robot OS
- Lego connection installed: Connect the Lego robot to Ozeki 10
- MySQL database server installed: http://www.ozeki.hu/index.php?owpn=6150
- SQL table created in Lecture 7: http://www.ozeki.hu/index.php?owpn=6153
- Touch Sensor: http://www.ozeki.hu/index.php?owpn=6040
- Color Sensor: http://www.ozeki.hu/index.php?owpn=6086
Add 'insertdate' column to the 'Color_data' table!
To be able to store the sensor data with timestamps, first you should change your database table definition. The SQL command for that is the 'ALTER TABLE'. You have to start the command with this and after that you have to type name of the table which you want to modify. After that, type the 'ADD' keyword then 'insertdate' and 'VARCHAR(255)' to add a new column with the name 'insertdate' and type 'varchar(255)' to your table (Figure 2). Finally after executing it, execute the 'SELECT * FROM Color_data'. You should see that you have two columns, the first with your previous collected data and the second is titled with 'insertdate' and every cell is empty.
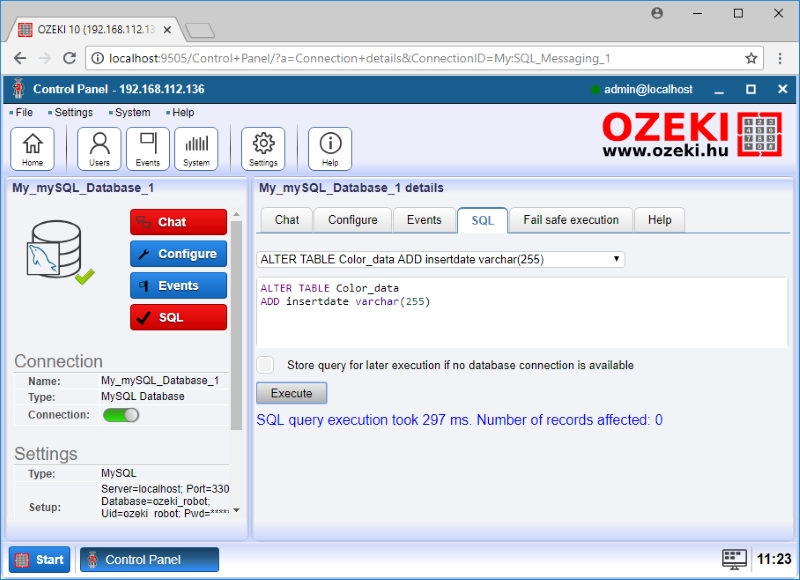
Figure 2 - Extra column added to the table
Create the 'formatted date' block!
After that your database table is able to store timestamps, you should to be able to insert the current time with date, time and milliseconds with your SNAP. So please open your SNAP in Ozeki 10 and open or import the program which you created in the previous Lecture. To insert the current time to your database, you must insert it in a defined format. The defined format is 'year-month-day hour:minute:seconds.milliseconds'. To get the correct format you should create a new block by clicking on the 'Make a block' button in the Sensing tab. Then please name your block to 'formatted date' and choose the 'Reporter' option and click on the 'OK' button (Figure 3).
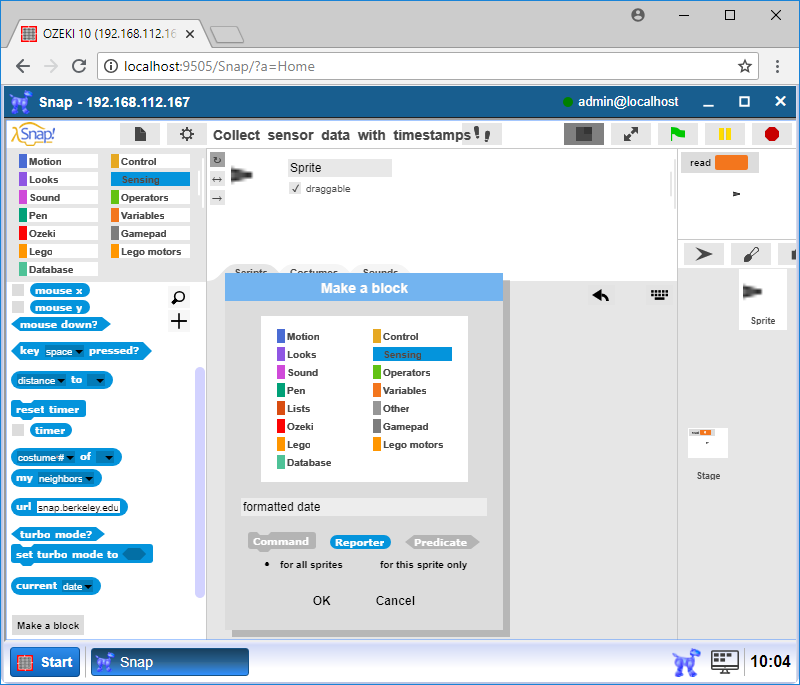
Figure 3 - Creating the 'formatted date' function with the block editor
Edit the 'formatted date' block in Block Editor
to store the current date!
After that you clicked on the 'OK' button, a window turns up with an entry point and a report block. First please place a 'script variable 'a' ' block between the entry point and the report block and click on the variable to rename it (milliseconds). This is a special variable, because you can use it only in this window. Then place a 'set [variable] to [value]' where the [variable] is 'milliseconds'. You can calculate it by dividing the 'current time in milliseconds' by 1000, to get current time in seconds. If you get the floor of this, multiply it with 1000 and get the current time in milliseconds without the milliseconds part. If you subtract it from the 'current time in milliseconds' you get the milliseconds of the current time. This calculation is in a 'set [variable] to [value]' block. After that place a 'join ...' block in the report block and click on the triangle pointing to the right to increase the opportunities up to 13. Then place a block or type in the required characters to the empty places to get the preferred datetime format for the database (Figure 4). Finally click on the 'OK' button.
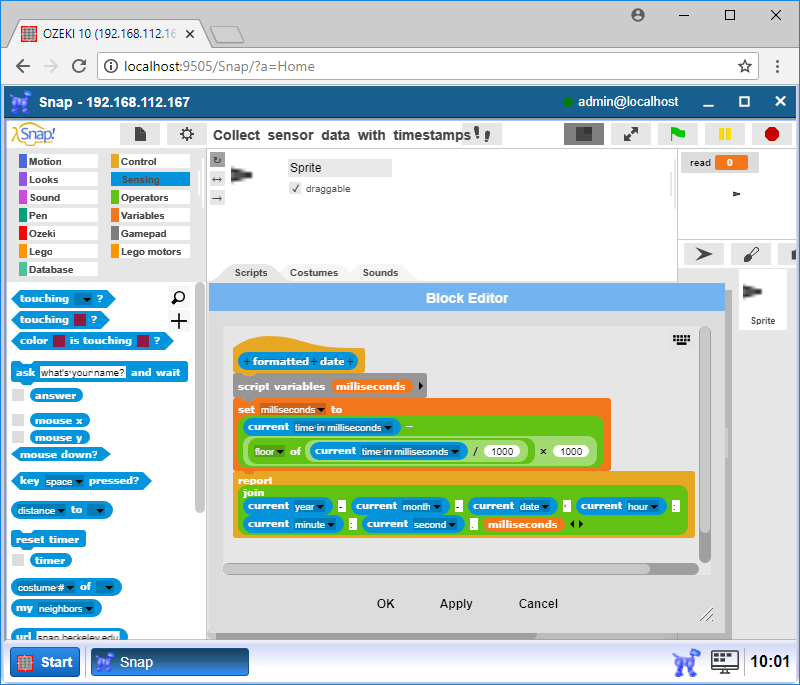
Figure 4 - Write a block that formats the date to your database
Write code to store color data when pressing the touch sensor.
The timestamps are stored in the 'Color_data' table too!
After you changed your database table definition to store sensor data with timestamp. You should modify your program to store your timestamps. On the 'Insert ...' block inside the parenthesis and after the 'values' keyword you can find two-two triangle pointing the opposite. If you click on the triangle with the right direction, you extend the opportunities or by clicking on the triangle with the left direction, you can reduce the opportunities. Please click on the triangle with the right direction inside the parenthesis and after the 'values' keyword to be able to insert timestamp data. Then type 'insertdate' inside the parenthesis and your own 'formatted date' block from the Sensing tab after the 'values' keyword to the empty places (Figure 5). Finally run your program by pressing the 'space' key and pressing your Touch sensor to insert some data in your database.
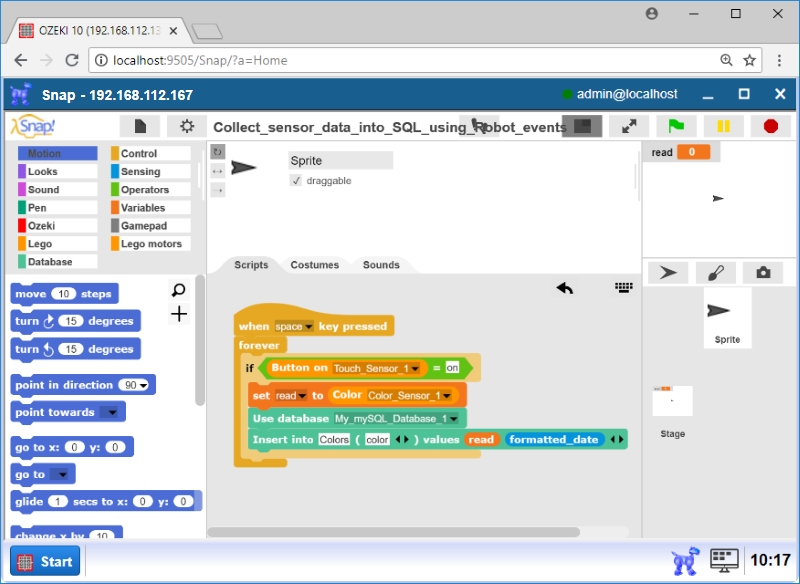
Figure 5 - Color data with timestamp stored in the table
Modify code to store data only in case of color change!
After you can store sensor data and timestamps, you should modify your program to store color sensor data when it changes. First create a variable using the 'Make variable' button and call it 'old'. Then place a 'set [variable] to [value]' block after the 'Use database [database]' block, where [variable] is 'read' and [value] is 'transparent' (Figure 6), so you can set an initial value to the read variable. Then in the forever loop save the current color value and compare with the old one. The 'if ...' block will make the comparison between the 'read' and 'old' color data. If a change is detected, the new color data will be inserted into the 'Color_data' table. You can run the code with 'space'.
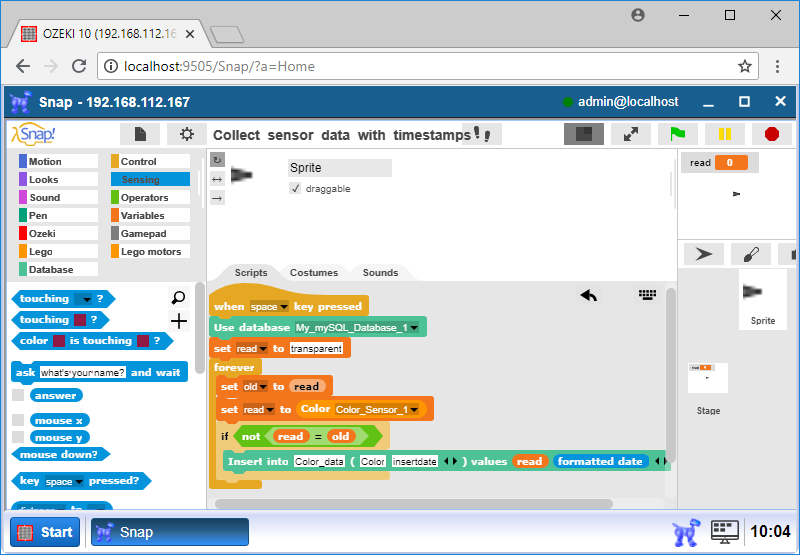
Figure 6 - Store only color changes to black, blue, brown, green, red, white or yellow
Check results in the Ozeki 10 SQL connection!
After you run your modified programs, you should check what happened in your database. So open your database connection in your Control Panel and select the SQL tabpage. If you type and execute the 'SELECT * FROM Color_data' query (Figure 7), you get all of the inserted data. At the first part of the data, you can see that the 'insertdate' cell is empty because these data were inserted before you modified the table definition. At the second part of the data you can see that the 'insertdate' cell is filled with datetime, but somewhere one after another in the Color column the cells have the same value. At the third part of the data you can see that the insertdate cell is filled with datetime and every cell one after another have the different value. Finally good to know that if you have a database table with more than one column and you would like select only some of them, you can do it if you replace the '*' with the name of the columns you wish to select.
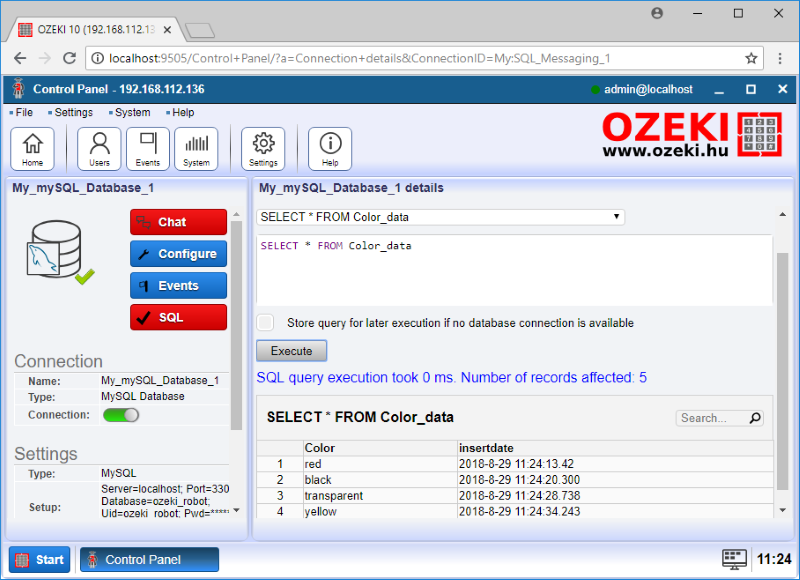
Figure 7 - Table content displayed in Ozeki 10's SQL console
Use 'NOW()' SQL command to store timestamp into the table!
After learning how to store color changes, you should learn how to use the SQL NOW() function. First please open your database connection from your Control Panel and select the SQL tab. Here you can type the 'SELECT NOW()' query and execute it, you should see the current datetime in a row. If you type a number such as '3' between parenthesis after the NOW word, please execute this modified query to see the current time with millisecond precision. Then you can insert data to your database using NOW(), if you type and execute the 'INSERT INTO Color_data (Color,insertdate) VALUES ("black",NOW(3))' query. Finally by executing the 'SELECT * FROM Color_data', you can see that the last row is your inserted data with a timestamp created with the NOW() function.
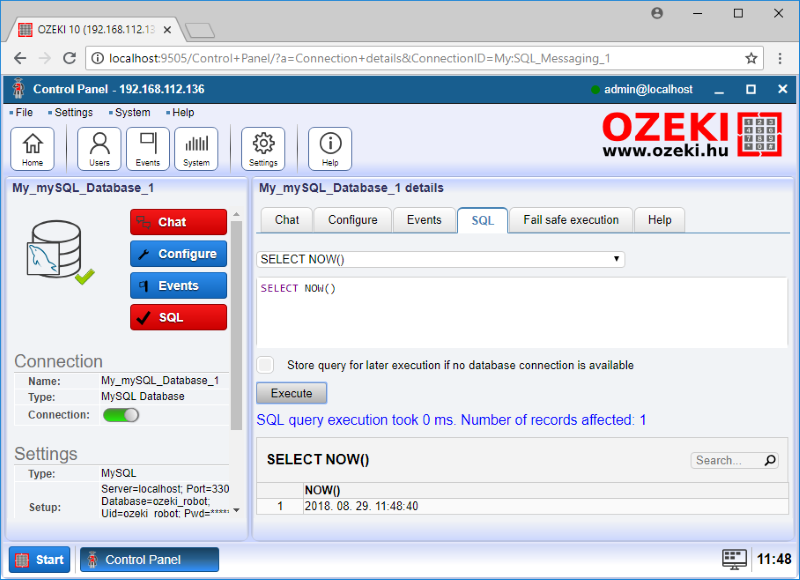
Figure 8 - Current time displayed with the NOW() SQL function
Program code
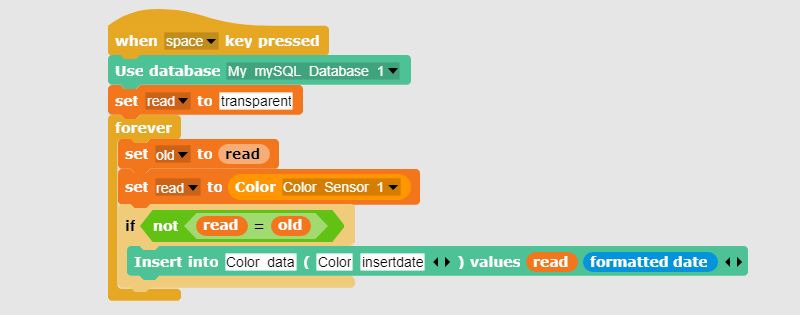
Figure 9 - Program code to insert color sensor data with timestamps
|
|
The program stores color codes to SQL database Store black, blue, brown, green, red, white or yellow colors with a timestamp. These will be the database records that measurements. It is easier to follow the guide if you have the codes in front of you: Download the SNAP code files |
More information
- Collect sensor data into Text files
- Control the robot using Text files
- Collect sensor data into Microsoft Excel
- Install a database server
- Create database tables, introduction to SQL
- Collect sensor data from the Robot into SQL
- Collect sensor data into SQL using Robot events
- Collect sensor data with timestamps
- Control your robot from a database
- Use aggregated SQL data to make robot control decision