 Sign in
Control your robot from a database
When you work with databases, it is also important to be able to receive robot control instructions from you database server. In this lecture you will learn how to read a database table periodically and when a robot control command is found how to forward it to your robot.
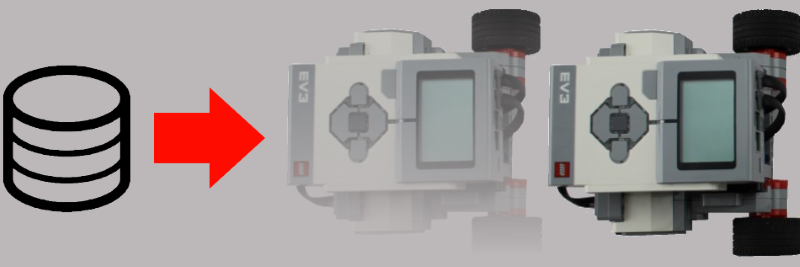
Figure 1 - The robot can be controlled using database
Requirements
- Ozeki 10 installed: Installed Ozeki 10 Robot OS
- Lego connection installed: Connect the Lego robot to Ozeki 10
- MySQL database server installed: http://www.ozeki.hu/index.php?owpn=6150
Create table for incoming directions!
To control your robot from your database first you should create a new database table to store the inserted directions. So open your Control Panel and click on your database connection and choose the SQL tab. Then type in the 'CREATE TABLE Direction_data (direction VARCHAR(255))' command and execute it (by clicking on the Execute button) to create a table called 'Direction_data' with one column named 'direction' which stores character data (Figure 2).

Figure 2 - Creating the 'Direction_data' table in SQL console
Write code to read data from database!
After that you created the database table which will store the direction data, you should create a program which will read from this table and control your robot according to the read data. So first open your SNAP and place a 'when green flag clicked' block as an entry point for your program. Then place a 'forever' block after the entry point because your program will read infinitely from your database. Finally make two variables called 'row' and 'data' by clicking on the 'Make variable' button in the 'Variables' tab, to store the raw and the formatted direction data (Figure 3).
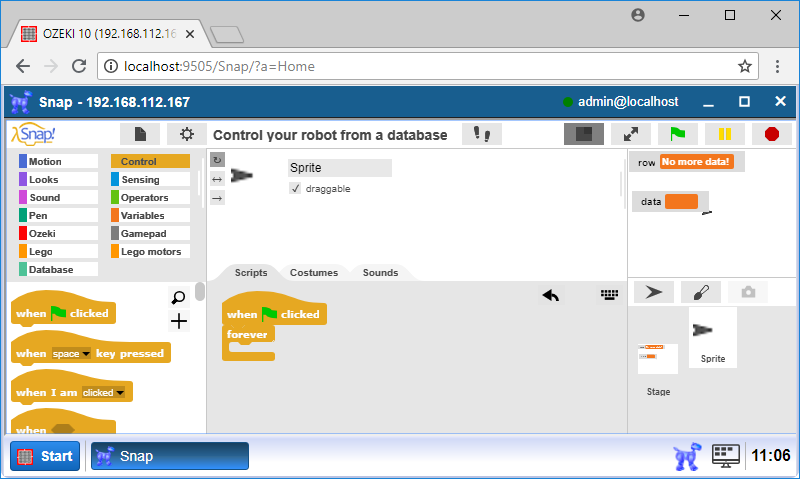
Figure 3 - Prepare storing data in a forever loop
After that you did preparations, you should read data from your database. First place a 'Use database [name]' (Figure 4) block between the entry point and the forever block, where the [name] is your SQL database connection's name in Ozeki 10. Then place a 'set [variable] to [value]' block inside the 'forever' block and set the [variable] to 'row' and the [value] to a list that stores all directions by using 'Select [columns] from [database]' block after the 'to' word.
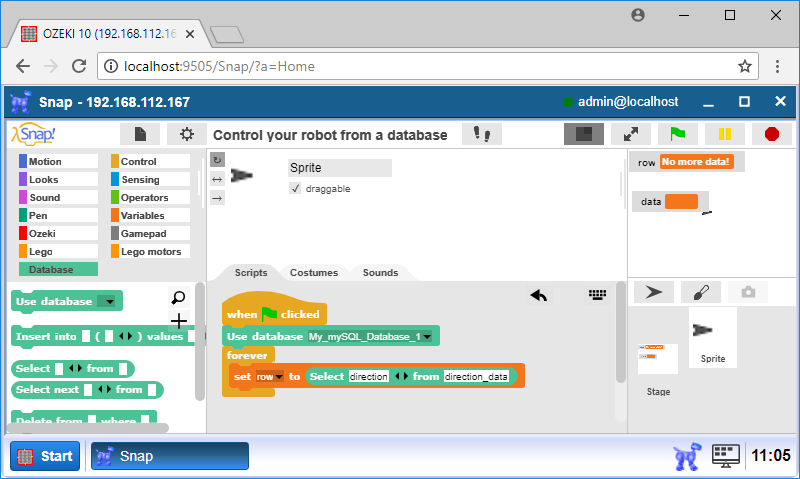
Figure 4 - Store all direction records from the table
Expand code to format and process incoming directions!
To get the formatted data, you should remove the quotation mark surrounding the 'row' variable by using a 'split [text] by [character]' block from the Operators tab (Figure 5), where [text] is the value stored in the row variable and the [character] is the quotation mark character: ". The split block will separate the read data to a list. The 'item [number] of [list]' block can select list data, where [number] is '2' and [list] the value of your split block. Finally place a 'set [variable] to [value]' block after the previous 'set ...' block, where [variable] is 'data' and [value] is your 'item of ...' block.
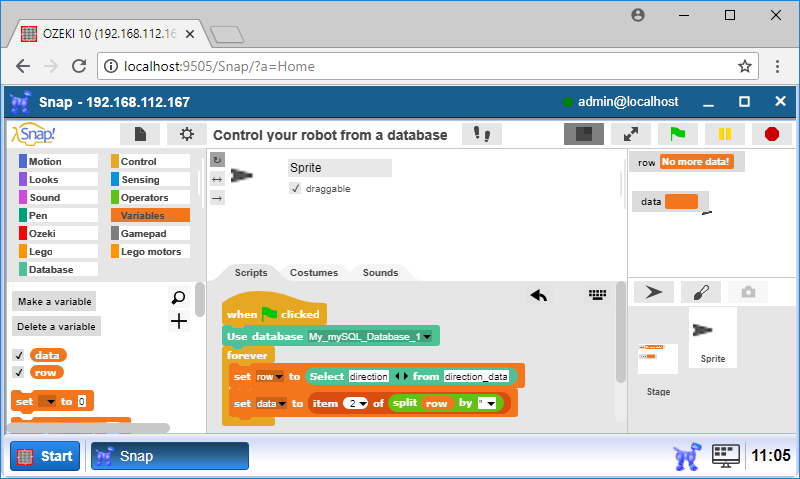
Figure 5 - Direction data is formatted so it can be processed properly
After that you got the formatted data from the database, you should process it. First you should examine if it is a direction. So place an 'if [true/false] else ' block after the 'set ...' blocks where [true/false] is a '[variable] = [value]' block, where the 'data' [variable] is used and the compared [value] is this text: 'No more data!', which means your table is empty, so please place a 'wait [value] secs' block inside the 'if ... else' block between the if and the else part, where [value] is 1 (Figure 6).
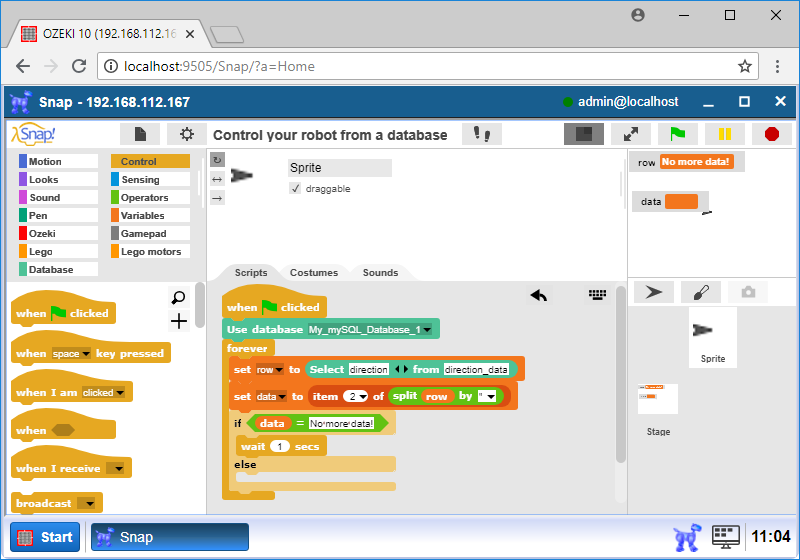
Figure 6 - You can compare data value with text by using if statements
Expand code to control the robot using
incoming directions from the database!
Then place two 'if [comparison]' blocks (Figure 7), after the else part, where the [comparison] is a '[variable] = [value]' block, where the data [variable] is used and the [value]s are 'forward' and 'reverse', so the motors can be controlled after the 'if's. First place a 'Drive [motors] [direction] [time] sec' block, where [motors] are A+B, the [direction] is 'forward' or 'reverse' and the [time] is 2, which will move your robot to the read direction for two seconds. Finally place a 'Delete from [table] where [comparison' block after each 'Drive' block, where the [table] is 'Direction_data' and the [comparison]s are 'direction="forward" LIMIT 1' and 'direction="reverse" LIMIT 1' to delete read data from the table. It is quite easy to add left and right directions as well with additional 'if'-s.
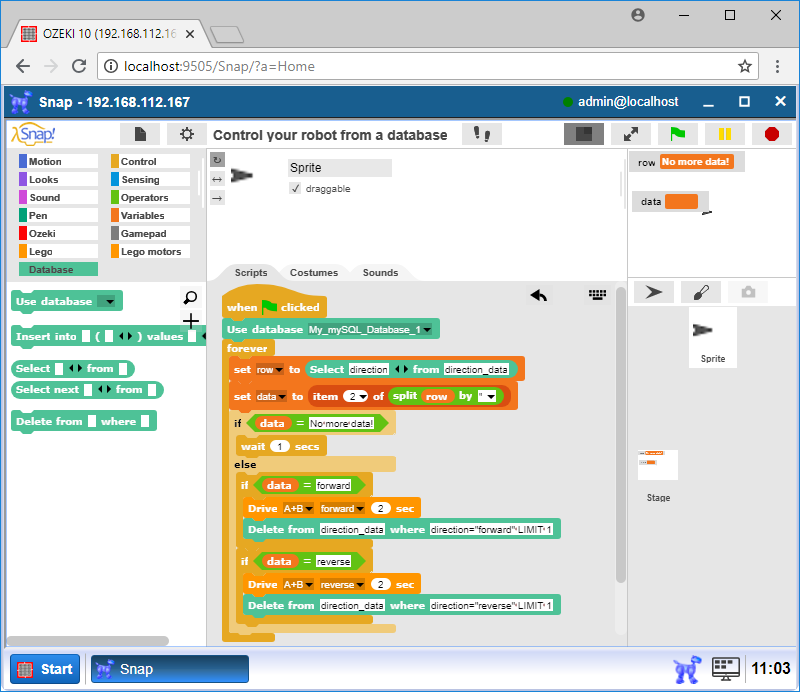
Figure 7 - Moves robot in the received directions, while the direction data gets deleted
Insert data into the table to test your program!
After you successfully created your program, you should test it. So please open your database connection in your Control panel and choose the SQL tab. Type 'INSERT INTO Direction_data (direction) VALUES ("forward"); ' (Figure 8). Execute it then change the "forward" to "reverse" and execute it again. Finally if you click on the green flag, you should see your robot move forward for two seconds then backwards for two seconds again.
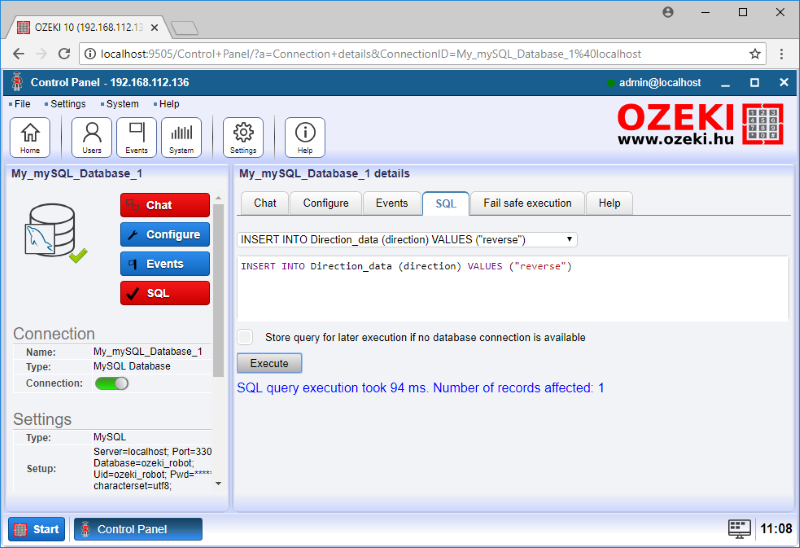
Figure 8 - Test your program in SQL Console
Program code
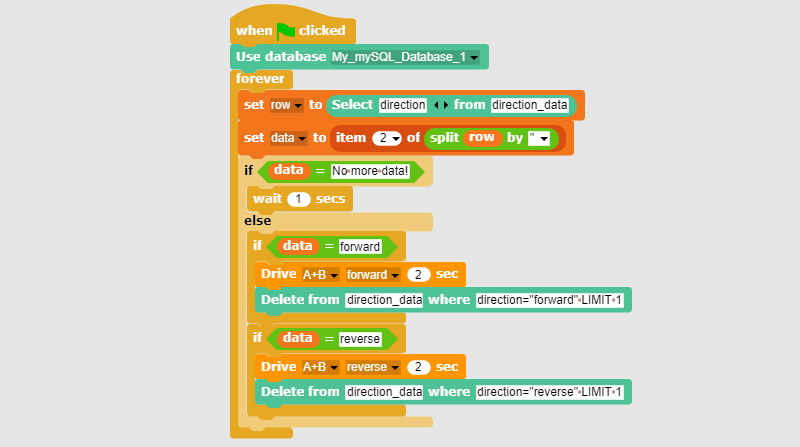
Figure 9 - The program code controls your robot from database rows
|
|
The program code moves your robot in a few directions It controls your robot from your database in forward or reverse directions. It is easier to follow the guide if you have the codes in front of you: Download the SNAP code files |
More information
- Collect sensor data into Text files
- Control the robot using Text files
- Collect sensor data into Microsoft Excel
- Install a database server
- Create database tables, introduction to SQL
- Collect sensor data from the Robot into SQL
- Collect sensor data into SQL using Robot events
- Collect sensor data with timestamps
- Control your robot from a database
- Use aggregated SQL data to make robot control decision