 Sign in
Connect the Lego Brick to your Windows PC
In order to write programs to control your Lego robot, you need a personal computer. We recommend you to use a Windows 10 machine with a Bluetooth connection. This lecture details the steps that are needed to connect your Lego robot to your PC. It starts with Bluetooth, and also gives you all the necessary information to set up a USB or a Wifi connection. You will also learn which connection should be used under various circumstances.
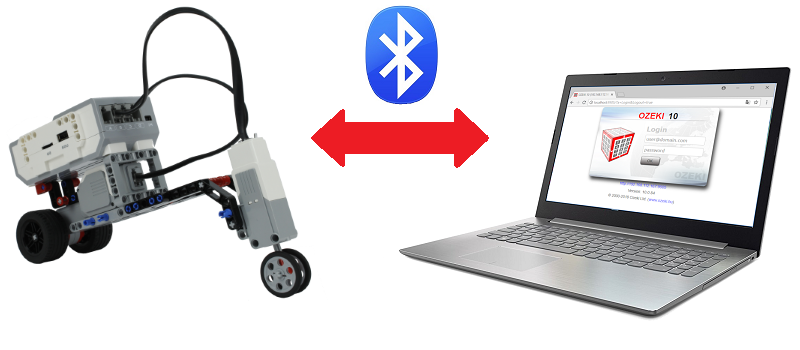
Figure 1 - Bluetooth connection between the Chopper and PC
Requirements
- Ozeki Chopper
- PC with Bluetooth stick or Notebook with Bluetooth
Instruction video
Lecture video - How to connect the Lego EV3 Brick to the PC via Bluetooth
Describe what Bluetooth USB stick is good for!
Bluetooth USB stick - It allows you to connect wirelessly to the EV3 Brick device on the Ozeki Chopper. It can be plugged into your computer's USB port.
Open Windows Device Manager to watch the COM ports!
In this task you will see if you have a Bluetooth COM port on your PC. Please open the Device Manager by right clicking on the Start menu and selecting the 'Device Manager' option to check it. In this window you will find the device list. You cannot see the ports in the 'Device Manager' yet like Figure 2 shows. After pairing, you will see two new COM ports appear. In the last task you will learn how to detailly examine these ports and check if the connection was successful.
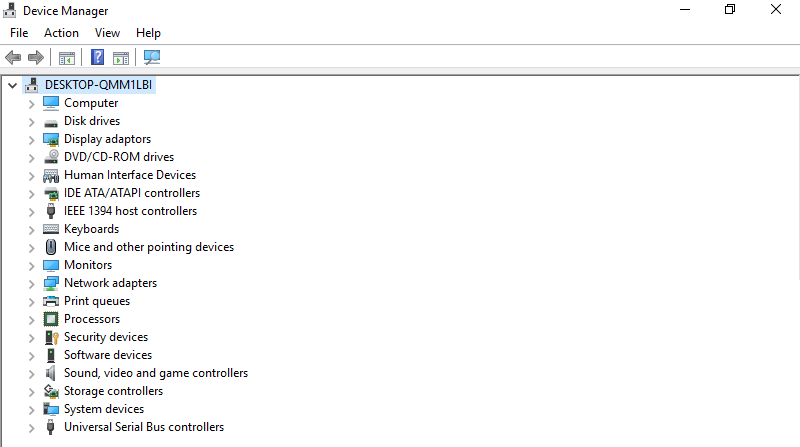
Figure 2 - At first you will not see the COM ports
Turn on the Bluetooth from the Brick's menu!
First you need to hold down the Brick's middle button for a few seconds to turn it on. After the Brick has booted, find the 'Bluetooth' settings. You will see the following checkboxes: 'Visibility' and 'Bluetooth'. Please put a tick in both by using the Brick arrows and pressing the middle button (Figure 3). After this, you can make your PC connect to your EV3 Brick via the Bluetooth USB stick.
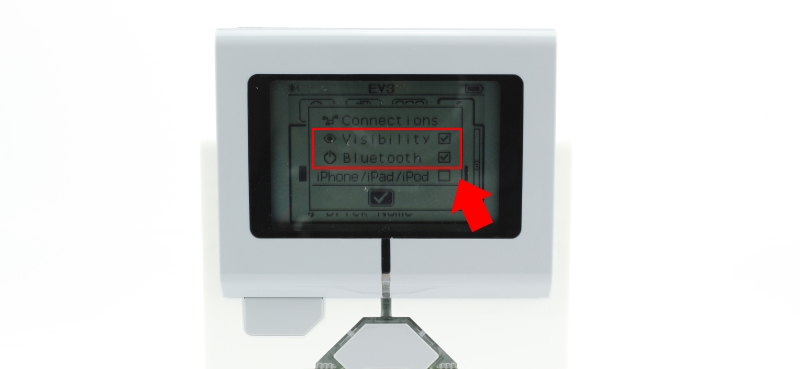
Figure 3 - Turn on Bluetooth from the Brick's options menu
Connect your PC to Lego Mindstorms EV3 Brick via Bluetooth!
After checking that your Bluetooth adapter is plugged in. Please open the taskbar as you see it on Figure 4. Click on the Bluetooth symbol and choose the 'Add a Bluetooth Device' option from the menubar that instantaneously pops up from your Windows taskbar.
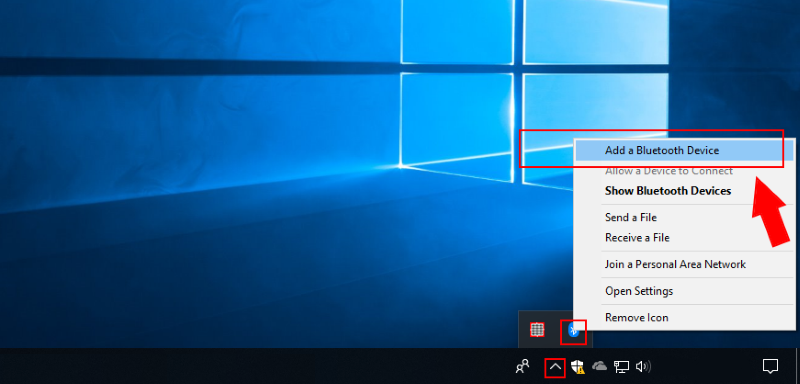
Figure 4 - Open 'Add a Bluetooth Device' from taskbar
A large device settings window will open up. Please click 'Add Bluetooth or other device', which you can see on Figure 5. You will find yourself on a small black pop-up window called 'Add a device'. Please select 'Bluetooth' option to find all Bluetooth devices you can pair with your PC.
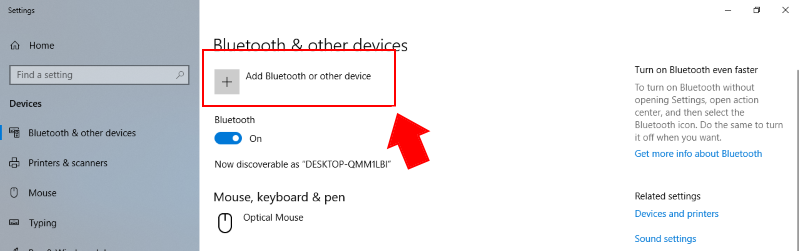
Figure 5 - Open 'Add a Bluetooth or other device'
In the 'Add a device' window you have to search the Lego Mindstorms EV3 Brick's name. You can see the Brick's name on the top of the Brick's LCD display. If you have figured out the Brick's name, wait until it appears in the 'Add a device' window and click on it (Figure 6). The pairing should start.
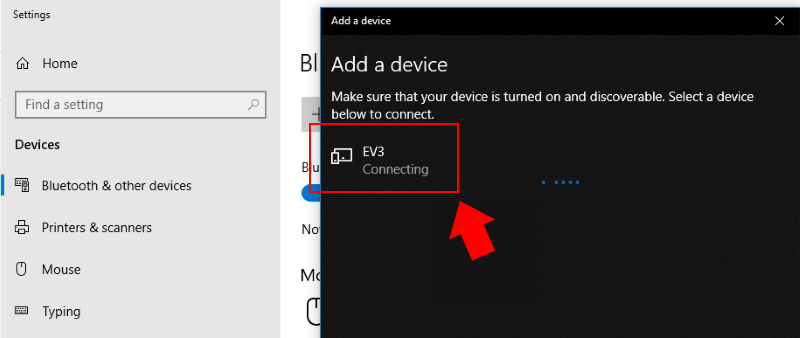
Figure 6 - Select the Brick's name and click on it
A box appears on your Brick's LCD, where you can accept the Bluetooth connection request from your PC. If the name of the PC is correct, press the Brick's right button then the middle button to accept it. Then you should see another window box, called 'PASSKEY'. Here you can write your own PIN code (e.g. 1234). Press the middle button to accept the PIN code on the screen (Figure 7).
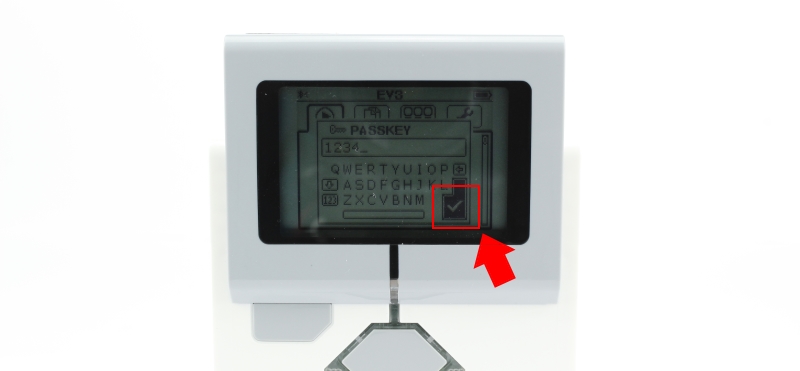
Figure 7 - Accept the connection request from your PC and the PIN code
You should type the same PIN code on your PC (Figure 8). You have opened a window called 'Add a device'. After you have configured the code on the Brick, you should see a PIN code field under the EV3 Brick's name in the black window. Type here the same PIN code that you have set on the Brick. After writing the correct PIN, click on 'Connect' and your Brick will be paired to your PC.
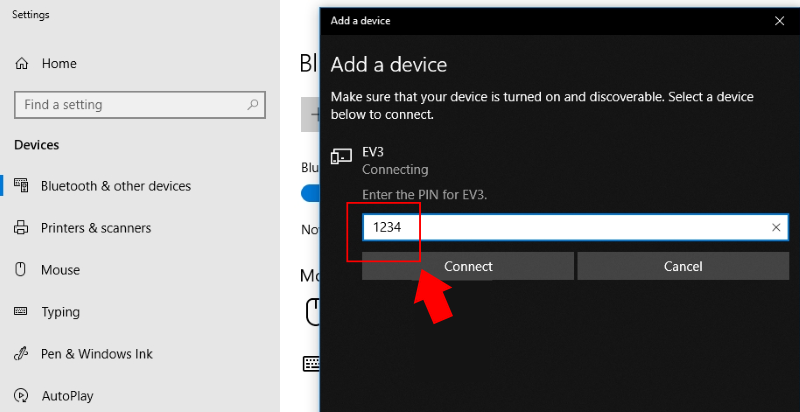
Figure 8 - Type the same PIN code on your PC, which you have accepted on
your Brick
If everything went as planned, you will see the Brick paired (Figure 9). In the 'Add a device' window, you should see this message: 'Your device is ready to go!'. Your Brick's name should be visible in the black window too. You should also see a text: 'Paired', which means that the Brick was successfuly paired to your PC. Click on 'Done', so from now on you can use all device functions.
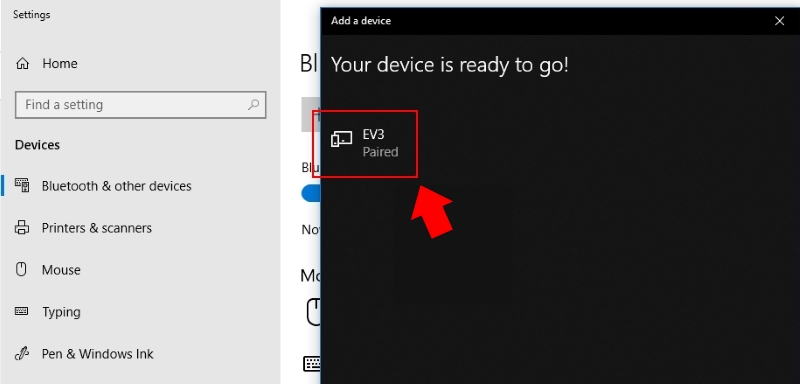
Figure 9 - The Brick is paired via Bluetooth
Check the outgoing COM port if the Brick is paired!
Make sure 'Bluetooth Settings' contain the two new COM ports. Open the 'Control Panel' and type 'bluetooth' to the search box. Under 'Devices and Printers' click on 'Change Bluetooth settings' then select the 'COM Ports' tab. The two new COM ports should be visible if the pairing was successful. To install Lego connection in Ozeki 10 you should select the outgoing serial port during the installation progress as you can see on Figure 10.
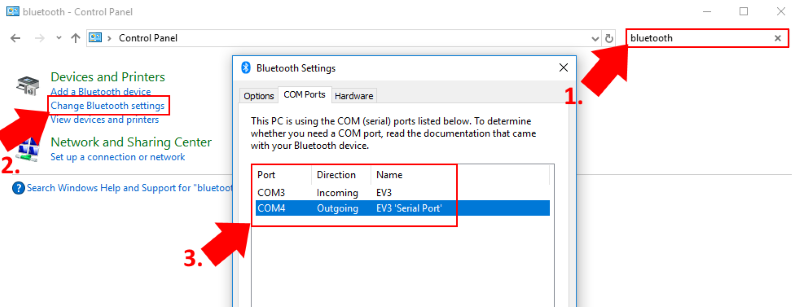
Figure 10 - COM ports in the 'Bluetooth settings'
More information
- Collect the parts
- Build the frame
- Connect the motors to Lego Brick
- Connect the Lego Brick to your Windows PC
- Install Ozeki Robot Developer
- Connect the Lego robot to Ozeki 10
- Test the Lego Motors individually
- Start SNAP and write your first program
- Use Lego blocks in SNAP to control Lego Motors
- Drive your Robot around obstacles