 Sign in
Using nested loops and conditions
In this lecture you will learn what a nested loop is and you will see how it can be used. You will also learn how to break loop cycles using conditions. You will see how a sensor value received from a robot sensor can be used to control how your loops operate.

Figure 1 - Programs about nested loops and breaking loops using conditions
Requirements
- Ozeki 10 installed: http://www.ozeki.hu/index.php?owpn=6066
- SNAP: http://www.ozeki.hu/index.php?owpn=6180
- Sniffer: http://www.ozeki.hu/index.php?owpn=6204
Discover nested loops
In this task you will learn what is a nested loop. You have learned what is loop and how you can use them. If you would like to execute something more times after each other loop is the best programming tool. If a loop exists inside the body of another loop, it is called nested loop. You can take any loop inside another loop. You can see an example for nested loops in Figure 2.
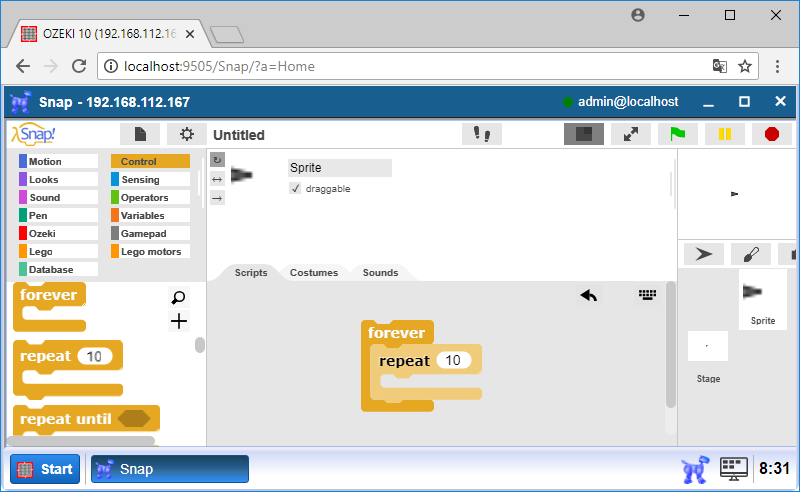
Figure 2 - Example for nested loop
Discover repeat until block
In this task you will see how you can break a loop. It is useful if you would like to stop the loop if something happens. You can break your loop if you use the 'repeat until [condition]' block (Figure 3) from 'Control' category. In the condition you can set an event that can break the loop. Your loop will execute until an event (the condition) is not coming.

Figure 3 - How looks like the 'repeat until' block
Writing a program that drive the robot forward until sensor value is red
In this task you will write a program that drive the robot forward at 20% until the Color sensor do not detect red colour. The motors will stop after the loop so when the Color sensor detects red. Check the program in Figure 4 to see how easy to use the 'repeat until' block. You just need to drop the blocks inside the 'repeat until' block that you would like to execute more times.
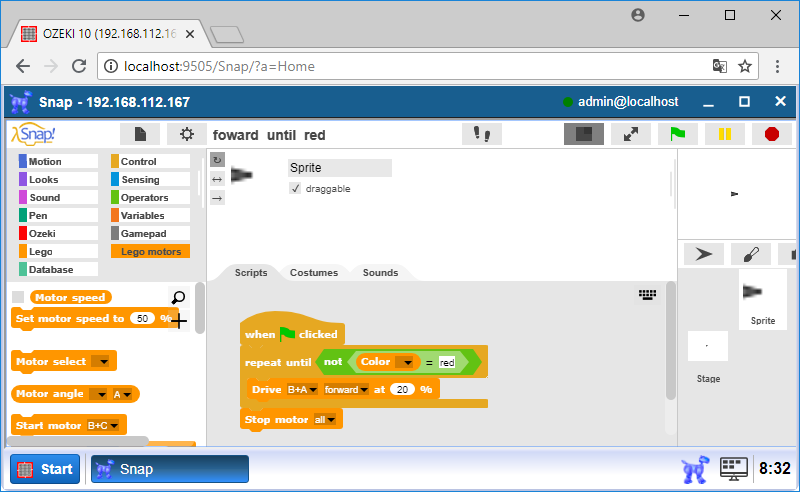
Figure 4 - Using 'repeat until' block
Write a program that drive the robot until no button has pressed
In this task you will write another program to practise how to use the 'repeat until' block. Now, you should connect the Touch sensor to your robot. After that wirte a program that can run until the Touch sensor is not being pressed. If you pressed the Touch sensor the motors should stop. Until you do not press the Touch sensor the robot should go forward at 20%. Check in Figure 5.
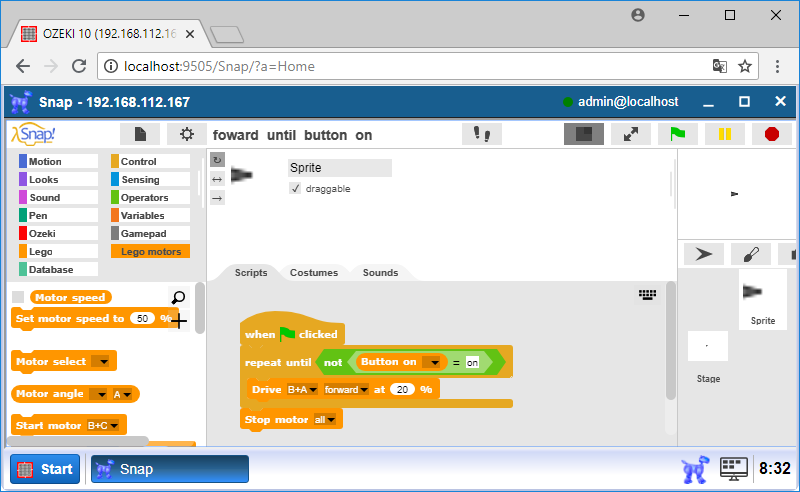
Figure 5 - Repeat until Touch sensor is not being pressed
Write a program to understand how to use nested loops
In this task you will write a program to understand nested loops. The program should take the robot around a square continuously. To take the robot around a square you need to use a 'repeat [4]' block and drive the robot forward then turn it right. If you would like to do that continuously you need to use another loop, too. In this case you use nested loops. Check the program in Figure 6.
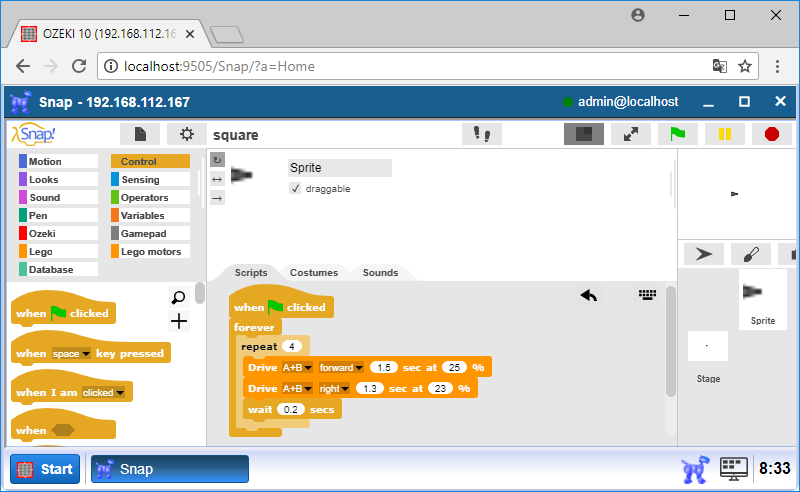
Figure 6 - Using nested loops
Program code

|
|
Download the programs The first program is capable to drive the robot until sensor value is red. The second program is capable to drive the robot until button pressed. The third program is capable to take the robot around a square in a loop. Download Ozeki SNAP code |
More information
- My first 'hello robot' program
- Saving and loading my project, writing sequential programs
- Using loops to repeat tasks
- Understanding events
- Understanding conditions (and using sensors)
- Using variables and operators
- Using nested loops and conditions
- Making blocks
- Making blocks with input and return value
- Using broadcast events