 Sign in
Create a data class
Robots often need to work with data. In this lecture you will learn, how to create a data class to store the data in memory or on a disk. You will learn to use attributes to describe the data. You will learn what serialization is. You will also learn how to prepare your data to be used in automatically generated forms and lists.
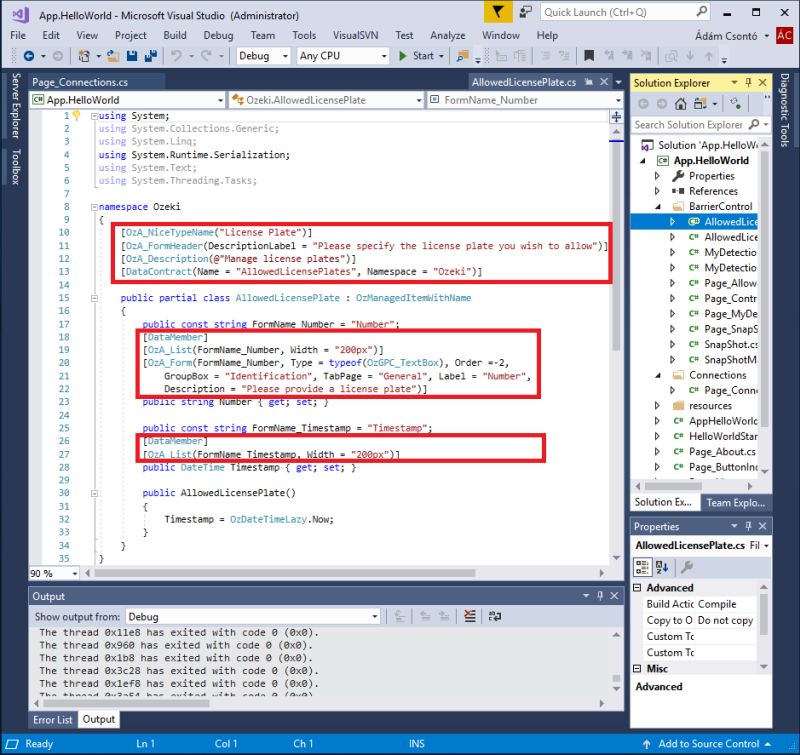
Create a data class to store allowed license plates!
In the following video you can see how to create a class to store license plate numbers and timestamps. You will also see how to add attributes to your class to display them in an automatically generated form and list.
Add attributes to your class!
If you develop your own application to your Ozeki 10 software, it is possible to use the available tools in the Ozeki library. Among others, with the help of Ozeki library you are able to generate forms and lists by adding attributes to your data classes.
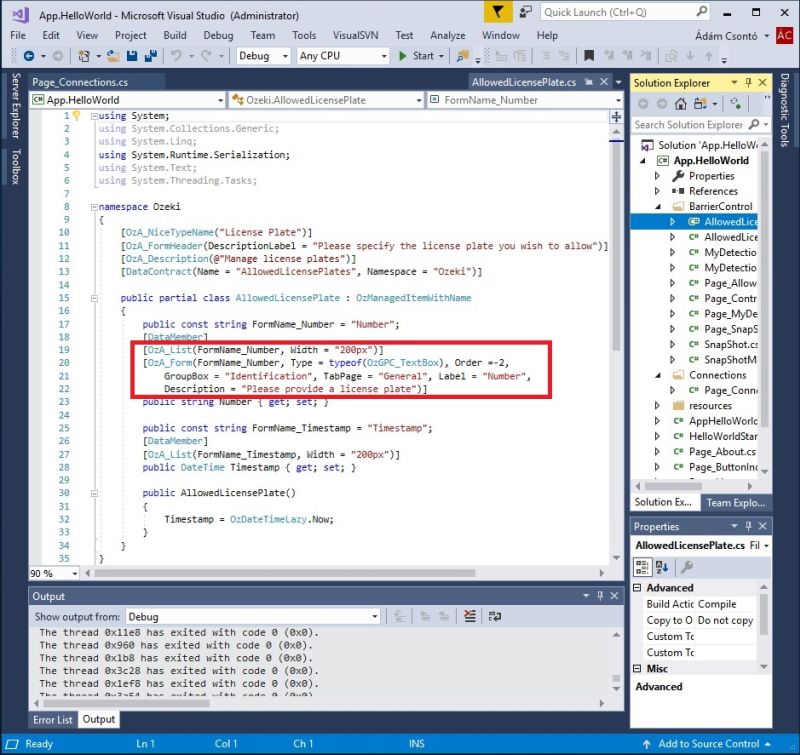
Prepare your data to be used on a form and on a list!
To automatically generate a form, you need to use the [OzA_Form] attribute before the properties. With the help of this attribute, the following properties can be set to be generated automatically:
[AttributeUsage(AttributeTargets.All)]
public class OzA_Form : OzA_AttributeDisplay
{
    public OzA_Form();
    public OzA_Form(string name);

    public string After { get; set; }
    public string CSSBelow { get; set; }
    public string Below { get; set; }
    public string Popup { get; set; }
    public string CSSLabel { get; set; }
    public string[] Hide { get; set; }
    public Type InputContainerType { get; set; }
    public OzA.BelowType BelowType { get; set; }
    public OzA.LabelPosition LabelPosition { get; set; }
    public bool Nullable { get; set; }
    public bool Enable { get; set; }
    public Type TargetPageType { get; set; }
    public string TabPage { get; set; }
    public Type TargetGroupType { get; set; }
    public bool GroupBoxHidden { get; set; }
    public string GroupBox { get; set; }
    public string Label { get; set; }
    public string OriginalName { get; }
    public bool HideIfEmpty { get; set; }
    public string Description { get; set; }
    public OzVisibility Visibility { get; set; }
}
If you use the [OzA_List] attribute before a class, it will be shownn in a list. The [OzA_List] attribute has the following properties you can set:
public class OzA_List : OzA_AttributeDisplay
{
    public OzA_List();
    public OzA_List(string name);

    public OzCollapse Collapse { get; set; }
    public string Width { get; set; }
    public bool HideIfEmpty { get; set; }
    public string Label { get; set; }
    public string Popup { get; set; }
    public bool SearchIgnore { get; set; }

    public enum OzCollapse : byte
    {
        MobilePhone = 0,
        None = 1
    }
}
Learn about serialization!
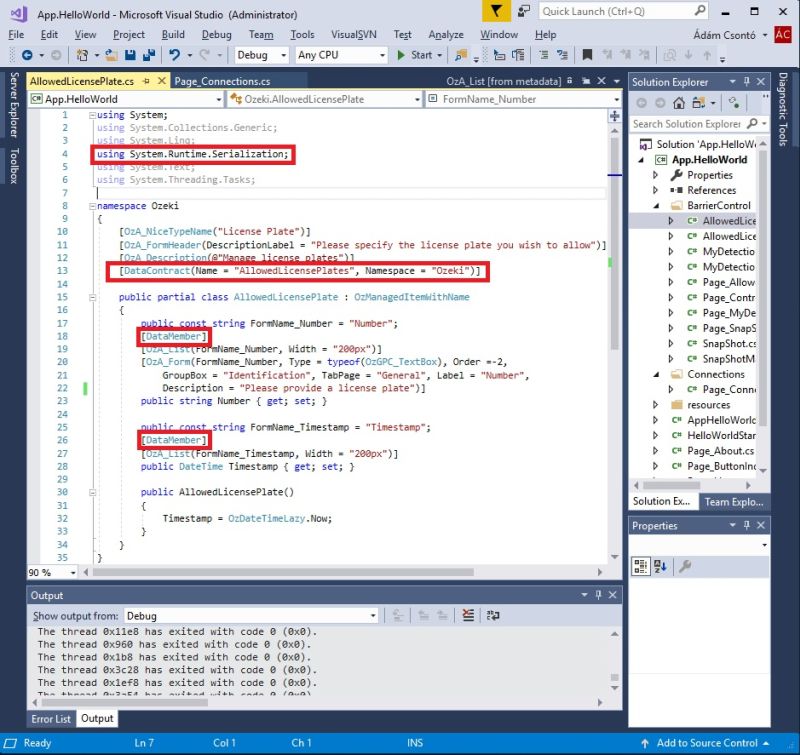
In order to be able to use attributes in your project, you need to add the System.Runtime.Serialization library to your references and among to your using directives. The System.Runtime.Serialization namespace contains classes that can be used for serializing and deserializing objects. You need to use the [DataContract] attribute before the class, and the [DataMember] attributes before the properties.
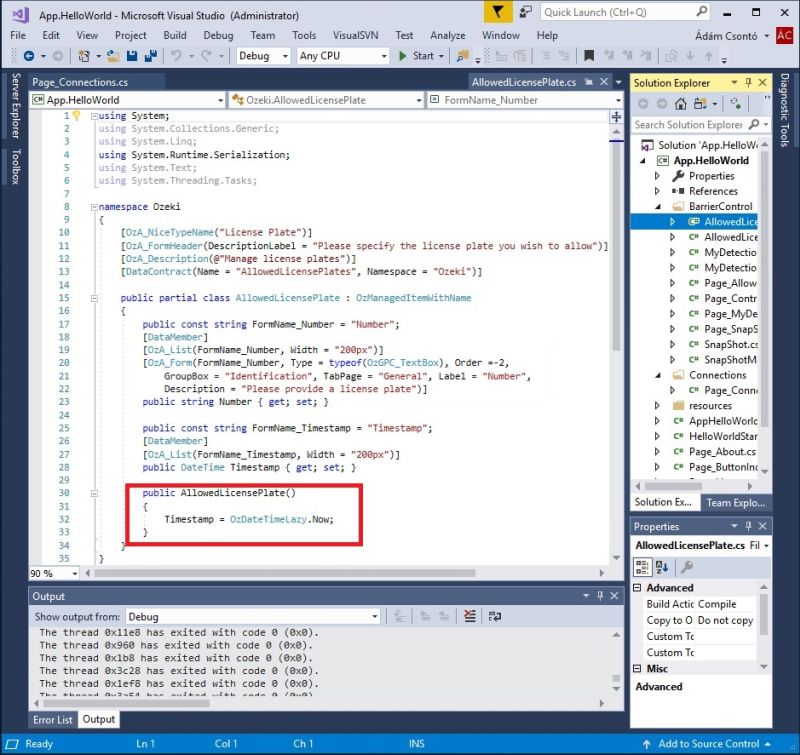
Create a constructor to initialize your data!
In some cases it is possible that you do not use the OzA_Form attribute before a property. This results that it will not appear on the generated form, so you need to set its value on other way. In other cases you need to modify the data you enter on the form. These modifications can be set using a constructor as it can be seen on the following figure.
More information
- Become a Robot Master
- Build your first App in C#.Net
- Send messages from your C#.Net App to your Lego robot
- Receive messages from your robot and handle events
- Convert a SNAP app into C#
- Build a user interface for multiple robots
- Create a C#.Net version of the Barrier Control App
- Build a responsive user interface for various screen sizes
- Create a data class
- Learn to use an item manager
- Automatically generated grids and forms