 Sign in
Robot control using SMS
Text messages received from mobile phones provide a great way to create remote control systems. In this lecture, you will build a robot that can be controlled using text messages. It will read the command received an SMS and act accordingly.
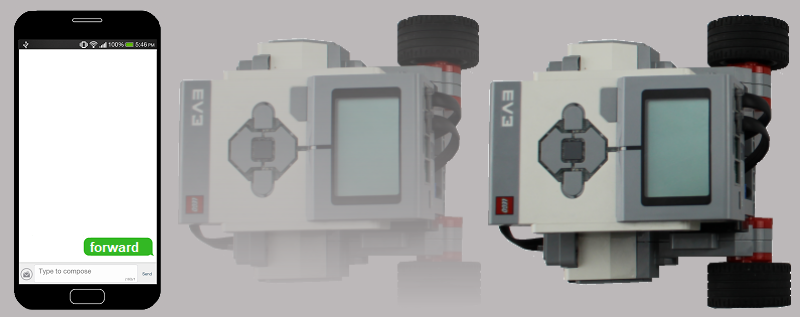
Figure 1 - See how your robot is moved using SMS command
Requirements
- Ozeki Sniffer: Sniffer robot build instructions
- Ozeki 10 installed on your phone: Installed Ozeki 10 Robot OS
- Lego connection installed on your phone: Connect the Lego robot to Ozeki 10
- SNAP basics: Basic knowlege of the Snap programming language
Write down what the SMS is!
SMS - in other words: Short Message Service. It is a service where you can receive and send short messages which have limited number of characters. SMS is a component of telephones, internet and mobile device systems. The service is started on mobiles devices in the early 1980s.
Subscribe to the Android SMS connection in Control Panel!
Android SMS connection is needed in order to send and receive SMS messages in Ozeki 10. In the Ozeki Desktop, you need to click on the Control Panel icon. After that, if you want to use it from Snap app, you need to subscribe it to this connection. In the connection list, you need to find the connection called 'My_SMS_Android_1@localhost', as you can see on Figure 2. There should be a green indicator near that name. Click on it to open the connection's details page.
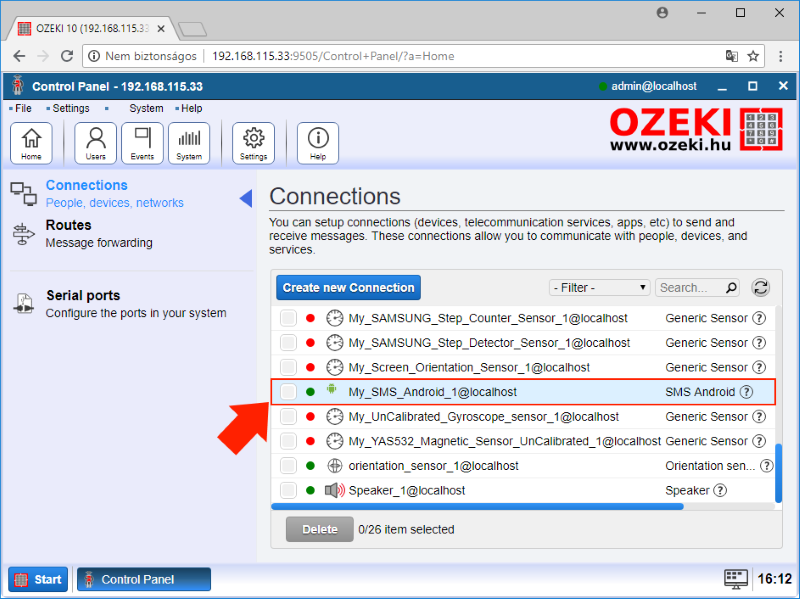
Figure 2 - 'My_SMS_Android_1@localhost' on the Connections list
In the details page of 'My_SMS_Android_1', there is a tab called Subscribers, please click on it. Here you can see all the connections that are subscribed to this connection. These connections will get the messages that are sent by this connection. The Snap needs to be added on the list in order to get the messages from 'My_SMS_Android_1'. To do this, click on the blue button called Create new Subscription. There are two fields called Connection and Address. Into both fields, you should write the following line: Snap@localhost and click OK, which can be seen on Figure 3. Now you are ready to write programs in Snap that can send and process SMS messages.
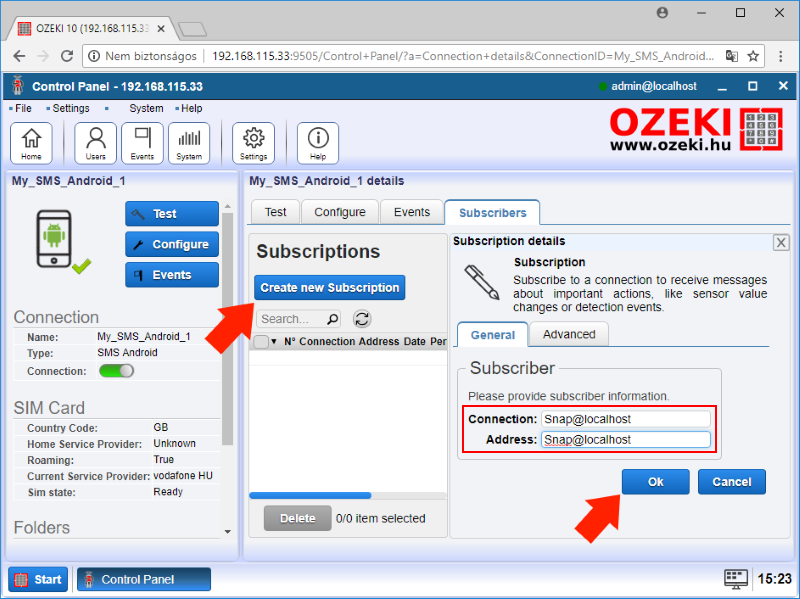
Figure 3 - Creating new Subscription
Create an entry point and display the message in a bubble on the canvas!
To create the entry point, please place a 'when green flag clicked' block from Control category to the Scripts field of the GUI. It actives when you click on the block or the green flag on the top right corner of the form. Then you need to attach a 'Get next message' block found in Ozeki category to the previously placed control block like Figure 4 demonstrates. This block waits until your phone receive an SMS that will be forwarded to the Snap application as an incoming message due to the created subscription you set up in #Task 1. In the next step, you are going to display this message.
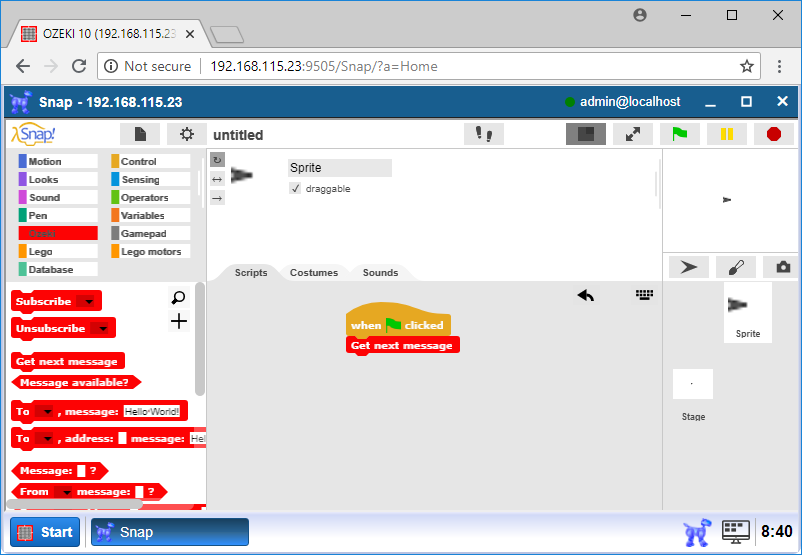
Figure 4 - Adding the 'Get next message' block
First of all, you need to store the received message in a variable to work with it. To make a variable, please navigate to the Variable category and click on 'Make a variable' button. In the popup window, type the name of the variable to be created then press 'Ok'. You can see that the new variable has appeared in the category under the buttons. Now you need to load the incoming message into the made variable. You can use the 'Set [variable] to message value (string)' block from Ozeki category for it. Attach it to the 'Get next message' block, then please select the previously created variable for the block's variable field. This block is responsible for giving the message received to the 'sms_text' variable. To display the message in the bubble above the cursor, you need to use the 'say [text] for [time] secs' block found in Looks category. Drag the 'sms_text' variable and place it into the text field of the block. After you start the program, it will wait for an incoming message. And if there is an incoming message, it will display the message at the top right corner like on Figure 5.
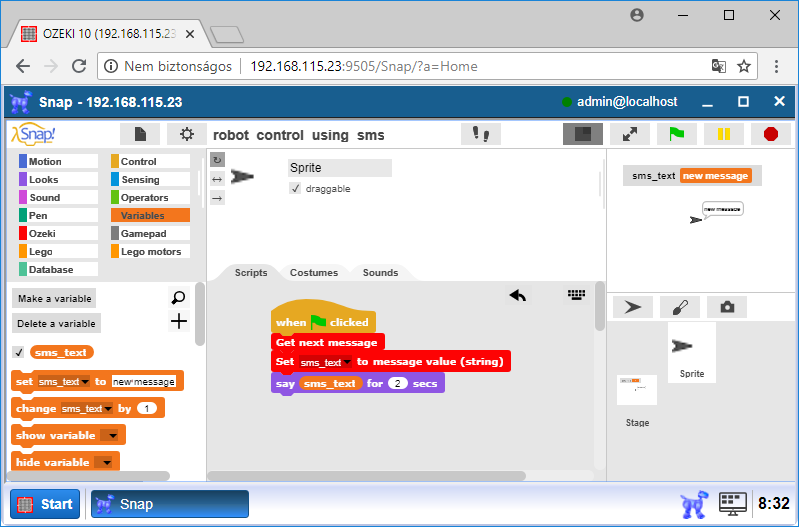
Figure 5 - Displaying the received message
Upgrade the code to drive the robot forward if a 'forward' message is received!
After the begining steps, you can start using your phone to control the robot with SMS messages. You can delete the 'say [message] for [time] secs' block. It was only needed to test the message receiving functionality. After that you need to compare the variable's value to the word 'forward'. If they are match with eachother, your robot should go forward. You can implement the comparison operation using the green '[value1] = [value2]' block from Operators category. Then just insert the 'sms_text' variable into one of its fields and the 'forward' text into the another one. To make decisions depending on the return value of the block, you need to insert it into an 'if' statement like on Figure 6. Finally, you need to place a 'Drive [motors] [direction] [time] sec at [speed]%' block inside the 'if' statement. You should select 'A+B' for the block's 'motors' field, because the Sniffer's motors are connected to the A and B ports of the EV3 Brick. Then select the 'forward' option for the 'direction' field. Due to this, the robot will go forward if the condition given in the 'if' block is fulfilled. The 'time' and the 'speed' fields detemine how many times the robot should go and at how much power. Send an SMS containging the 'forward' text to the phone and see what will happen!
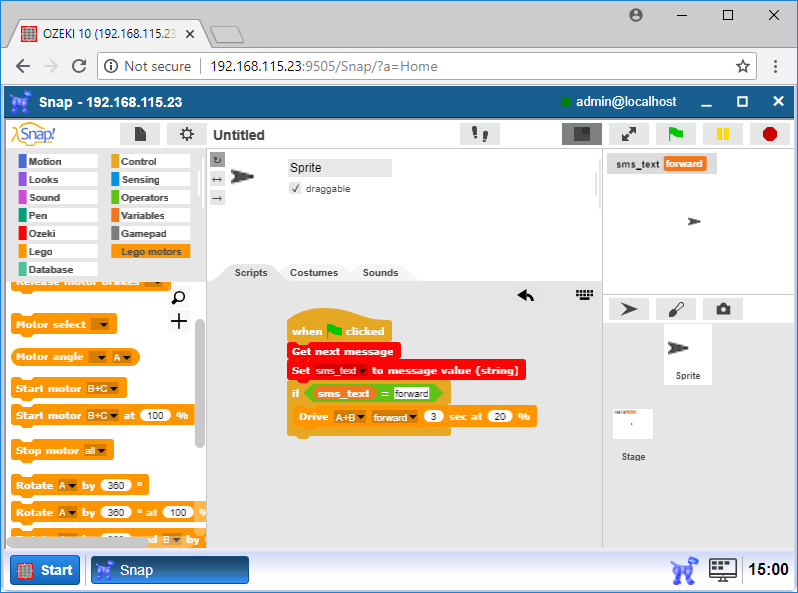
Figure 6 - Moving the robot
Simplify the code so that you do not use a variable!
In the previous task, you learned how to get a message, save it to a variable and compare the value of the variable to the word 'forward'. And if they were the same, the robot went forward. You can implement it simplier without using any variable. You should delete the 'Set [variable] to a message value (string)' block using the 'Delete a variable' button in Variables category and insert a 'From [connection] message: [text] ?' block found in Ozeki category to the 'if' statement's condition field instead of the green comparator block. Finally, you need to select the 'My_SMS_Android_1' option for its 'connection' field and type 'forward' into the 'text' field. This block will check whether the message received from the selected connection is equal to the text given in the 'text' field.
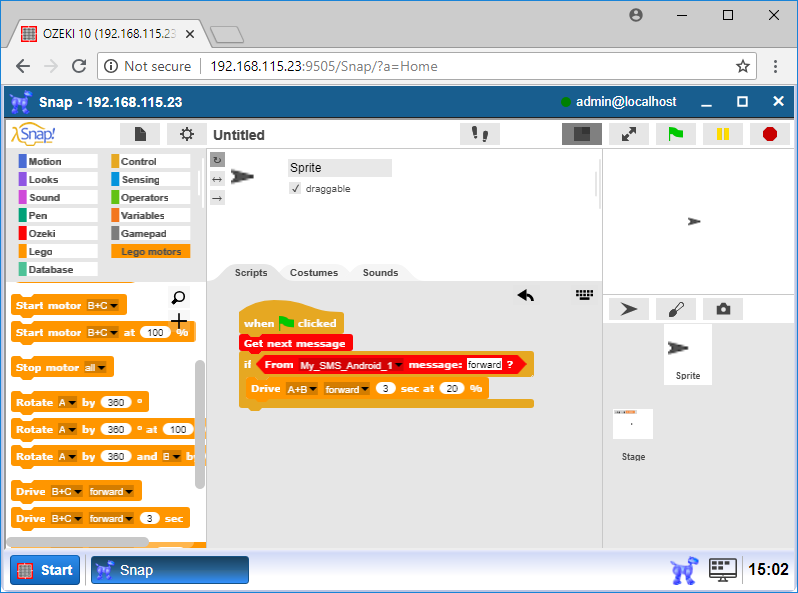
Figure 7 - Cleaner code than in the previous task
Upgrade the code to move the robot backward when a 'backward' message is received!
You can use multiple if statements in your program, so your robot can do different kind of things. To solve this task, you just need to duplicate the whole 'if' block and attach the new one to the previous one and set its parameters. So you should type the 'backward' text into the newly placed 'From [connection] message [text]' block's 'text' field and select 'reverse' option for the 'Drive' block. Now your program can handle forward and backward operations.
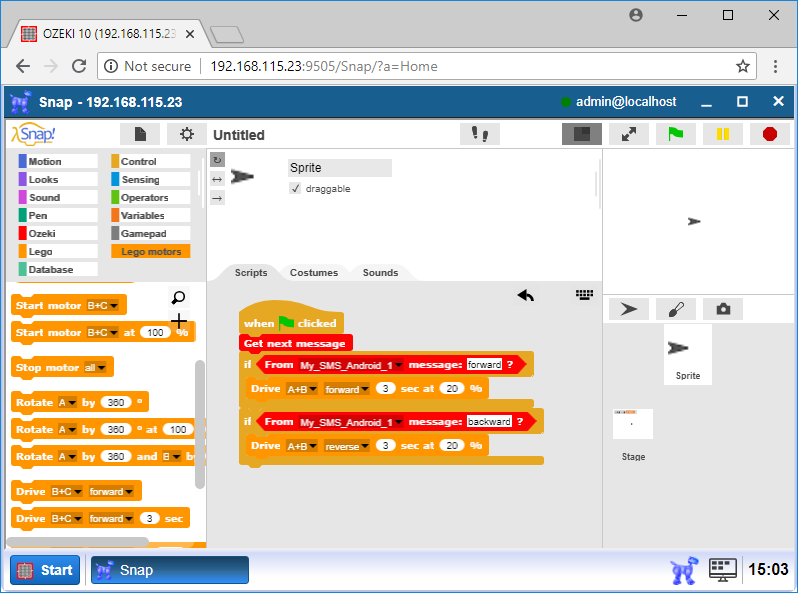
Figure 8 - Upgraded code, the robot also can do a backward move now
Upgrade the program to handle multiple commands in one run!
It would be nice if the program was constantly processing the incoming messages until you stopped it, would not it? To implement it, you just need to do a little modification. So you should drag all the blocks except the 'when green flag clicked' one and put them into a 'forever' control block. Finally, you should attach this forever block to the 'when green flag clicked' block. So due to the 'forever' block, the program will wait continously for incoming messages and move the robot depending on them until you stop the program using the red stop button on the top right corner of the GUI.

Figure 9 - Finalizing the code, adding the forever block
Program code
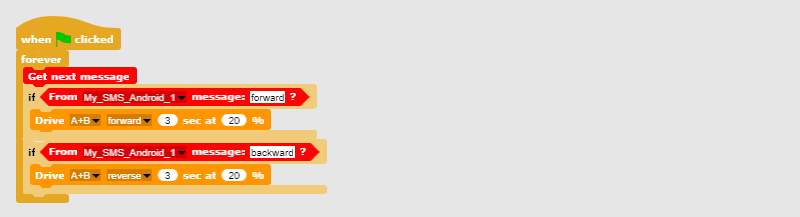
Figure 10 - This program code can drive your robot forward or backwards
|
|
Download the SNAP code to control your robot with SMS commands The code can receive SMS messages and control the robot with them. It is easier to understand this guide if you see the codes in front of you: Download the SNAP code to control the robot using SMS |
More information
- Displaying emotions, playing sounds
- Control robot using chat
- Error alert using e-mail
- Robot status updates on a website using FTP
- Robot control using voice commands
- Robot error alert using text to speech
- Robot control using SMS
- Error alert using SMS
- Write messages in Morse code
- Robot error alert using Telephone call (voice)