 Sign in
How to measure light intensity and how to capture color information
|
In this lecture you will learn to use the color sensor. You will learn the 3 operation modes: color detection, ambient light intensity measurement and reflected light intensity measurement. You will learn how to configure the sensor and how to read the values, and what each reading means. |
|
You can connect the sensor in a matter of second
The EV3 Color sensor can be connected to all sensor ports of the Brick. These ports are called 1, 2, 3, 4 from left to right. Figure 1 shows the simplicity of connecting these devices. The key is that all data and electricity flows through a single cable, which is called EV3 cable. After you have connected the color sensor, the Brick automatically detects it, so you can test it in the Brick's menu.
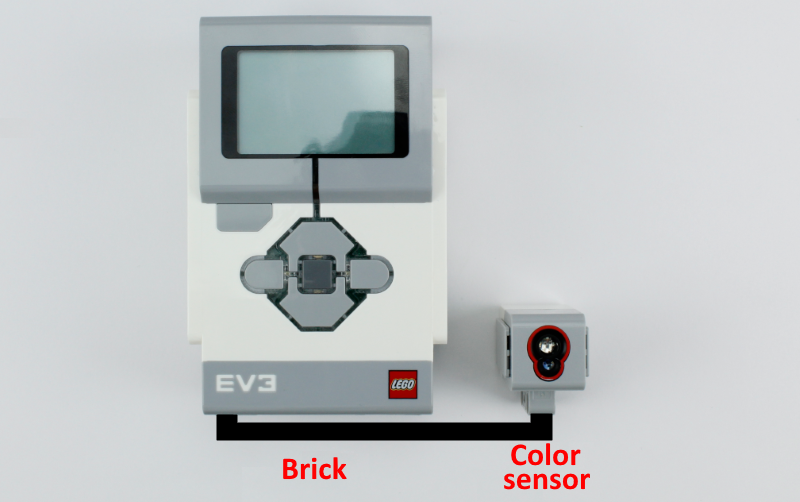
Figure 1 - Lego Mindstorms EV3 Brick connected with the RGB color sensor
Requirements
- Lego Mindstorms EV3 Brick
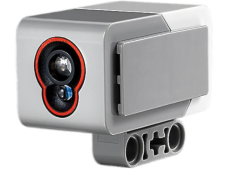
- EV3 RGB Sensor: http://www.ozeki.hu/index.php?owpn=6086
- EV3 cable
- Ozeki 10 installed: http://www.ozeki.hu/index.php?owpn=6066
- Connect Brick via Bluetooth: http://www.ozeki.hu/index.php?owpn=6065
- Lego connection installed: http://www.ozeki.hu/index.php?owpn=6067
Video tutorial: 'How to use the Lego color sensor in Ozeki 10'
Start Ozeki 10 and open Control Panel!
Make sure that the sensor is correctly connected to the Brick. Start by opening Ozeki 10 in a browser. If your Brick hasn't been paired with PC yet, you can pair it via Bluetooth by following this guide: http://www.ozeki.hu/index.php?owpn=6065. Log in to Ozeki 10 and open the Control Panel (Figure 2) to view all connections. Control Panel can easily manage almost all electronic device around you. In this guide you will use it to sense colors in the simplest way.
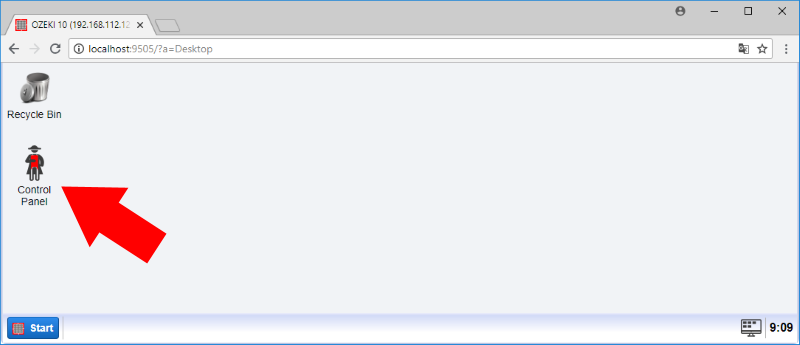
Figure 2 - Opening the Control Panel through the GUI
Select RGB sensor from the list!
The connection list will show all available Ozeki 10 connections. You should see the Lego devices connected, if not then here is a simple guide to properly connect your EV3 Brick to Ozeki 10: http://www.ozeki.hu/index.php?owpn=6067. Do not panic if you cannot see the Color sensor in the list. It means the Brick is connected to the wrong COM port, so please delete all EV3 devices from the list and connect the Brick through the other COM port. By doing so, you will see the 'Color_Sensor_1' in the list. Click it (Figure 3) to find yourself on the device chat window.

Figure 3 - This is where you can find the detected 'Color_Sensor_1' device
Run 'subscribe' and 'read' commands!
All Ozeki 10 devices has a chat window. You can ask all commands by typing 'help' and hitting enter. First send 'subscribe' to get all RGB sensor measurements. Then type 'read', which is a general command to acquire data from any Ozeki 10 connection, but in this case it will return the detected color (Figure 4). It can be black, blue, green, yellow, red, white, brown and no color.
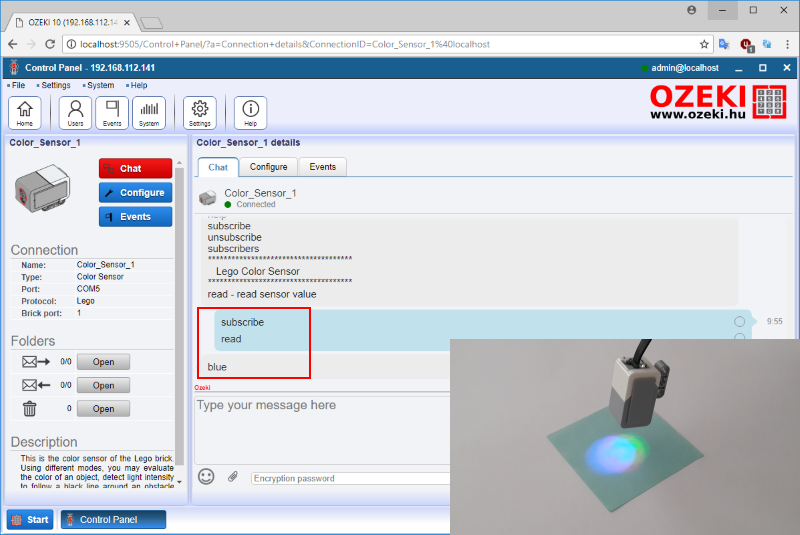
Figure 4 - Run subscribe and read the color of the paper
Change the color and run 'read' again!
You can test it with another color by replacing the paper in front of the sensor. Hold the sensor to the object as you can see it in Figure 5 below and run 'read' from chat again. Subscription is not necessary, since you have already subscribed to the sensor in STEP 3. You can repeat it as many times you wish with different kind of colors. Try the sensor with another supported color too.
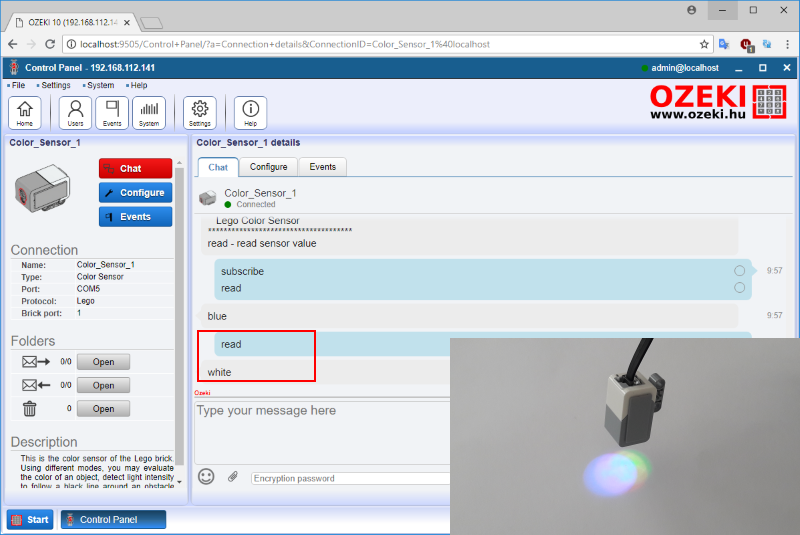
Figure 5 - Run 'read' after changing the paper to another color
Open the Configuration menu and choose between three different modes!
Click the 'Configure' tab page and look at the Sensor mode selection box, where you can choose from 3 different modes (Figure 6). Select reflected light intensity mode for the sensor to emit red light from a LED and measure the luminous intensity of the red light reflected from the surface. Select light intesity mode to detect the amount of light coming from the environment from a 0 to 100 scale. Although the color mode is the most popular. It can detect colors from black, blue, green, yellow, red, white, brown and no color as well. Look at Table 2 for more details to deeply understand the modes.

Figure 6 - Choose between 3 different modes in the 'Sensor mode' field.
Take a glimps at the sensor events in the Events menu!
By switching to the 'Events' panel, you can check the color sensor communication history. It clearly shows both 'read' commands after you have subsribed to the sensor. Each reading gets the color as a reply. First 'blue' then 'white' (Figure 7). The history is a good way to check sensor measurements just in case you do not remember what your device did. There is also a combined events page in the Control Panel application on the same GUI page, so you can see all events coming from all devices.
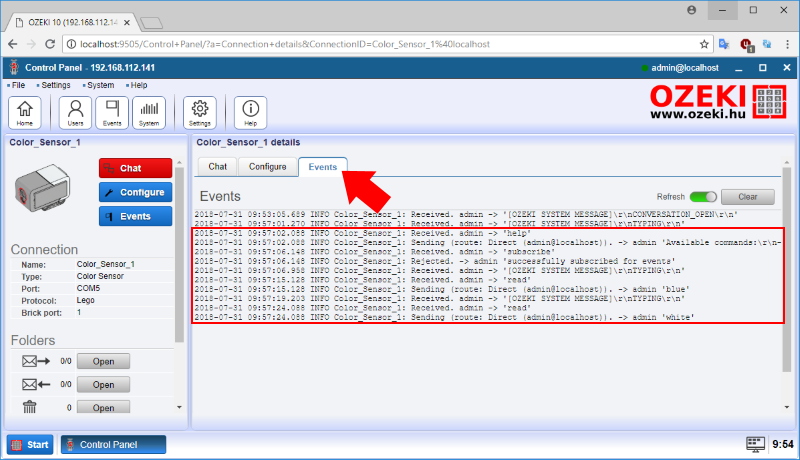
Figure 7 - Look at the colors measured by the sensor
The EV3 color sensor command set in Ozeki 10
The first table contains all commands that can be used to get measurements from the LEGO color sensor through Ozeki 10. These commands can be sent through chat by clicking the blue 'Send' button or they can be routed from any other Ozeki 10 connection too, so you can simply detect colors. The best thing in Ozeki 10 is that you can even create program block diagrams, which makes it possible to automatically send text commands you can see below on Table 1.
| Color sensor commands | Description |
|---|---|
| help | request the command set |
| subscribe | subscribe to device messages |
| unsubscribe | unsubscribe from device messages |
| read | gets color or luminous intensity as a response |
Table 1 - Contains all commands to read your Color sensor
Additional information
The digital EV3 Color Sensor distinguishes between seven different colors and serves as a light source for detecting reflected light, although it can detect ambient light too. Use the sensor to build color sorting and line-following robots or experiment with light reflection of different colors. The technology is widely used in the following industries like recycling, agriculture and packaging.
| Modes | Description |
|---|---|
| Reflected light intesity mode | Color sensor emits a red light and measures the amount reflected back into itself from the surface you are testing. The intensity of the light is measured as a percentage from 0 to 100, with 0 being very dark, and 100 being very bright. |
| Ambient light intesity mode | Color sensor measures the amount of light in its environment, without producing its own light source. Ambient light intensity is measured as a percentage from 0 to 100, with 0 being very dark, and 100 being very bright. |
| Color mode | Color sensor can detect seven different colors: black, blue, brown, green, red, white and yellow. Each color has a value. |
Table 2 - The RGB sensor can detect three different color modes
Your Mindstorms EV3 set can distinguish lights and colors. You only need a Lego Mindstorms EV3 Brick to create simple features thanks to the color sensor, which can distinguish 7 different colors and various different light intensity levels from 0 to 100%. It's new technology is capable to detect reflected and ambiant lights. The sensor can also emit 3 different colors from it's own LED.
| Data | Value | Notes |
|---|---|---|
| Color | 0 - 7 | 0 - no color, 1 - black, 2 - blue, 3 - green, 4 - yellow, 5 - red, 6 - white, 7 - brown |
| Light intensity | 0 - 100 | Reflected or ambient light intensitiy in percentage |
Table 3 - Color and light intensity explanation
More information
- The touch sensor and sensor messaging
- Capturing infrared signals using the IR sensor
- How to measure light intensity and how to capture color information
- Using motors and rotary encoders
- Distance measurement, the ultrasonic sensor
- Orientation in space, the gyroscope sensor
- Using the LCD display
- Using indicator leds on the Lego Brick
- Power management and working with the brick battery
- Playing sounds on the Lego speaker