 Sign in
Motion detection
In this lecture you will learn about motion detection. Detecting motion or the lack of motion using cameras is often needed in robotics. It is also used in security systems. You task in this lecture will be to build a lego mouse trap, that catches a mouse and sends the captured image in e-mail to the user.
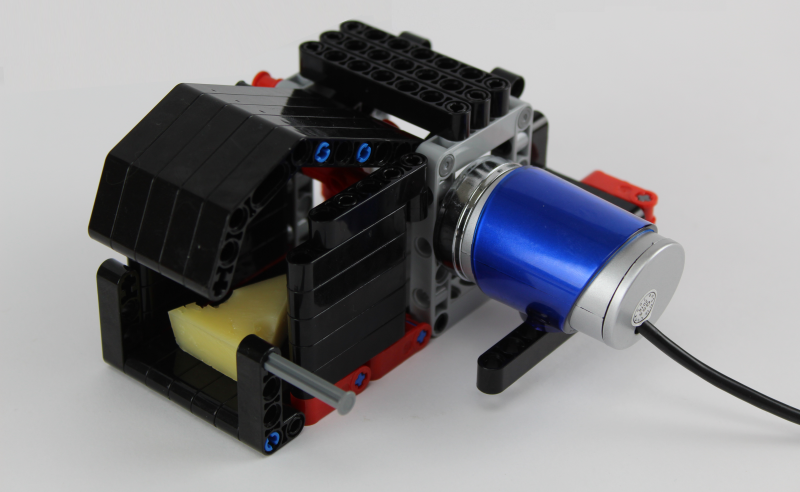
Figure 1 - Ozeki Mouse trap in action
Requirements
- USB camera connected to your PC
- Ozeki Mouse trap: http://www.ozeki.hu/index.php?owpn=6281
- Ozeki 10 installed: http://www.ozeki.hu/index.php?owpn=6066
- Lego connection installed: http://www.ozeki.hu/index.php?owpn=6067
- Snap basics: http://www.ozeki.hu/index.php?owpn=6180
Check this video about a Lego mouse trap in action!
The following video (original link of the video: https://www.youtube.com/watch?v=IF3AMENXTfE) is going to show you that how easy is to build a mouse trap using Lego. The following tasks will introduce our version of this mouse trap, how you can catch a mouse with that, and use motion detection to send an image alert when the mouse entered the mouse trap.
Place the cheese as a bait into the mouse trap!
Setup the Motion detection connection!
In Ozeki 10, you can use your USB camera as a motion detector, and for that you just need to create a new connection. In Control Panel you can do it the same way, as you did in all the previous lectures. Just click on Create new Connection and select the Video connection method, as the Figure 2 shows. At this point you can choose between various camera connections, but to be able to detect motion you need to select the Vision connection.
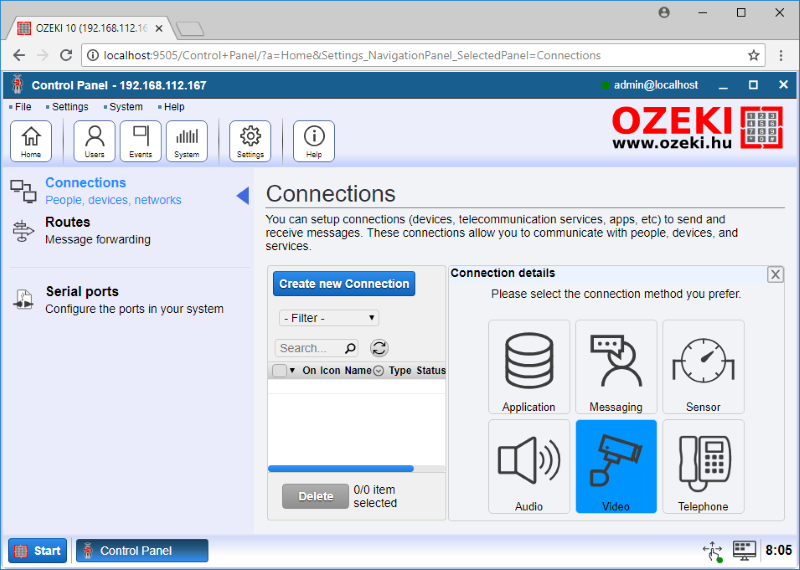
Figure 2 - Connection methods in Ozeki 10
After you selected the Vision type of connection, you need to specify what type of vision you want to use your camera. This lecture is about to detect motions, so just select the Motion camera connection. Lastly you can modify the details of the connection (Figure 3) like the name of it, also you can select the camera, the resolution and the frame rate. In the Vision tab you can specify the sensitivity of the camera, that means how much motion needs for the camera to detect it.
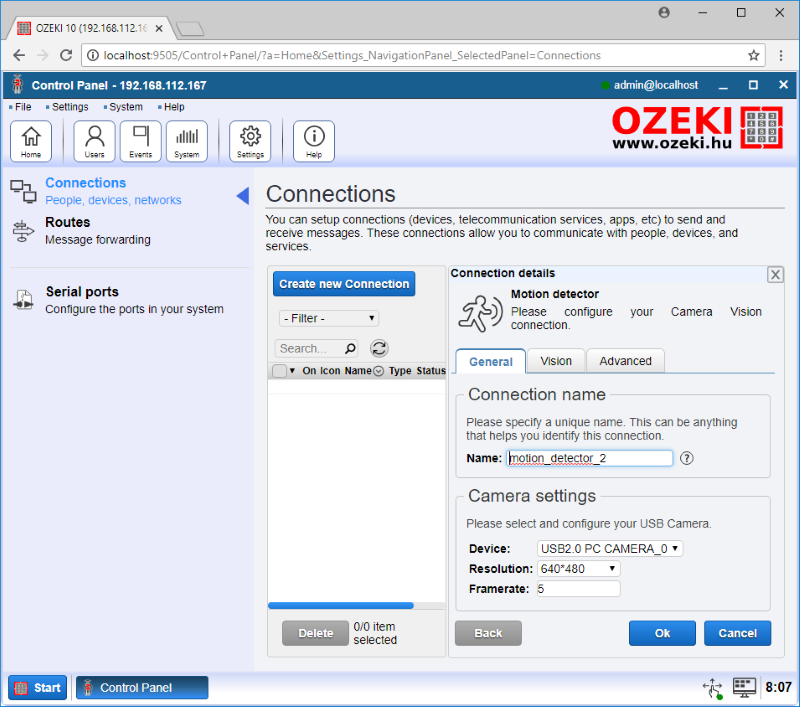
Figure 3 - Details of Motion detection connection
Next, you need to make sure that all the information from the motion detector arrives to SNAP, where you will write the code that do that action in case of detection. For that you need to create a route for these information. You can do that by clicking on Routes in Control Panel, and select Create new Route. Here you need to specify that the information will come from the motion detector connection and will arrive to the SNAP application as you can see in Figure 4.
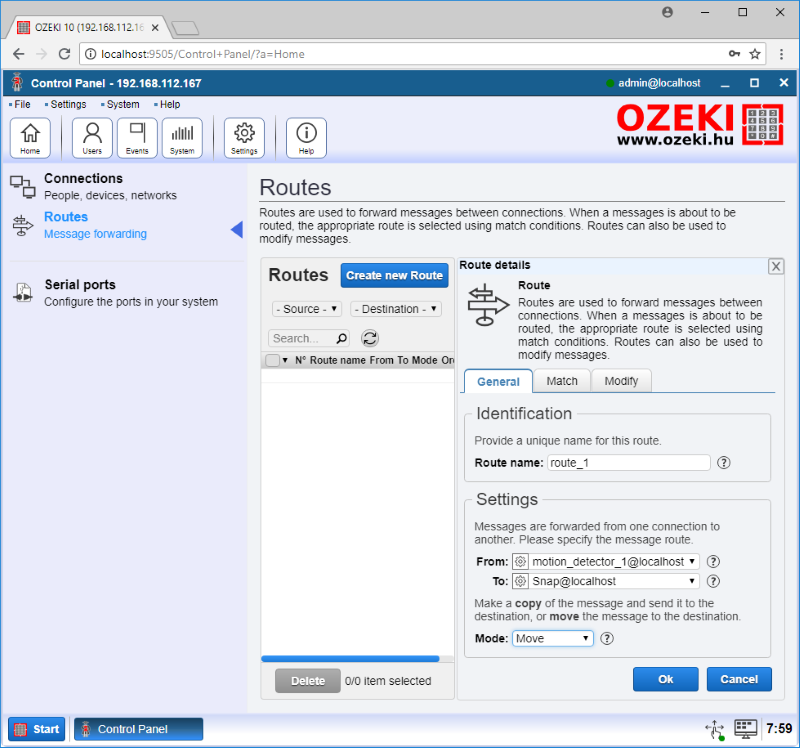
Figure 4 - Route creation in Ozeki 10
Setup the e-mail connection!
Next, you need to create a connection, that can handle the snapshots in case of detection and send them to an e-mail address. So, for that click on Create new Connection, and first, select the Messaging method. Next, as you can see in Figure 5, you need to choose the E-mail connection.
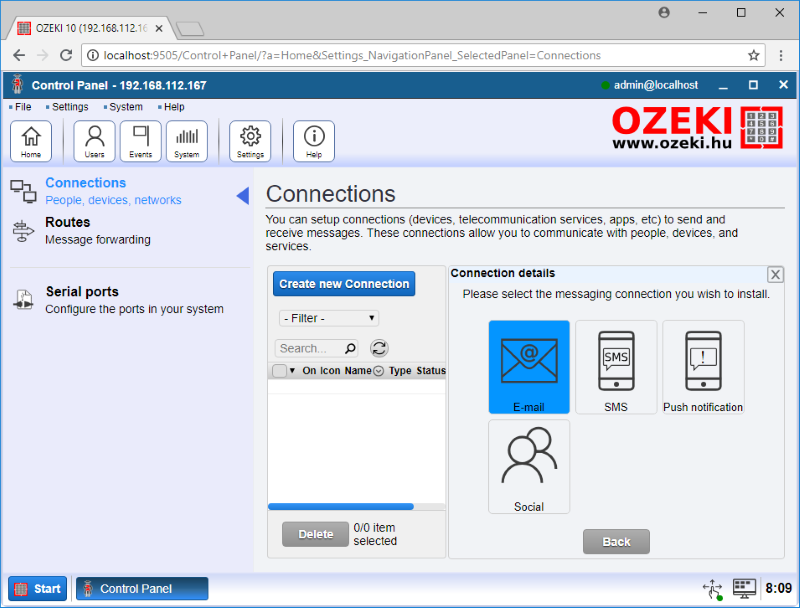
Figure 5 - Messaging connections in Ozeki 10
After you chose the E-mail connection, you need to select, which type of e-mail you want to use. For now just select the Gmail connection, and lastly in the connection details, you can setup the options of the connection as the Figure 6 shows. You can give a name for that, modify the details of the SMTP server, and finally you have to add the username and password information of an existing Gmail account, as an originator for the outgoing messages.
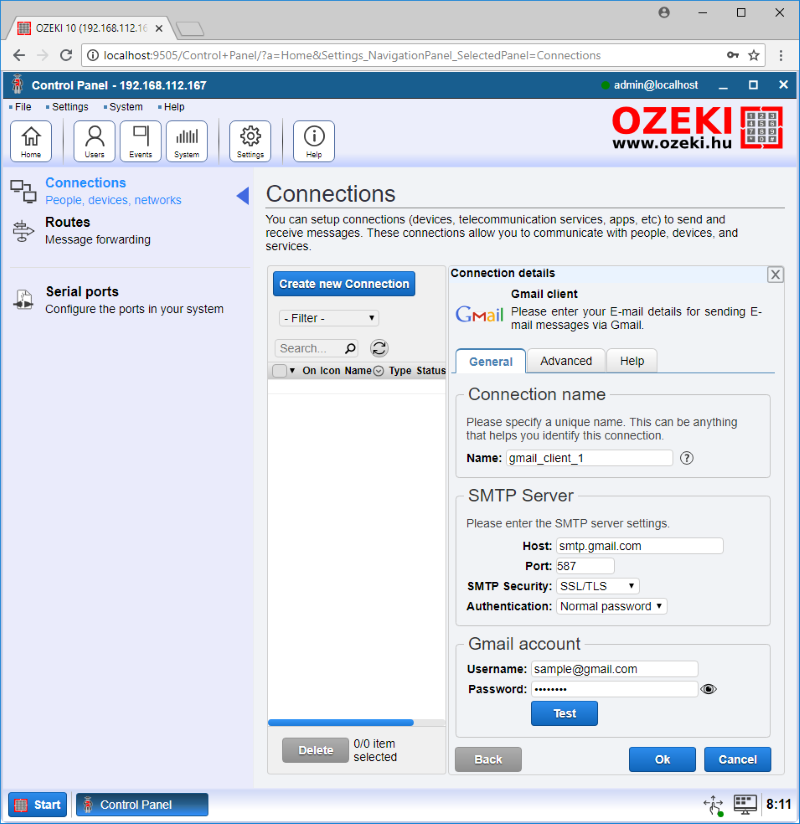
Figure 6 - Connection details of the Gmail connection
Write code to detect the mouse if it enters the trap!
After all the connections set to detect the mouse, now you only need the write the code for that in SNAP. So, first, add the 'When green flag clicked' block. Then, to take multiple snapshot from the detected mouse, place the 'Forever' block. Then to wait for messages from the motion detector, add the 'Get next message' block. After that, store that message with the 'Set 'message' to message value (string)'. If there is a detection, the connection will send the message: 'Motion detected.'. So, with an 'if' block, you need to compare the message value with this text like in Figure 7.
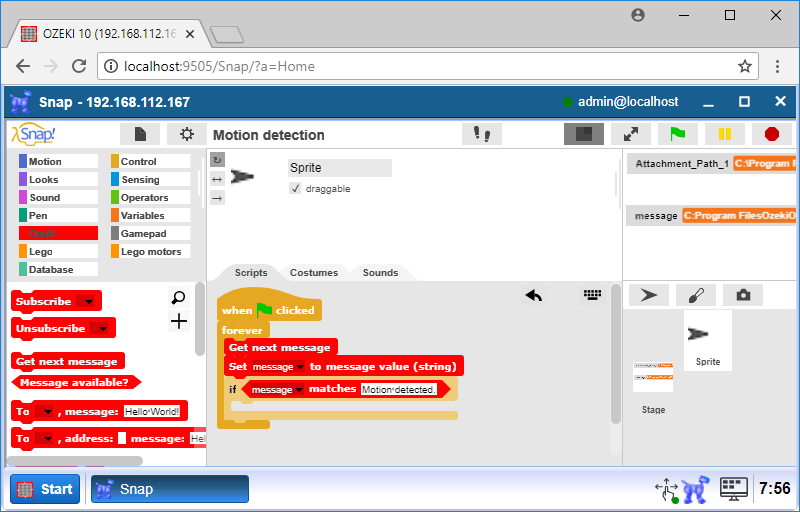
Figure 7 - The code receives messages from the camera
Upgrade code to take snapshot in case of detection!
If the message 'Motion detected.' arrives from the camera, the control of the program moves into the 'if' block. Here you need to take a snapshot from the mouse that triggered the motion detector with the camera. For that, just add the 'To [connection] message: [text]' block, select the Motion detection connection, and type the command 'snapshot' like in Figure 8. With that now your mouse trap can take a snapshot from the mouse if it enters the trap.

Figure 8 - If motion detected the camera takes a snapshot
Expand code to send e-mail with the taken snapshot!
The last thing, that you have to do is to send an e-mail with the picture of the detected mouse. for that, first create the 'Attachment_Path_1' variable. Then with the 'Set' block, set this variable to the path to the snapshot. After that you only need to send it to the e-mail connection, so please drag the 'To [connection], address: [e-mail address] message: [text]' block. Here, select your e-mail connection, then type the e-mail where you want to send the picture, and lastly drag the 'List' block to the message part, and add the 'Attachment_Path_1' variable in there like in Figure 9.

Figure 9 - The snapshot sent as an e-mail
Program code
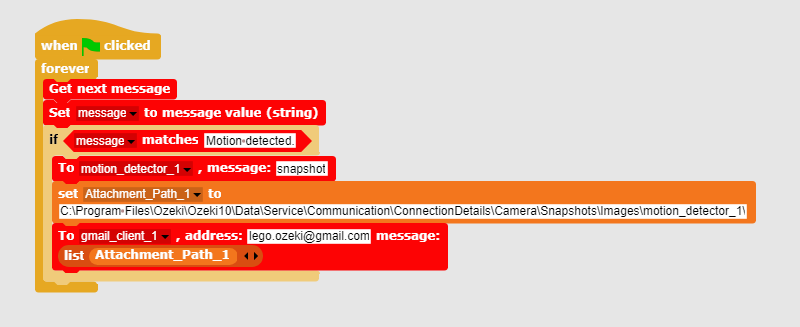
Figure 10 - The program can detect motion and send snapshots by e-mail
|
|
Download program code to control a mouse trap The code can detect mouses entering the mouse trap and send images by e-mail It is easier to follow the guide if you have the codes in front of you: Download Ozeki Snap code |
More information
- Introduction to visual sensors
- Introduction to cameras, taking snapshots
- Face detection
- Barcode recognition / build a cash register
- Computer vision, QR code recognition
- Motion detection
- Circle detection, line detection, measurements using cameras
- Car license plate recognition
- Build a PTZ camera
- Use a VR headset to control your camera