 Sign in
Robot error alert using text to speech
Text to speech offers a great way for your robot to communicate with people. In this lecture you will learn how to convert text messages into voice, and how to get your robot to say what's on it's mind. Text to speech combined with voice recognition is a great way to build a robot that can interact with people in the most natural way.
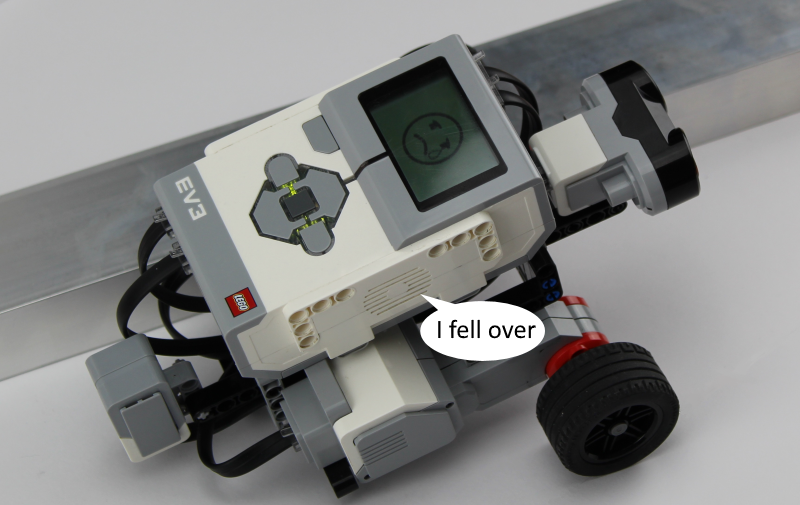
Figure 1 - Reading text after the robot falls over
Requirements
- Ozeki Sniffer: Sniffer robot build instructions
- Ozeki 10 installed: Installed Ozeki 10 Robot OS
- Lego connection installed: Installed Lego Bluetooth connection
- SNAP basics: Basic knowlege of the Snap programming language
Create a Text to Speech connection in Control panel!
As it was in the previous lectures, the first thing you need to do is to install the required connections in Ozeki 10. For completing this lecture you only need a Text to Speech connection. You can do this by opening Control Panel, click on the blue Create new Connection button and after choosing Audio method, just click on Text to Speech as you can see it on Figure 2.
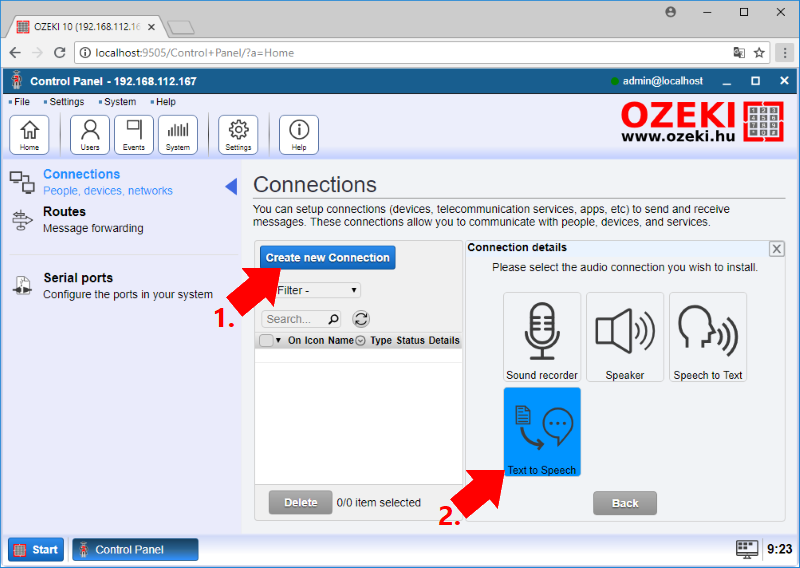
Figure 2 - Select Text to Speech from the available audio connections in Ozeki 10
To be able to use this connection in your browser, just select the Browser connection and after you clicked on it, you will be able to see the configuration menu of the connection like Figure 3 shows. Here you can type a specific name for this connection, switch between the available languages and specify the speed of the speaker's voice. Finally click on 'Ok' to finish the installation process.
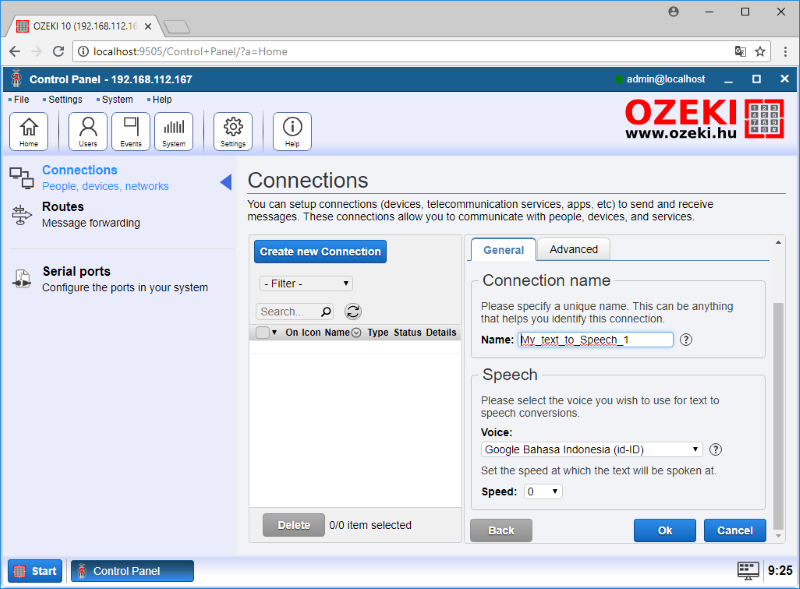
Figure 3 - Text to Speech configuration menu
Create a program to recalibrate the Gyroscope Sensor!
The next task of this lecture is to start creating your SNAP code. The first block that you should add is the 'when green flag clicked' block. Then you should re-calibrate the Gyroscope Sensor to 0°. To do that calibration, first you need to add the 'wait until' block and drag the '=' operator in it which should check if the 'Rotation angle' is 0° (Figure 4). That means the program will wait here until the rotation angle of the sensor can read 0°, which means that the sensor has been recalibrated.
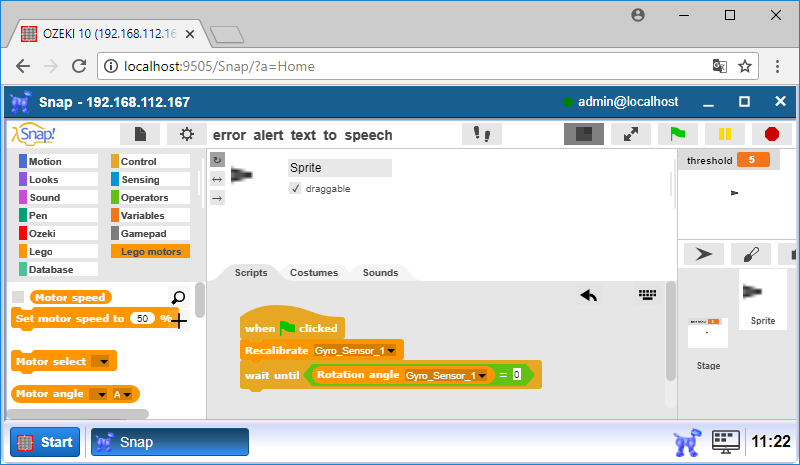
Figure 4 - Recalibrating the Gyro Sensor
Improve the code to start the connected motors of the robot!
After you finished the calibration, your robot is ready to go. To start the robot, you will need a block that starts moving both motors. This block will be the 'Start motor' block (Figure 5) that you can find in the Lego category. Here you can define which motors to start. You should select A+B, because the Sniffer uses these motors. You can also type how much power you want the motors to produce.

Figure 5 - Starting both motors to move your robot
Expand the code to check the rotation angle of the Gyro Sensor!
To check the rotation angle of the Gyroscope Sensor, you need to add the 'wait until' block that will examine the rotation angle until it hits the critical value which makes your robot fall over. Please drag the '>' operator in the 'wait until' block and add the 'abs of' block including the current 'Rotation angle'. Just type the critical value with this Rotation angle like on Figure 6. With this setup you will be able to detect the possible falls in both directions of your robot.
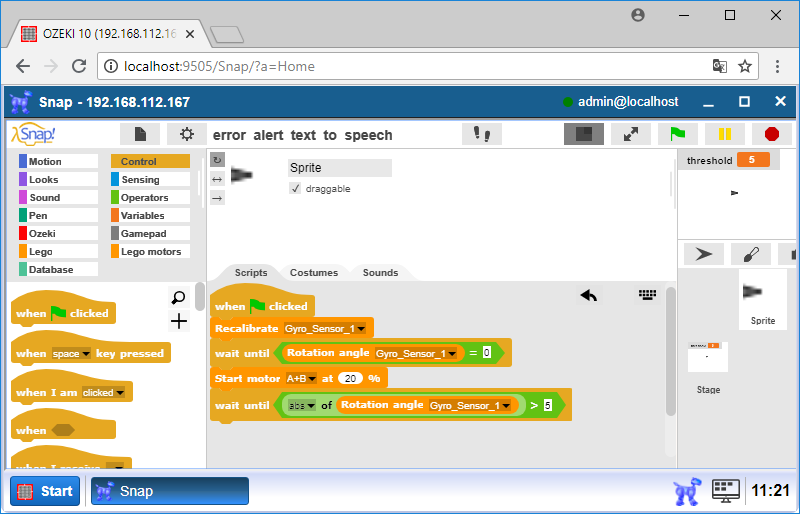
Figure 6 - Comparing the rotation angle
Upgrade the program to send an alert when the robot fell over!
When the rotation angle is bigger than the threshold, the robot is likely to fall over. When this happens, first think what you have to do is to stop all the driven motors on the robot by adding the 'Stop motor' block and selecting A+B motors. Then send the error alert with a 'To message:' block, where you have to choose the Text to Speech connection you installed in Step 1 from the drop-down list and type the message that you want to hear from your speaker in case of an error (Figure 7). You have prepared the program that alert you by using your PC's speakers if your robot is fell over!
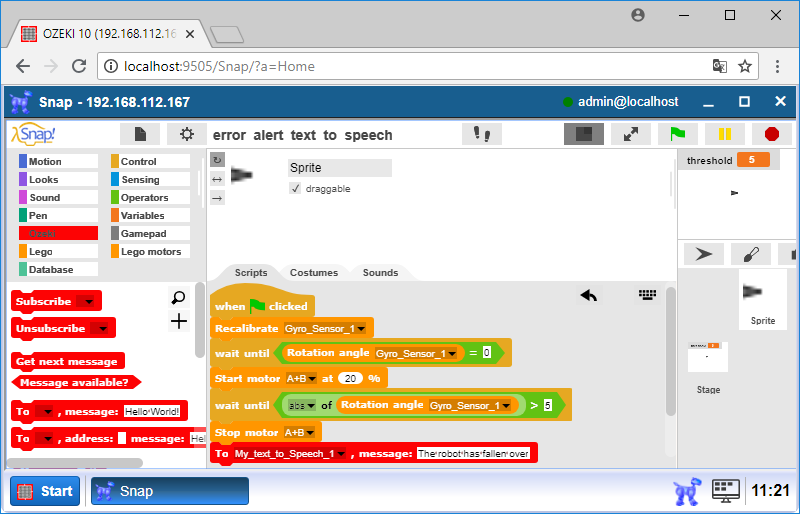
Figure 7 - The last block sends the message through the speaker
Program code
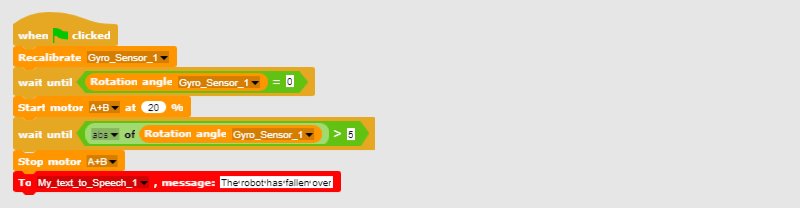
Figure 8 - The complete program that alerts you if the robot fell over
|
|
Download the SNAP code to detect if your robot falls over The code can send error alerts with Text to Speexh technology. It is easier to follow the guide if you have the codes in front of you: Download the Ozeki Snap code for Text to Speech error alerts |
More information
- Displaying emotions, playing sounds
- Control robot using chat
- Error alert using e-mail
- Robot status updates on a website using FTP
- Robot control using voice commands
- Robot error alert using text to speech
- Robot control using SMS
- Error alert using SMS
- Write messages in Morse code
- Robot error alert using Telephone call (voice)