 Sign in
Connect the Lego robot to phone
On this page you will find an instruction how to start the Ozeki 10 service on your Android mobile device. Also, with this coure you will be able to filter existing connections and setup properly a new Lego Brick one. With this newly created connection, you can view its sensors' details and get more information about them, also you will be able to configure them.
Requirements
- An Android phone with version 5.0 (Lollipop) or above
- Integrated Bluetooth chip in your phone
- Lego Mindstorms EV3 Brick
- Ozeki 10 installed on your phone: Installing Ozeki 10 on your Android device
- EV3 Brick paired with your phone using Bluetooth: Bluetooth pairing on Android phones
Start Ozeki 10 service and sign in
After you have started the Ozeki 10 application, click on the 'Start service' icon. Then you need to wait a few seconds, until the service starts. Then click on the link, as you can see on Figure 1. On the login screen, you need to type in the previously given 'Default user' and 'Password'. You are now succesfully signed into Ozeki 10, where you will be able to add new connections.
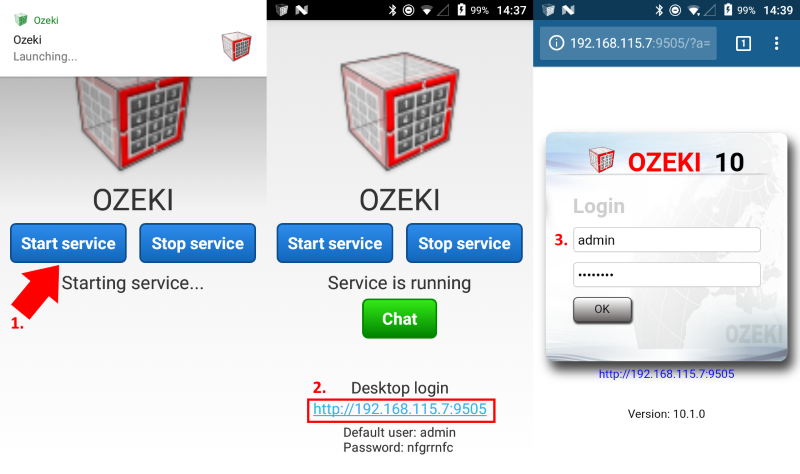
Figure 1 - Starting the service and signing in
Open Control Panel
First of all, before you do anyting, you need to rotate the screen horizontal, if you can't, you need to enable it from your phone's screen options. On default settings it's already turned on, you just have to rotate the screen, until you got an image like, Figure 2, so you can see the screen widely. On the Ozeki 10 Desktop click on the Control Panel icon. In the Control panel, you can add various type of connections, such as a Lego Brick connection, which will be added in the next steps.
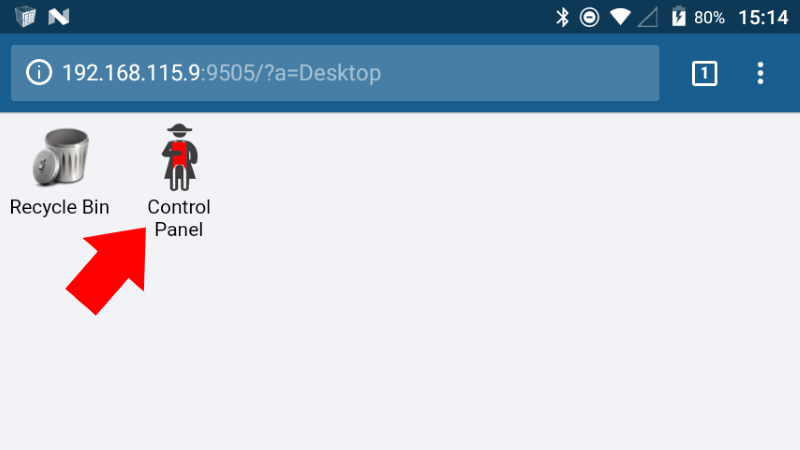
Figure 2 - Selecting 'Control Panel'
View existing connections
When you first enter the 'Connections' section, you will see a number of connections. It can be the default 'admin@localhost' connection, or your android phone sensors, such as accelerometer, gps, light sensor, proximitiy sensor, charger monitor and so on as you can see on Figure 3. You can also view its details, test them and configure if you would like to to done that or some of them.
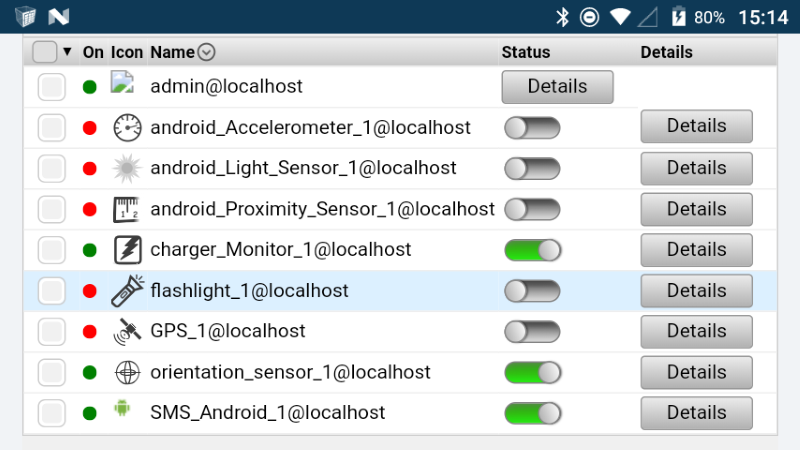
Figure 3 - Existing connection
Filtering existing connections
To filter the connections, click on the 'Filter' drop down menu, as you can see on Figure 4, marked in a red square. Then a window will pop up, shown at Figure 4, in this list, you can see all available types of filters. Unselect almost all of them, only leave the 'Connected', 'Not connect' filters on. After you modified the filters, the 'Connections' list will be empthy, but when we will create the new Lego connection, it will be filled up with various types of Lego sensors, connections.
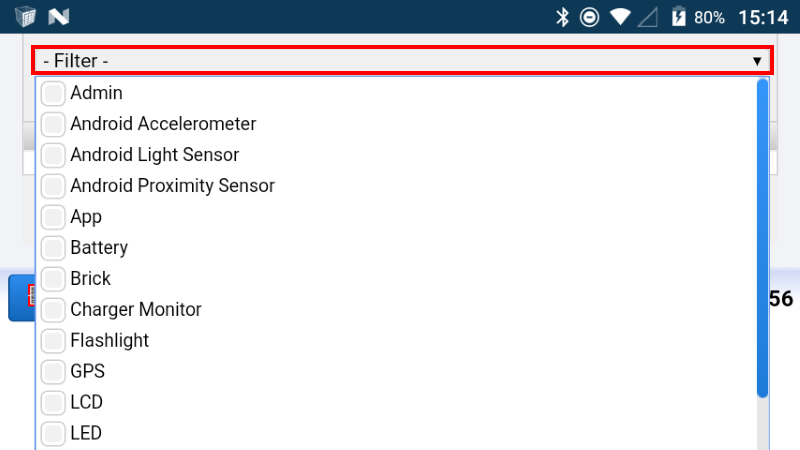
Figure 4 - Filtering the connections
Create a Lego connection
Now you can choose the wide blue 'Create new Connection' button to create a new connection. This connection will be a Lego sensor connection, but if needed you can setup other types of connections, for example a telecommunication services, apps etc., With these, you can communicate with people, devices, and services, as you can read the text at Figure 5.
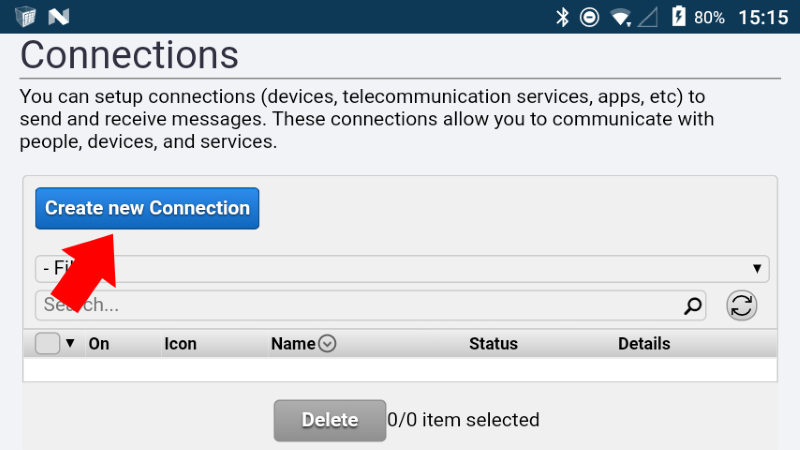
Figure 5 - Adding a new Connection
From the various options you need to select 'Sensor', because your EV3 device is a type of sensor. It has many sensors that you will able to control in the future, the Lego's motor is also a type of sensor, because you can view its settings, for example the speed and rotation. You need to select 'Lego' connection, shown at Figure 6, it does not need a lots of exposition why. The image of this 'Lego' button is just an illustration, your EV3 robot may look differently. Keep in mind, only EV3 robots are supported, older types of robots cannot be used, check it before use.

Figure 6 - Choosing the right type of sensor
From the Bluetooth device drop down menu select 'EV3'. You should be able to see this connection, if you succesfully paired together your phone and your Lego device. If you just have connected the robot, you may need to click on the green 'Refresh' button to be able to see it. You can leave the 'Sensor polling' settings as it is. If you have done, click on the blue 'Ok' button.
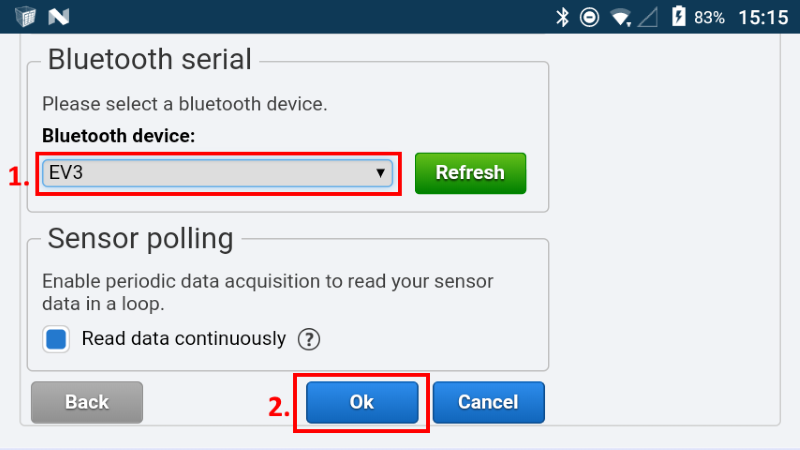
Figure 7 - Adding the EV3 connection
View the newly added connections
In the connections list, now you can see all the EV3 Brick components and the Brick itself, as you can see on Figure 8. Near every components, sensors, there is a green dot, which means it's available, also the icons help you recognize the components. You will find a 'Details' button near each of them, there you can find more informations and configure the selected device.
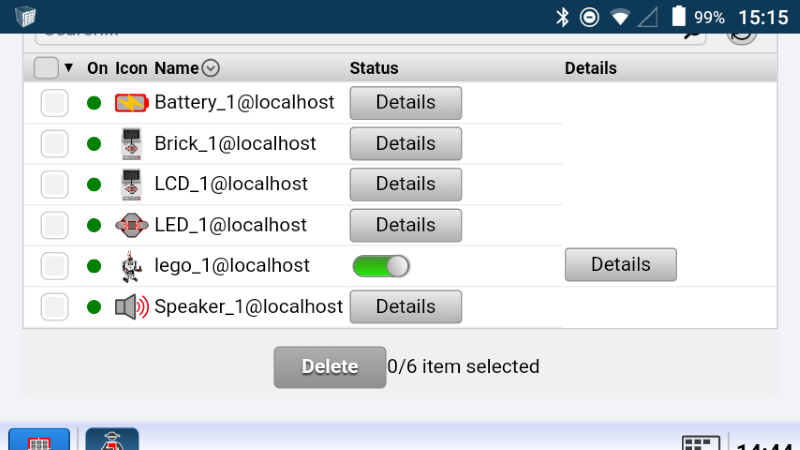
Figure 8 - Listing the Lego Brick connections
More information
- How to make an app
- How to make a GPC
- How to make a persistent file
- How to generate and display the QR Code image
- Installing Ozeki 10 on your Android device
- Robot control using SMS
- Robot error alert in SMS
- Build a custom GPC to enhance your Graphical User Interface (GUI)
- Trouble Shooting
- Learn to use browser sensors
- Publish your app and make money
- Bluetooth pairing
- Lego Mindstorms EV3 Bluetooth troubleshooting
- Easily open Ozeki Snap through the GUI
- Open the arm when te object is close
- Basic command set
- Bluetooth pairing on Android phones
- Connect the Lego robot to phone
- Chat with robot through phone
- Chat with robot using phone and PC
- How to create Lego robot build instruction
- Mapping and Navigation