 Sign in
Mapping and Navigation
Robot navigation is often based on drawing and constantly updating a map of the environment using sensors. In this lecture you will learn how to draw a map on the canvas in SNAP, and how to update the map as information becomes available.
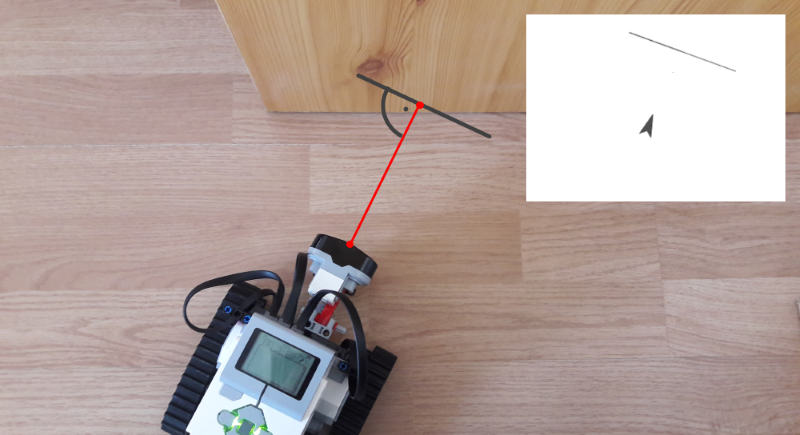
Figure 1 - Demonstrating the usage of the program
Requirements
- Ozeki Dozer: Dozer build instructions
- Ozeki 10 installed: Installed Ozeki 10 Robot OS
- Lego connection installed: Installed Lego Bluetooth connection
- SNAP basics: Basic knowlege of the Snap programming language
Create a program to control your robot using the arrow keys.
During the previous lectures, you probably learned how to control your robot using the arrow keys on your keyboard. Now your task is to write a SNAP program that can move your robot forward, backward, right and left depending on the pressed arrow key on your keyboard. By pressing the the up arrow key, the robot should go forward at 30% power until the key is unpressed. It should do the same by pressing the down key, but backwards. At right and left turn, the robot should turn approximately 10 degrees to the right and to the left. Look at Figure 2 for help. It shows how the completed program should look like.
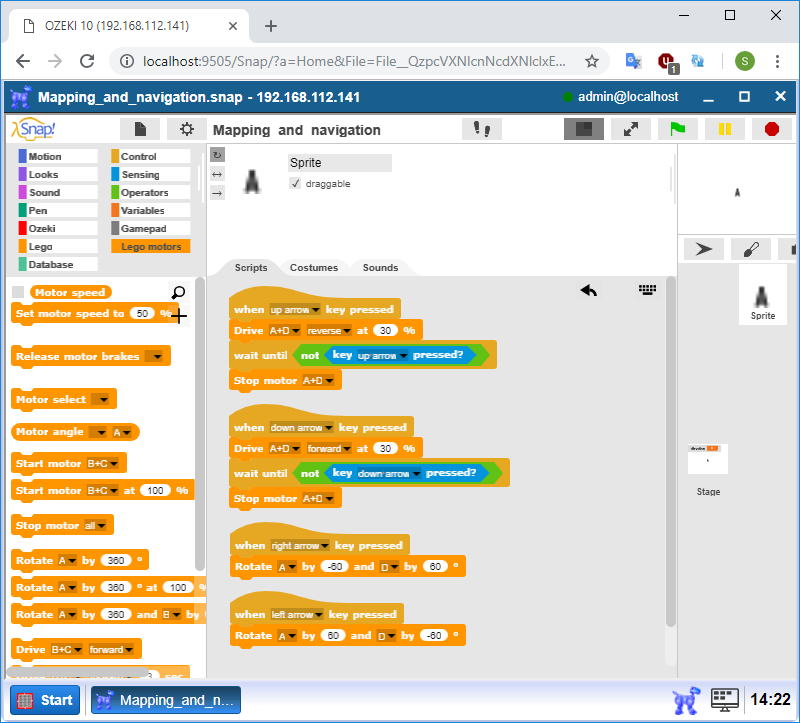
Figure 2 - Robot control using keyboard
Set the cursor to center and clear the canvas.
You are going to use the cursor to draw the straight line that demonstrates the distance between the robot and the object in front of it. So, there may be a case where the cursor is not on the center of the canvas when the program stops. Due to that, you need to set the cursor to the initial position at start. In order to do that, you have to clear the canvas and set the cursor to the center of it. So create an entry point and attach the 'clear' and 'pen up' blocks to it. The first one clears the canvas. The second one picks the pen up to avoid unwanted drawing while setting the cursor to center. Then attach a 'go to x: 0 y: 0' block to move the cursor to center. Finally attach a 'point in direction 0' to point the cursor up. The Figure 3 demonstrates these steps.
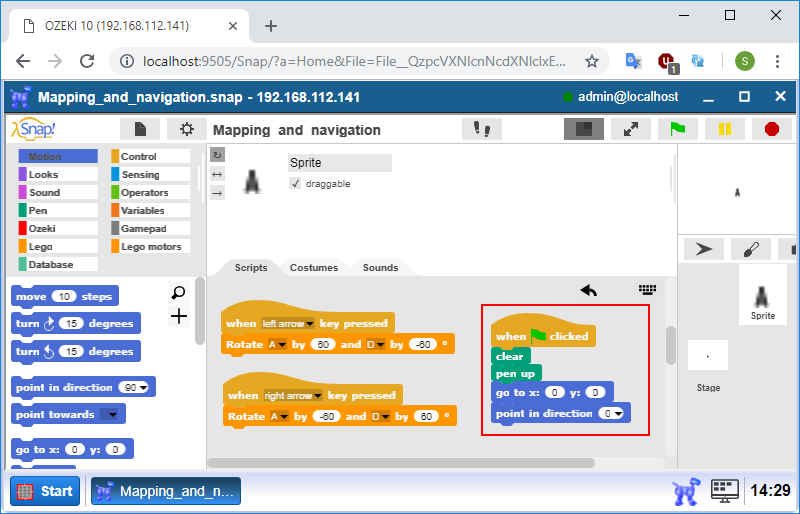
Figure 3 - Setting the cursor to center
Create two variables called 'distance' and 'direction'. Change the value of the direction variable by -10 and 10 when the robot turns left and right.
To create a variable, please navigate to the Variables category then click on the 'Make a variable' button. In the pop-up window, name it and click OK to create it. Once you have created the 'distance' and 'direction' variables, you need to set zeros as initial values to them. So you have to attach two 'set [variable] to 0' blocks to the end of the 'when green flag clicked' entry point then select these two variables for the blocks' 'variable' fields. In order to change the value of 'direction' variable by -10 and 10 when the robot turns left and right, you just need to attach 'change direction by [value]' blocks to the end of the 'when left arrow key pressed' and 'when right arrow key pressed' entry points as you can see on Figure 4.
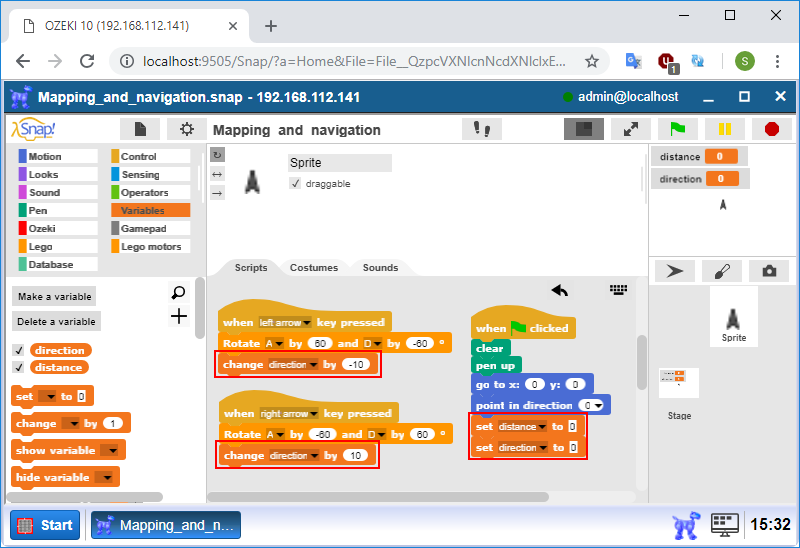
Figure 4 - Setting initial values to the variables
Using your sensor to measure the obstacle's distance.
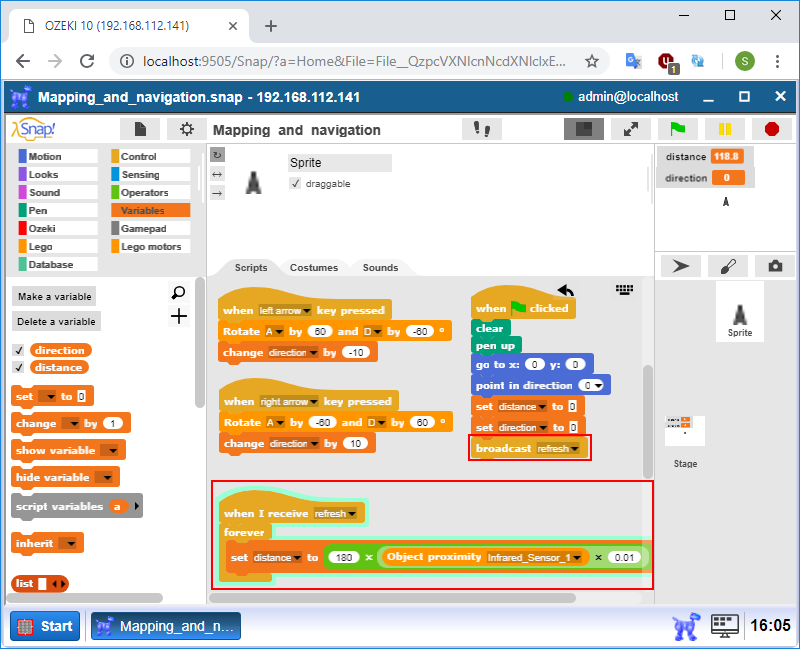
Figure 5 - Using the infrared sensor
Drawing the line, representing the obstacle's distance
After we can use the sensor data, now we can start drawing on the drawing table. We need to use the distance variable that we have created previously, and also use some blocks from the Motion and Pen category. With these blocks, a line representing the barrier and its distance will be drawn. We also add a 'clear' block to clear the drawing table, every time the program updates the table, using the sensor's data. You can check how the line has actually created by pressing on the 'Visible stepping' button, in the menu bar (Figure 6, marked with a red arrow).
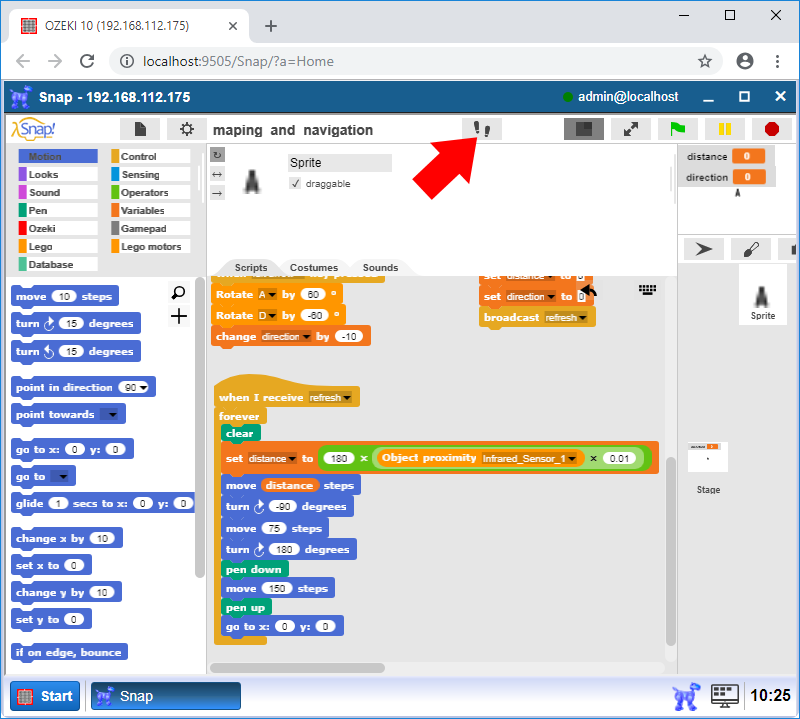
Figure 6 - Drawing on the distance
Update the drawing.
In the previous task, we have created the drawing mechanism, but the cursor is not moving, when we turn the robot. Also, the representing line is also not rotating as we turn the robot left or right. We can change that using the 'point in direction [direction]' block from the Motion category. You need to attach the direction variable into the 'direction' place in the previous block. Also the same block after the 'go to x:0 y:0' block'.
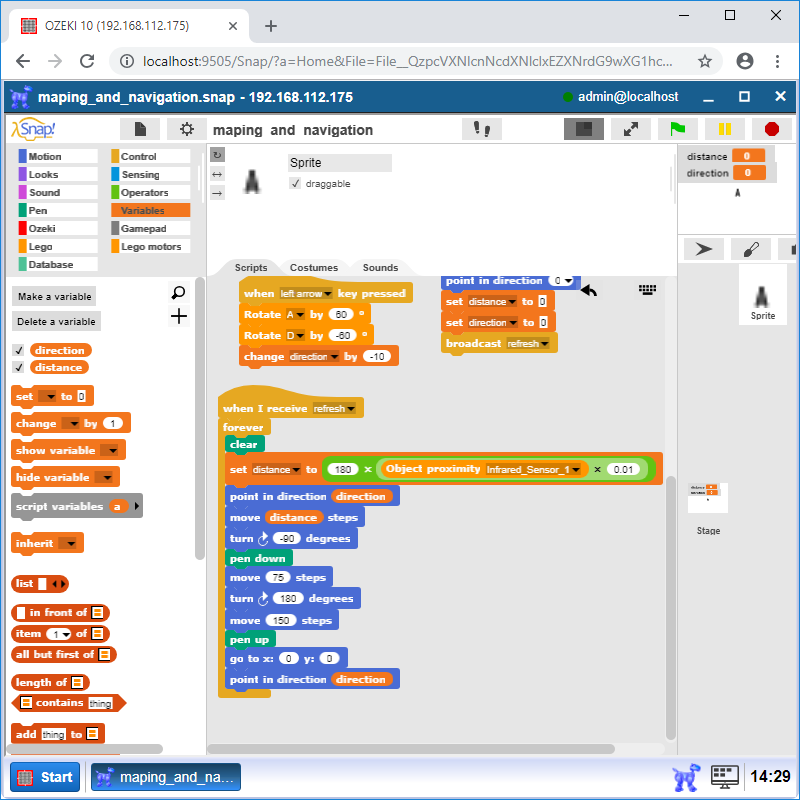
Figure 7 - Creating the 'refresh' broadcast event.
Program code
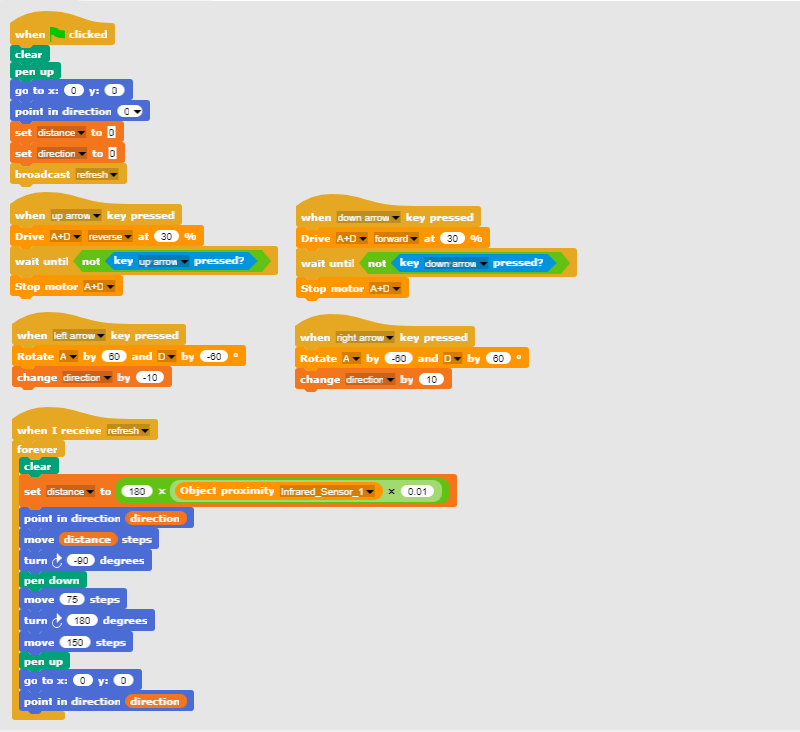
Figure 8 - Program code to detect barriers and draw on the board
|
|
Download the SNAP programs It contains the full program code, with that you can draw the barriers' position on the board. The barriers that are in front of the robot, sensor. Download the SNAP program files |
More information
- How to make an app
- How to make a GPC
- How to make a persistent file
- How to generate and display the QR Code image
- Installing Ozeki 10 on your Android device
- Robot control using SMS
- Robot error alert in SMS
- Build a custom GPC to enhance your Graphical User Interface (GUI)
- Trouble Shooting
- Learn to use browser sensors
- Publish your app and make money
- Bluetooth pairing
- Lego Mindstorms EV3 Bluetooth troubleshooting
- Easily open Ozeki Snap through the GUI
- Open the arm when te object is close
- Basic command set
- Bluetooth pairing on Android phones
- Connect the Lego robot to phone
- Chat with robot through phone
- Chat with robot using phone and PC
- How to create Lego robot build instruction
- Mapping and Navigation